
Disclosure: This site may use affiliate links. Product specifications should be checked against manufacturer or retailer pages before purchase.
Direct Answer
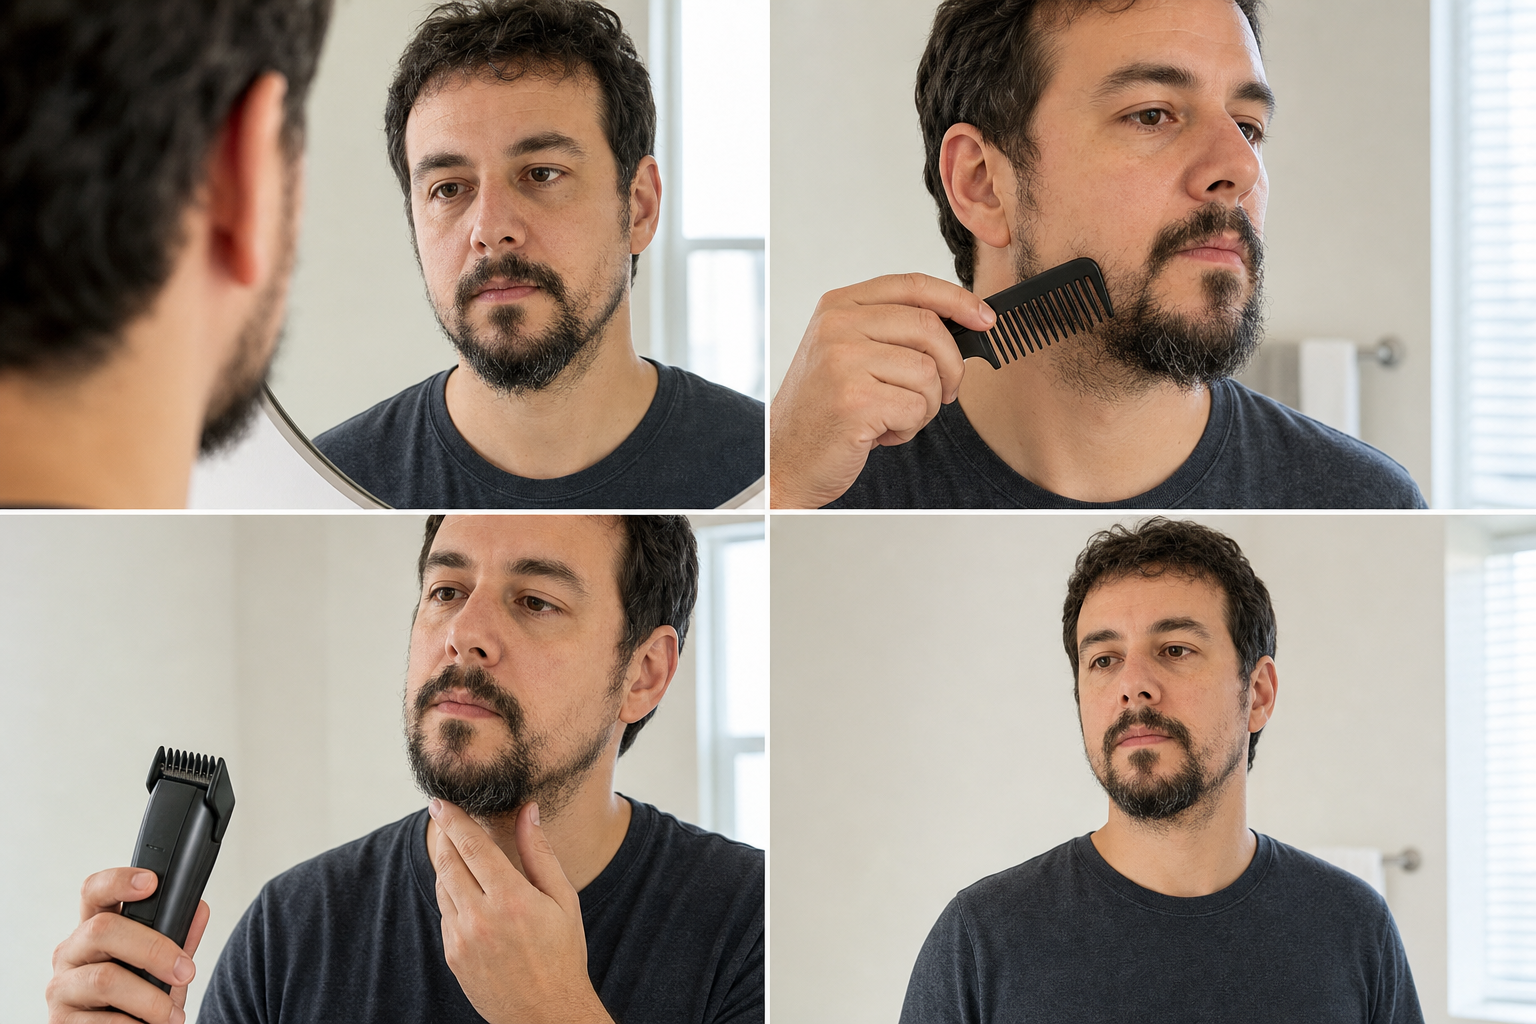
Direct answer: Trim a patchy goatee more evenly by drying and fully releasing it, mapping stable dense, sparse, and transition zones, and protecting the under-lip patch, connectors, central chin anchor, outer width, lower edge, and neckline. Choose one conservative silhouette and one longer guard, trim only a documented zone as the exact manual allows, then clear, release, compare from normal distance, and stop.
This workflow manages the appearance of an established, naturally uneven goatee. It does not make hair grow, diagnose why density differs, fill a bare area, guarantee symmetry, prescribe a universal length, or convert a new area of hair loss into a styling problem.
Patchy-Goatee Decision Table
| Observation after release | Appropriate next step | Do not assume |
|---|---|---|
| Stable lifelong or longstanding density variation | Map zones and test one conservative length relationship | Trimming will create new growth |
| Long hairs repeatedly cross a sparse zone but separate after release | Compare a shorter coherent silhouette | More length always creates coverage |
| One dense anchor projects beyond the rest of the goatee | Use one bounded guarded correction | The sparse zone should be cut to match it |
| A new smooth, round, oval, expanding, or concerning patch appears | Pause grooming changes and seek qualified assessment | The cause is cosmetic or self-diagnosable |
| The complete width, connectors, lower edge, or neckline must move | Plan a separate shape redesign | Density balancing and outlining are one task |
Define “More Evenly” Without Promising More Hair
In this guide, “more evenly” means reducing avoidable visual contrast between the goatee’s existing zones while preserving a coherent shape. It can involve releasing compressed hair, reducing an isolated long dense group, choosing a silhouette that does not depend on stretched overlap, and keeping structural anchors visible.
It does not mean making every square area equally dense. Follicle distribution, hair diameter, color, curl, direction, and facial contour can differ. Trimming changes visible length and edge relationships only. It cannot establish the cause of sparse growth or guarantee regrowth.
Separate Stable Sparseness From New Hair Loss
Before planning a trim, ask whether the distribution has been stable across ordinary grooming cycles or has changed recently. Record front and matched three-quarter photographs under even light rather than relying on memory. Do not diagnose the pattern from a photograph.
The American Academy of Dermatology’s alopecia areata overview notes that this condition can begin with a round or oval patch on the beard or scalp and requires a dermatologist for diagnosis. A new, sudden, smooth, expanding, painful, inflamed, scarred-looking, or otherwise concerning area belongs outside this grooming workflow.
Create a Dry, Naturally Released Baseline
Use the goatee preparation guide to wash only when necessary, remove all moisture, undo compression from sleep, clothing, masks, or product, and guide each region with a wide-tooth comb along its observed grain. Set the comb down and wait for the entire goatee to settle before judging density.
Wet hair can group into darker strands or stretch across a gap. Product can hold an overlap that disappears later. Fingers and combs can expose or hide skin by changing direction. The baseline must show what remains without tension, compression, or a hand holding hair in place.
Use Consistent Light and Viewing Distance
Compare the goatee under diffuse front light with no harsh side beam. Keep camera distance, lens, head position, expression, and exposure consistent. A close mirror and directional light can exaggerate every visible space, while a distant dark room can hide structure.
Make the first decision from a normal conversational distance, then use close views only to verify hair ownership and equipment clearance. Do not chase differences visible only under one extreme angle or magnification.
Map Dense, Sparse, and Transition Zones
Mark the established under-lip patch, left and right connectors, central chin body, outer chin panels, lower edge, and under-jaw transition. Within those structures, record where hair is consistently denser, consistently sparse, or changes gradually. Use neutral names such as Zone A, B, and C rather than calling one side defective.
Count neither follicles nor individual hairs. The useful observation is whether a zone remains visually stable after two releases and whether its hair direction or length changes the apparent gap. A density map is a planning aid, not a medical measurement.
Identify Structural Anchor Zones
An anchor is a stable area that gives the goatee recognizable continuity: often the central chin body, one lower-chin group, the under-lip patch, or a connector that remains visible after release. Record anchors before shortening anything.
Protect anchors from automatic equalization. Removing a central or connector anchor to match a sparse neighbor can weaken the complete silhouette without making density more uniform. The goal is to organize the hair that exists, not to cut every zone down to the least dense point.
Protect the Under-Lip Patch
Document whether a gap or bridge exists between the under-lip hair and chin body, along with the patch’s narrow or broad span and any natural offset. Sparse spacing around it may be part of the established design. Exclude its width and connection from the length test unless an isolated projecting group inside that patch is the only recorded target.
Do not widen or reconnect this area by stretching long diagonal hair toward the chin body. Judge it only after the hair settles. When its perimeter or bridge requires alteration, remove that work from the density session and plan a separate redesign.
Protect Both Mustache Connectors
Trace each connector from the mouth corner into the outer chin panel. A connector can be naturally thinner than the central chin body and still preserve continuity. Record where its hair begins, ends, and settles after release.
Do not cut the denser connector merely to match a missing or sparse connector on the other side. The bilateral goatee guide owns landmark comparison and one-sided shape correction. This page instead manages visible length relationships inside the existing distribution.
Protect the Central Chin Anchor
The central chin often appears denser because hair overlaps vertically and the surface turns away from direct light. Observe it from front and three-quarter views. Record the lowest released point and the transition into each outer panel.
A long central group can dominate the goatee and increase contrast with sparse side zones. That group may be a valid bounded target, but do not flatten the complete chin or move the lowest point during a density test.
Keep the Existing Width and Outline Fixed
Record both outer endpoints, sidewalls, lower-edge arcs, and neckline before changing length. Density balancing should occur inside an already accepted silhouette. Keep bare-cutter outlining, connector redesign, sidewall narrowing, and neckline movement out of the session.
The goatee edge-cleanup guide owns root-confirmed outliers on the clear-skin side of an existing boundary. This page does not create a sharper edge to distract from sparse growth.
Observe Local Growth Direction
Pass a wide-tooth comb once through each region along its own grain, put the comb aside, and observe the resting direction. One side may point downward while another angles outward or curls back toward the chin. Direction can change apparent density without changing the number of hairs.
Do not comb every zone into one artificial direction and trim that temporary arrangement. The Wahl facial-hair trimmer instructions illustrate combing to reveal the beard and beginning with a longer guide. Apply only the exact manual for the model in use.
Test Whether Extra Length Helps or Separates
Longer hair can overlap a sparse transition when it settles naturally, but it can also separate into strands, expose more skin, curl away, or require product and repeated repositioning. Compare the current released state with a matched record from the previous stable length when available.
Do not grow or retain length solely because a close mirror suggests that more hair must mean more coverage. The useful length is the one that remains coherent through ordinary movement and release without being pulled across the sparse zone.
Choose a Conservative Silhouette Before a Number
Decide whether the goatee should remain compact, moderately projected, or longer at the central anchor. Protect the existing width, connectors, lower edge, and neckline. Only then identify a longer guard that the exact model manual supports for the selected test zone.
A guard label does not fix one final length. Hair direction, compression, cutter path, pressure, attachment seating, and repeated passes affect what is captured. The goatee guard guide provides the model-bound guard selection workflow.
Start With the Longest Supported Guard
Verify the complete trimmer model, regional suffix, guard identity, seating method, permitted travel, electrical rules, and care procedure. Fit the selected longer guard according to that model’s instructions. With power off, inspect teeth, locks, and cutter condition.
The Philips MG3900 instructions and the Wahl document above show that attachment fitting, cutting travel, and care differ by manufacturer and model. Use the directions supplied for the actual tool; neither reference creates a universal guard or motion for every goatee.
Select One Length Target
Choose one stable target such as an isolated central group projecting beyond the compact silhouette or one dense outer-chin zone whose length creates a dark block beside a sparse transition. Leave every other zone unchanged for the first comparison.
The bounded goatee touch-up guide owns a single internal maintenance target. Use that scope rule here: one target, one setting, one supported path, one release, and one comparison.
Keep Sparse Zones Out of the First Pass
A sparse zone may contain fewer overlapping hairs and can look shorter even when individual hairs are long. Do not repeatedly pass a guard through it simply because the neighboring dense zone was trimmed. Protect it as the untouched reference during the first test.
After the dense target is released, reassess whether the transition is less abrupt. Cutting the sparse area by default can remove the limited continuity it provides and make the visual gap more apparent.
Rehearse the Path With the Tool Switched Off
With the guarded trimmer powered down and held away from the face, rehearse the target zone, entry point, permitted travel, exit point, and clearance around the mouth, connector, chin sidewall, bottom arc, and neck transition.
If the path crosses two density zones, enters a boundary, requires skin stretching, or disappears from view, reduce the target. A rehearsal is a planning check, not evidence that a running tool will produce a specific result.
Make One Manual-Supported Guarded Correction
If the tool’s own instructions permit the setup, make one light, visible pass through the selected dense or projecting target. Keep the attachment locked in place and use the documented approach. Leave the surface at the planned endpoint instead of continuing into the sparse reference zone.
Do not shorten the setting, add pressure, reverse direction, repeat the pass, or remove the guard in the same step. One-variable control preserves the evidence needed to judge whether the silhouette improved after release.
Power Down and Remove Captured Hair
Cut power before touching the head, guard, hair, or skin. Remove captured hair, then use the model instructions for washing or brushing, moisture removal, lubrication where specified, and refitting. Recheck the attachment before considering another trial.
The cleaning and oiling guide explains general maintenance boundaries. Clearing also matters to measurement because packed hair can change how a guard seats or moves through the next zone.
Release the Complete Goatee Before Comparing
Guide each region once more along its observed grain, set the comb aside, and wait for the mouth patch, connectors, chin anchor, outer panels, bottom arc, and neck transition to return to rest. Recreate the same front and three-quarter views with unchanged light.
Do not hold longer hair over a gap or judge the result while the guard is still compressing the goatee. Compare the complete silhouette from normal distance first, then inspect the target closely for unexpected steps or captured anchor hair.
Judge Transitions, Not Equal Hair Counts
Ask whether the dense-to-sparse transition now appears gradual, whether anchors remain connected, whether the central projection fits the width, and whether the shape stays coherent when the head turns. Do not ask whether every zone looks identical.
Natural density remains visible, and that is not a failed result. The test succeeds as an observation when it preserves structure and reveals whether one length relationship is more stable. It does not prove a universal style or an objective improvement for every viewer.
Avoid a Fragile Comb-Over
Hair that naturally settles across a sparse transition can remain part of the goatee. Hair that must be pulled, pasted, sprayed, or repeatedly moved into place is not a stable released baseline for this trimming workflow.
Do not cut an anchor at an extreme angle to manufacture coverage. Release the hair after every observation. If the desired look depends on constant tension or causes discomfort or skin problems, stop and choose a different silhouette or seek appropriate professional advice.
Limit the Trial to One Length Change
Log the baseline map, chosen target, untouched sparse region, model, guard, setting, travel, single pass, debris removal, settled comparison, and stop reason. If the same projecting group remains, consider a later adjustment only after rebuilding the complete setup.
Do not make the second side match, shorten all zones, move the outline, and add product in the same session. Multiple simultaneous changes prevent a defensible comparison and increase the chance of removing structural hair.
Know When the Task Becomes a Redesign
Stop density balancing when the under-lip patch, connectors, outer width, lower-edge arcs, lowest point, or neckline must move. Those are shape decisions. Record the intended silhouette and plan a separate session with new landmarks.
See common goatee trimming errors for the risks of expanding a narrow task into several zones. An uneven distribution does not justify removing every nearby anchor.
Stop for Tool, Skin, or Hair-Loss Concerns
Stop power immediately for pulling, pinching, pain, broken skin, unusual warmth, odor, smoke, changed sound, slowing power, a shifting head, or unexpected removal. Wait until all movement ends before inspection. Do not compensate with pressure or a shorter setting.
Pause cosmetic changes when hair loss is new, sudden, smooth, round or oval, expanding, or accompanied by concerning skin or nail changes. A board-certified dermatologist can assess hair loss; this page cannot diagnose a condition or recommend medication, supplements, oils, or growth treatments.
Record the Released Result
Keep matched frontal, two three-quarter, and underside views, the density-zone map, protected anchors, model and guard identity, one target, one pass, settled comparison, and reason for stopping. Use ordinary lighting and retain the unedited originals.
Limit conclusions to this session. The record cannot prove follicle count, hair-growth change, treatment response, exact symmetry, safety, comfort, professional performance, or suitability for another person’s skin, hair, tool, or goatee.
Patchy-Goatee Trimming Checklist
- The density pattern is stable enough for a grooming decision; concerning new loss is deferred.
- The goatee is dry, guided once along each region’s grain, and resting without tension.
- Light, distance, posture, and expression are consistent.
- Dense, sparse, transition, and anchor zones are mapped without diagnosis.
- The under-lip patch, connectors, central anchor, width, lower edge, and neckline are protected.
- The plan uses one conservative silhouette rather than a promise of more hair.
- The exact model, guard, setup, permitted travel, and care procedure are verified.
- One dense or projecting length target is selected; sparse zones remain untouched.
- The path is rehearsed with the guarded tool switched off and away from the face.
- One manual-supported correction is made with one setting and direction.
- Power is cut and captured hair is removed before reassessment.
- The complete goatee returns to rest and is compared from normal distance.
- Several needed changes, a shape change, unexpected removal, or a concern ends the session.
Frequently Asked Questions
Can trimming make a patchy goatee grow more evenly?
No. Trimming changes visible length and shape; it does not create follicles or guarantee regrowth. This workflow maps the existing distribution, protects denser anchors, chooses a conservative silhouette, and uses one released comparison.
Should sparse goatee areas be trimmed shorter or left longer?
There is no universal answer. Compare the naturally released goatee at two documented lengths without changing its outline. Longer hair may separate or cross gaps, while a conservative shorter length may reduce contrast. Keep the option that remains coherent after release.
Should I comb longer goatee hair over a sparse area?
Do not build the plan around hair held across a gap. Gently comb in local growth directions, remove the comb, and judge the released result. A stable overlap can remain, but it should not require tension, product, or constant repositioning.
When should patchy beard growth be checked by a dermatologist?
Seek qualified assessment when a patch is new, sudden, smooth, round or oval, expanding, accompanied by skin or nail changes, or otherwise concerning. A grooming guide cannot identify the cause or recommend treatment.
Sources and Claim Boundary
- Wahl facial-hair trimmer operating document, used as a manufacturer example for beard preparation, a longer-guide-first approach, attachment use, and equipment care.
- Philips MG3900 instructions, used as a second model-specific reference for fitting attachments, guarded operation, cleaning, and storage.
- American Academy of Dermatology alopecia areata overview, consulted only for the boundary that new round or oval beard hair-loss patches require qualified diagnosis rather than grooming inference.
- Goatee preparation workflow, used for the moisture-free, compression-free observation state required by this page.
Claim boundary: This page describes a conservative, exact-manual-bound way to observe and adjust visible length relationships within an established uneven-density goatee. It establishes no cause, diagnosis, treatment, regrowth effect, follicle count, standard density, ideal shape, universal guard, direction, force, pace, repetition count, neckline, product, supplement, medication, comfort, safety, symmetry, performance, or outcome. Trimming cannot create hair, and concerning new loss belongs with qualified care.
