
Disclosure: This site may use affiliate links. Product specifications should be checked against manufacturer or retailer pages before purchase.
Direct Answer
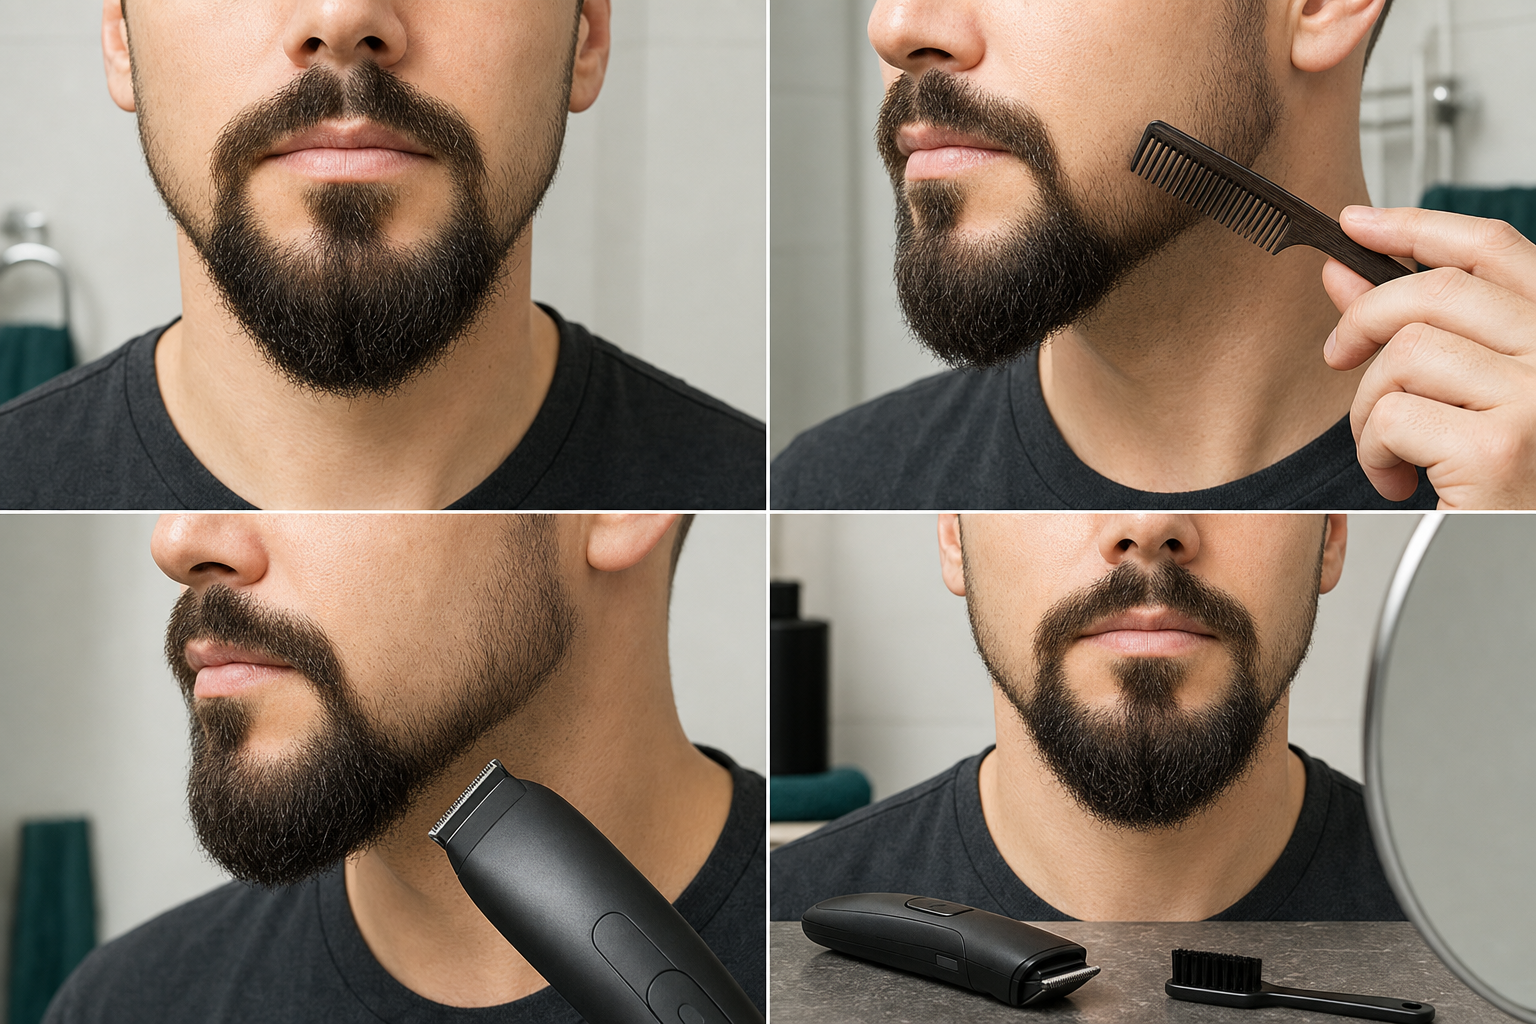
Direct answer: Clean up the edges around a goatee by drying and releasing it, recording the existing under-lip, connector, outer-chin, lower-edge, and neckline boundaries, and tracing each apparent stray hair to its root. Protect the goatee body, choose one clear-skin segment, rehearse with the exact tool switched off, make one short manual-supported correction, then switch off, clear, release, compare, and stop.
Edge cleanup maintains a boundary that already works. It does not set a new goatee width, shorten internal bulk, balance both chin panels, redesign the under-lip patch, reshape the mustache connectors, raise the lower edge, or move the neckline. If any of those decisions are required, schedule a separate trim rather than expanding cleanup stroke by stroke.
Goatee Edge-Cleanup Decision Table
| Observed issue | Correct workstream | Do not combine it with |
|---|---|---|
| One traceable hair sits on clear skin outside an accepted boundary | One-segment edge cleanup | Internal length or width changes |
| One stable longer group remains inside a chin panel | Bounded goatee touch-up | Exposed-skin outline work |
| Both panels differ in released bulk or landmarks | Goatee balance assessment | Automatic matching cuts |
| The under-lip patch, connectors, width, lower edge, or neckline must move | Full shape redesign | Routine cleanup |
| The apparent target moves after combing or changes with posture | Release and observe | Cutting |
Define Edge Cleanup Before Choosing a Tool
An edge is the transition between hair intentionally belonging to the established goatee and nearby clear skin. A cleanup target is one visible, traceable hair or very small group that remains outside that transition after the goatee is dry, gently combed, fully released, and viewed from a normal distance.
“Make it sharp” is not a complete plan. It can hide simultaneous changes to the upper mustache line, mouth-corner connection, outer-chin sidewall, lower chin arc, and under-jaw neckline. Name one segment and record which adjacent structures must remain unchanged.
Keep Edge Cleanup Separate From a Touch-Up
The goatee touch-up guide owns one stable internal length or bulk target inside an already approved shape. Edge cleanup instead works from the clear-skin side of one existing boundary and must not enter the body of the goatee.
Do not remove the guard and continue from a touch-up into freehand outlining while the tool is running. The cutting plane, visible target, protected landmarks, and stop rule all change. Switch off, release the complete goatee, and create a separate edge plan.
Recreate a Dry, Naturally Released Baseline
Begin with the preparation workflow in the goatee preparation guide: clean only as needed, dry fully, release compression, gently comb in local growth directions, remove the comb, and let every zone settle. Use a neutral expression and ordinary head position.
Wet, stretched, product-held, freshly pressed, or hand-positioned hair can create a false edge. Do not define a boundary while pulling the lip, extending the chin, turning the head sharply, or holding overlapping hair away from its resting position.
Record the Existing Shape Before Removing Anything
Take or compare matched front, left three-quarter, right three-quarter, and under-chin views under even light. Record the under-lip patch, central column, connector routes, outer endpoints, left and right sidewalls, lowest released point, lower-edge arcs, and neckline transition.
The record is not a template for geometric perfection. It establishes the current relationships that must survive cleanup. If the boundaries cannot be located consistently across two releases, stop and improve preparation or observation rather than cutting.
Map Six Boundary Segments Separately
Treat the upper mustache edge, under-lip patch perimeter, left connector, right connector, outer-chin sidewalls, lower chin edge, and under-jaw neckline as different structures even when they appear continuous from a distance. Hair ownership, direction, surface angle, visibility, and tool access change between them.
The mustache edge-cleanup guide owns the upper and lower mustache boundaries and endpoints. This page focuses on how those connections meet the chin body without turning the complete goatee into one continuous freehand sweep.
Protect the Under-Lip Patch
Record whether the under-lip patch is separate, connected, centered, naturally offset, narrow, or broad. Trace its left, right, upper, and lower margins only for identification. Keep the cutter outside the patch unless one specific perimeter segment is the preselected cleanup target.
A small change below the lip can alter perceived center, continuity, and spacing more than the removed hair suggests. If the patch itself needs a new width or connection, stop and classify the task as a redesign.
Protect the Central Chin Body
Identify the central column and lowest released chin anchor before evaluating either sidewall. Overlapping hair can make these structures appear wider, narrower, or offset at close range. Let them settle and preserve them as orientation landmarks.
Do not run an exposed cutter upward through the center to “clean” the face of the goatee. Hair inside the central body belongs to length, grain, or bulk work, not clear-skin edge cleanup.
Trace Both Mustache Connectors
Follow hair from each mouth corner toward its root and released end. Determine where mustache ownership ends, where connector hair crosses the cheek-side gap, and where the outer chin panel begins. Release the hair after tracing it.
A connector can look like stray side growth when it lies across clear skin. Cutting it can break continuity or narrow the upper goatee. Reject any target whose root belongs to a connector, even when its end projects beyond the apparent line.
Protect the Existing Outer Width
Record the left and right outer endpoints in a neutral front view and confirm them in matched three-quarter views. The endpoints define the accepted width. Keep every cleanup path on the clear-skin side and stop before the surface turns into the chin body.
The goatee balance guide owns bilateral landmark comparison and one-sided correction. Edge cleanup does not move both sidewalls inward to manufacture symmetry or copy the narrower-looking side.
Protect the Lowest Point and Lower-Edge Arcs
Locate the lowest released point and observe how each lower edge rises toward the outer panel. Distinguish hair hanging from inside the goatee from hair rooted on clear skin below the recorded arc. Trace ownership before selecting a target.
Do not flatten the bottom with one horizontal pass. A lower-edge change affects apparent length and silhouette. If the arc itself must rise or the lowest point must move, edge cleanup has become a shape decision.
Keep the Neckline as a Separate Boundary
The neckline sits under the jaw and may be partly hidden by released chin hair. Use the beard neckline guide for placement, visibility, and cleanup boundaries. Do not infer a universal distance below the chin.
A goatee sidewall cleanup must end before the under-jaw transition. Do not rotate the running tool around the jaw and continue into the neckline. Switch off, change posture, remap the surface, and treat any neckline work as a separate segment.
Trace Every Apparent Stray Hair to Its Root
Use a small comb or fingers only long enough to see where the hair originates, then release it. A long connector hair, curled lower-edge hair, or central group can cross a boundary while still belonging to the goatee body.
Select only a target rooted on the clear-skin side of the accepted line and still visible after two releases. If ownership is uncertain, leave it. Edge cleanup should not remove structural hair merely because its released end travels outward.
Choose One Boundary Segment for the Session
Name one limited segment such as the right outer sidewall below the connector, one isolated hair beside the under-lip patch, or a small clear-skin group beneath one lower-edge arc. Preserve every other segment as an untouched comparison.
Do not clean the patch, both connectors, both sidewalls, lower edge, and neckline in one continuous session. Several coordinated changes require a full outline plan with new landmarks and a larger verification record.
Keep an Untouched Reference Side
When one side is the target, leave the better-defined side untouched. Match posture, expression, light, and viewing distance before comparing. Use the reference to judge whether the corrected boundary again fits the complete goatee, not to force identical geometry.
Natural density, direction, facial contour, and connector position can differ. Do not copy every distance or angle from one side to the other.
Verify the Exact Tool, Head, and Manual
Confirm the complete model, regional suffix, detail head, cutter, attachment state, supported movement, power rules, cleaning method, and inspection requirements. A narrow head can improve visibility but does not prove suitability, safety, or a result.
Wahl’s current trimmer instructions and Philips’ current MG3900 manual are manufacturer examples of exact-tool setup, movement, attachment handling, and maintenance. Apply only the manual for the model actually being used.
Inspect Equipment With Power Off
With power disconnected or switched off as the exact manual requires, inspect cutter teeth, head seating, attachment locks, housing, controls, visible residue, cord or charging parts, and any component needed for the planned method. Stop for bends, cracks, corrosion, looseness, incomplete seating, or damage.
The guard-size guide explains why similar-looking parts are not automatically compatible. Even when cleanup uses an exposed detail head, the exact head identity and supported installation still matter.
Inspect the Target Skin Without Diagnosing It
Use even light to confirm that the boundary and clear-skin target are visible. Do not proceed over broken, bleeding, painful, swollen, infected-looking, or otherwise concerning skin. This observation is a stop decision, not a diagnosis.
Do not promise irritation-free cleanup or recommend a medical treatment. When a skin concern persists or is uncertain, defer grooming and seek appropriate qualified care.
Rehearse the Boundary Path With the Tool Off
Hold the switched-off tool several centimeters away and rehearse the approach, visible segment, endpoint, lift-away point, and clearance from the under-lip patch, connector, sidewall, lower edge, and neckline. Keep the head off the hair and skin during the rehearsal.
If the proposed path crosses a corner, disappears from view, enters the goatee body, or requires stretching the face, reduce the segment or choose another supported method. Do not solve poor visibility with pressure or a longer running sweep.
Use the Clear-Skin Side of the Boundary
When the exact manual supports the planned operation, begin on clear skin outside the recorded line and approach only the isolated target. Keep the cutting path parallel to the visible segment where practical and lift away before reaching a connector, corner, or surface transition.
Do not place the cutter inside the goatee and push outward through structural hair. Edge cleanup removes confirmed outliers outside a line; it does not create the line by cutting into the body.
Clean One Outer Sidewall Conservatively
Use one short, visible, manual-supported correction on the selected sidewall segment. Keep the outer endpoint, connector, central chin body, lower arc, and neckline outside the path. Lift away as soon as the target is removed or the surface begins to turn.
Do not continue upward into the connector or downward around the jaw because the tool is already running. Those transitions change ownership and require separate mapping.
Handle an Under-Lip Perimeter Target Separately
If one hair is confirmed outside the under-lip patch, preserve the patch’s recorded width, spacing, and connection. Use a stable neutral expression and keep the target visible without pulling the lip. Correct only that hair or tiny group.
Do not square, widen, narrow, center, or reconnect the patch during cleanup. If the current perimeter no longer works as a whole, stop and redesign it in a separate session.
Keep Connector Cleanup Outside the Connection
A connector target must be rooted outside the accepted path rather than merely crossing it. Preserve the mouth-corner endpoint and the visible bridge into the chin panel. Use matched front and three-quarter views before any correction.
The connector should not be chased into a thinner line. When repeated small removals are needed to expose a boundary, the task is no longer isolated cleanup.
Clean the Lower Edge Without Shortening the Goatee
Trace a lower-edge target to confirm that it is rooted below the accepted arc rather than hanging from the chin body. Protect the lowest point and both rising arcs. Use one short supported correction from the clear-skin side.
Do not comb the body upward, cut a temporary line, and assume it will remain after release. The lower edge must be evaluated with the complete goatee settled naturally.
Switch Off and Clear Before Reassessment
Switch off before touching, brushing, removing, or rinsing any component. Follow the exact manual for clearing, cleaning, drying, oiling, and reassembly. Inspect the head again before considering another correction.
The cleaning and oiling guide provides general maintenance boundaries. Clearing clippings is also a measurement control because trapped hair can obscure the line or change cutter contact.
Release the Complete Goatee and Check Four Views
Gently recomb, remove the comb, and allow the under-lip patch, connectors, central body, both sidewalls, lower edge, and neckline to settle. Return to the recorded front, left, right, and under-chin views under the same light and neutral posture.
Judge the complete goatee from an ordinary distance before using a close mirror. Do not hold hair aside, stretch skin, or evaluate only the corrected segment.
Use a One-Correction Review Budget
Record the target, tool, head, posture, path, one correction, clearing step, released result, and all protected landmarks. If the same traceable clear-skin outlier remains, one later correction may be considered only after the complete setup and visibility are reverified.
Do not shorten the tool setting, add pressure, reverse direction, widen the segment, and trim the reference side together. Multiple variable changes remove the evidence needed to understand what happened.
Stop Before Cleanup Becomes Redesign
Stop when the under-lip patch, center, connector path, outer width, lower arc, neckline, or internal length needs to move; when both sides lack a stable reference; or when several segments require correction. Record the broader goal and schedule a full shape session.
The goatee mistake-prevention guide explains why automatic equalization and expanding scope can turn one small difference into a larger structural change.
End the Session for Tool, Skin, or Scope Problems
Release the switch immediately if hair catches, the head pinches, contact hurts, skin breaks, the housing becomes abnormally warm, an odor or smoke appears, sound or vibration changes, power slows, the head shifts, or the cutter removes more than the selected outlier. Inspect only after the device is fully stopped.
The trimmer-pulling guide separates preparation, trapped clippings, cutter condition, assembly, care, power, and task-fit checks. Extra pressure and compensating cuts on another edge do not resolve the original fault.
Record the Edge-Cleanup Result
Log the date, released baseline, chosen boundary segment, root trace, reference side, model and head, off-tool rehearsal, single correction, clearing step, four-view review, preserved landmarks, and reason for ending. Matched images can preserve the observation setup.
Limit the record to what the current session shows. It cannot establish professional testing, exact symmetry, absence of irritation, comparative safety or comfort, or suitability for another person’s goatee.
Goatee Edge-Cleanup Checklist
- The goatee’s width, center, connectors, lower edge, neckline, and internal length already work.
- The goatee is fully dry, gently combed, and naturally released.
- Front, three-quarter, and under-chin boundaries are recorded.
- Every apparent stray hair is traced to its root.
- One clear-skin segment is selected; all other segments remain untouched.
- The under-lip patch, central body, connectors, endpoints, lower arcs, and neckline are protected.
- The exact model, head, setup, movement, and maintenance rules are verified.
- The equipment and target skin pass a powered-off observation check.
- The path is rehearsed off the skin with the tool switched off.
- One short manual-supported correction begins outside the goatee body.
- The tool is switched off and cleared before reassessment.
- The complete goatee is released and checked from four views.
- Unexpected removal or several needed changes end the session.
Frequently Asked Questions
What does cleaning up the edges of a goatee mean?
It means removing only isolated hair that is clearly outside an already accepted goatee boundary. The task preserves the under-lip patch, central chin body, mustache connectors, outer width, lower edge, neckline, and internal length rather than redesigning them.
Should I trim the goatee body during edge cleanup?
No. Internal bulk or length belongs to a guarded trim or bounded touch-up. During edge cleanup, keep the cutter on the clear-skin side of one recorded boundary, make one short manual-supported correction, then switch off, clear, release, and reassess.
How do I avoid making a goatee narrower?
Record both outer endpoints and connector paths before cutting, trace each apparent stray hair to its root, and reject any target owned by the goatee body. Keep one side untouched as a reference and stop after one released comparison.
When does goatee edge cleanup become a redesign?
It becomes a redesign when the width, center, under-lip patch, connector shape, lower edge, neckline, or internal length must move, or when several boundary segments need coordinated correction. Stop and plan those changes as a separate full session.
Sources and Claim Boundary
- Current Wahl trimmer instructions, consulted for one manufacturer’s facial-hair combing, setup, supported operation, and care directions.
- Current Philips MG3900 manual, consulted for model-bound head handling, edging operation, cleaning, and storage directions.
- Preparing a goatee before trimming, which establishes the dry release and ownership map used here.
- Touching up a goatee without overtrimming, which owns internal length and bulk maintenance rather than exposed-skin boundaries.
Claim boundary: The workflow is limited to one root-confirmed outlier on the clear-skin side of a previously accepted goatee edge, with the actual model manual controlling every tool action. It establishes no standard shape, width, boundary, guard, bare-cutter technique, travel direction, force, pace, repetition count, neckline, wet-use practice, or timing. It offers no hair or skin diagnosis, product ranking, first-person test, comfort or safety assurance, symmetry claim, performance finding, or outcome guarantee, and it does not supersede qualified care.
