
Disclosure: This site may use affiliate links. Product specifications should be checked against manufacturer or retailer pages before purchase.
Direct Answer
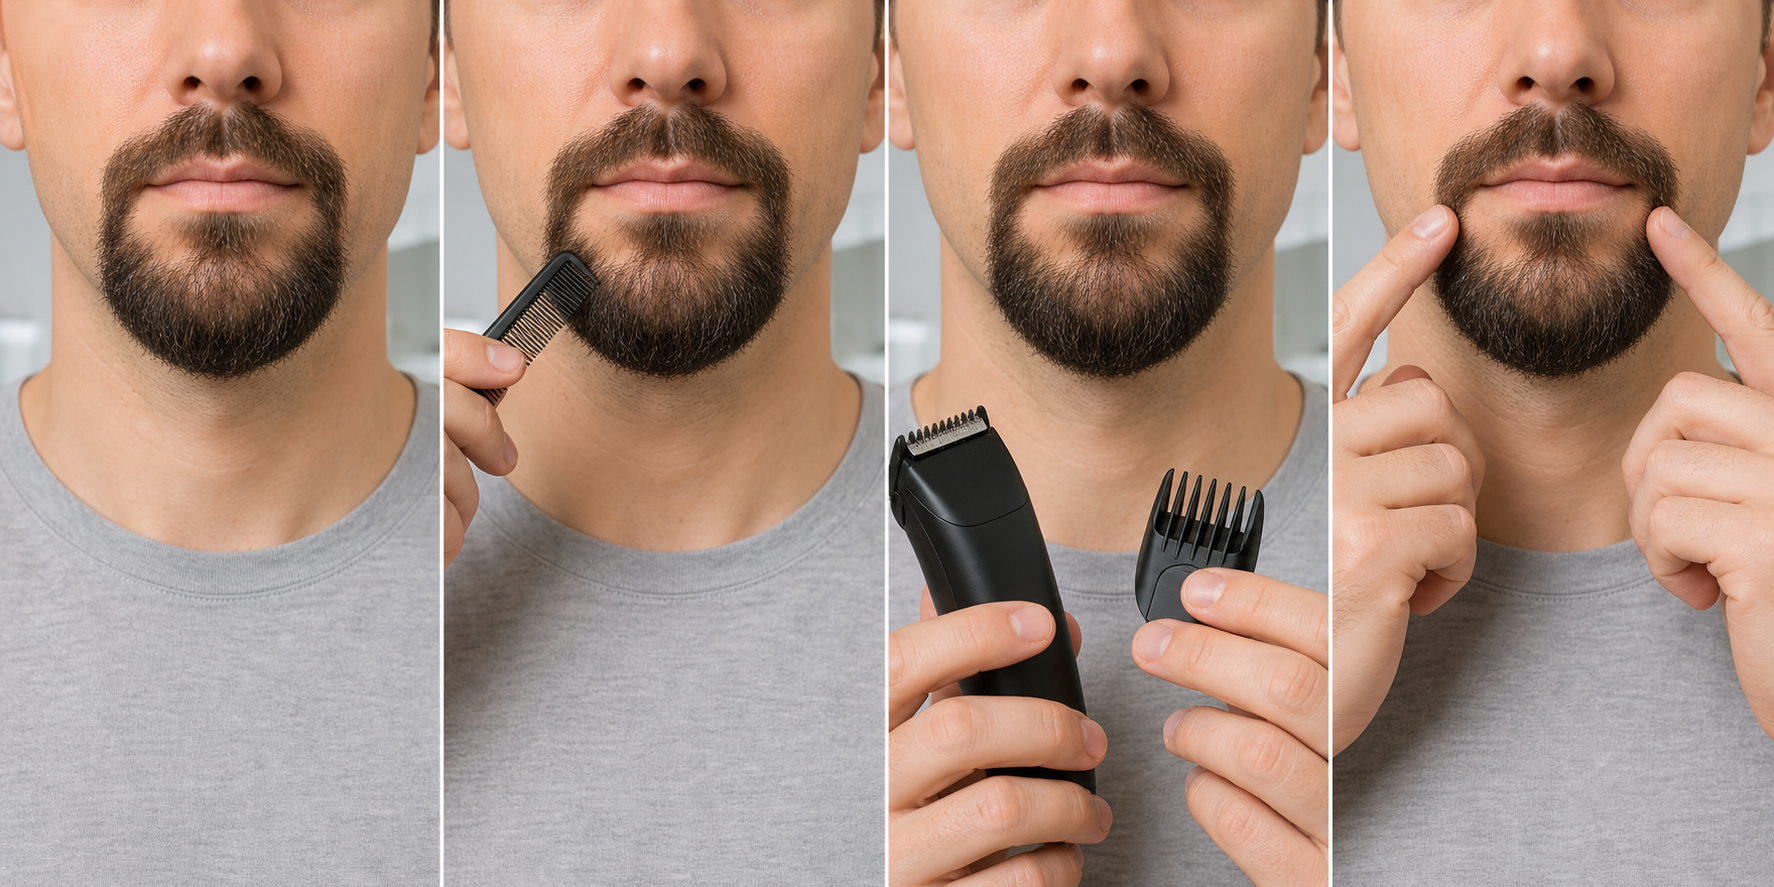
Direct answer: Prepare a goatee before trimming by cleaning and fully drying it when the tool requires a dry workflow, then letting every section rest without product or tension. Map the center and chin anchor, mustache connections, mouth corners, lower edge, neckline, cheek boundaries, and natural growth direction. Protect the shortest retained zone, inspect the exact tool and guard while powered off, and define one narrow trimming objective.
Preparation is an observation and setup stage, not the trim itself. It should reveal the goatee that is already present, the shape you intend to retain, and the areas that must remain untouched. This guide does not prescribe a goatee style, remove hair, select a universal guard, diagnose facial hair or skin, or promise symmetry, comfort, safety, density, growth, or a result.
Goatee Preparation Map
| Zone | Preparation question | Protected reference |
|---|---|---|
| Center and chin anchor | Where does the shape stay visually centered when the mouth is relaxed? | Existing center line and forward chin projection |
| Mustache connection | Is each side connected, separated, or crossed by neighboring hair? | Current connection width and ownership |
| Mouth corners | Which hair belongs to the mustache, connector, or chin body? | Visible corner clearance and retained endpoint |
| Lower edge | Where does the chin body end before neck hair begins? | Natural released lower contour |
| Neck and cheek boundaries | Are these established edges or undecided style choices? | Current retained boundary, not a newly invented line |
| Tool and guard | Are the complete model, attachment, condition, and instructions verified? | Powered-off fit and documented use limits |
Keep Preparation Separate From the Actual Trim
This page ends before a powered cutting pass. It owns cleaning, drying, release, direction mapping, zone ownership, boundary observation, tool inspection, and a written target. The existing mustache grain-direction guide explains root ownership in the upper part of a connected goatee, while the guard-size guide explains why exact-model length selection is a separate decision.
Do not combine these stages simply because the trimmer is already in hand. Cutting while still deciding where the goatee begins, which hair belongs to a connector, or whether a guard is compatible removes the evidence needed for a controlled decision.
Keep Preparation Separate From Style Redesign
A goatee can be connected or disconnected from the mustache, narrow or broad at the chin, rounded or more angular at the lower corners, and paired with different cheek and neck choices. Preparation records the current retained design. It does not choose a different design for the reader.
If the objective changes from maintaining an established shape to creating a new one, stop and plan that redesign independently. Do not erase a connector, move a lower edge, narrow the chin body, or change mustache endpoints as an unplanned side effect of setup.
Define One Observable Objective
Write one sentence describing the next task in visible terms. Examples include reducing bulk inside the established chin body, returning one overlong connector group to the existing outline, or maintaining the current goatee while leaving its boundaries untouched. Avoid goals such as “make it perfect,” “make it masculine,” or “make both sides identical.”
Then write the protected items: center, shortest retained area, mustache shape, both mouth corners, connector widths, chin projection, lower edge, neck and cheek boundaries, and any sparse zone. The first powered pass should not begin until the objective and protected list can coexist.
Use Even Light and a Relaxed Position
Stand or sit upright in even front and side light. Use a clean mirror at ordinary viewing distance, then use a closer view only for zone ownership and equipment inspection. Harsh overhead light can deepen shadows below the lip or chin and make one side look shorter or denser.
Relax the jaw and close the mouth naturally. Smiling, pursing the lips, lifting the chin sharply, or stretching skin can move connectors and the lower edge. Record the shape in the posture in which the goatee is normally seen, not in a pose created to make trimming easier.
Check the Skin Before Handling Hair
Look for painful, broken, bleeding, swollen, infected-looking, or actively irritated skin in the mustache, mouth-corner, chin, and neck areas. Do not run a guard or exposed cutter over a concerning area merely to preserve a schedule.
The American Academy of Dermatology’s healthy-beard guidance emphasizes care for the skin beneath facial hair. This page uses that source only for a general skin-care boundary. It does not diagnose a rash, bump, infection, ingrown hair, hair loss, or other condition.
Remove Residue Without Creating a New Styling State
Heavy balm, wax, oil, sweat, loose clippings, and dried cleanser can bind hair into temporary groups or obstruct a guard. Use an ordinary gentle cleansing routine when cleaning is needed, rinse residue away, and avoid introducing an unfamiliar product immediately before the trim.
Do not scrub aggressively or use heat, chemical straightening, or strong hold to make the goatee fit a preferred outline. Preparation should uncover the ordinary shape. A product-created shape is a poor ruler when the intended result will be worn after that product releases.
Follow the Exact Wet-or-Dry Boundary
Read the complete model instructions before bringing the tool near water. “Washable attachment,” “rinseable head,” “wet and dry,” and “waterproof” do not mean the same thing. A detached comb may be rinseable even when the powered handle, charging port, or cord must remain dry.
For a dry workflow, let both hair and skin dry fully. Philips’ current beard-trimming support guidance tells users of covered products to wash and dry the beard and face and to begin with a higher setting while becoming familiar with the tool. That is model-scoped guidance, not a universal wet-use rule.
Release Compression Before Mapping Length
Mask pressure, sleep, a tight collar, towel drying, repeated finger handling, and styling hold can flatten the chin body or rotate connectors. After cleaning and drying, use light handling and allow the goatee to settle in its ordinary position.
Do not pull hair straight to discover its maximum strand length. The relevant baseline is the released shape the wearer intends to keep. A stretched connector may look long enough to cross the mouth corner but return above it as soon as tension is removed.
Comb Gently by Zone, Then Release
Use a clean beard or mustache comb appropriate to the current length. Comb the mustache, connectors, center below the lip, chin body, lower edge, and any neck transition in their observed directions. Use only enough contact to separate obvious clumps and reveal crossing hair.
Remove the comb after each zone and let the hair settle. A comb is an observation tool, not a cutting rail. If a boundary or target disappears when the comb is removed, it is not yet a stable released reference.
Map the Center Below the Lip
Identify whether the hair below the lower lip forms a narrow strip, broader patch, natural gap, or disconnected island relative to the chin body. Note its center and the clear skin around it. Do not assume every goatee must have a soul patch or a continuous vertical connection.
Trace any crossing hair toward its root before assigning ownership. A visible end in the center may originate from one side. Cutting it as if it were center hair can create a gap or pull the apparent center away from the chin anchor.
Establish the Chin Anchor
The chin anchor is the stable central reference for the retained goatee body. Observe where the hair projects forward, where the densest central mass sits, and how that mass aligns with the relaxed mouth and center below the lip. It is not a demand for mathematical facial symmetry.
Keep this anchor outside the first experimental correction. If preparation cannot identify a stable center because hair is compressed, tangled, or held by product, repeat the release process rather than inventing a line with the trimmer.
Identify Mustache-to-Goatee Connections
At each side of the mouth, determine whether the mustache and chin body are fully connected, lightly connected, deliberately separated, or visually connected by crossing hair. Record the narrowest retained width and the root ownership of representative hair.
Connections can look different because of direction, density, light, and mouth position. Do not shave or narrow the darker side during preparation. The existing connection may be structurally balanced even when the two sides do not contain the same number of hairs.
Protect the Mouth Corners
Mark where each mustache endpoint, connector, and chin-side edge sits relative to the relaxed mouth corner. Keep the lip and soft tissue outside every future tool path. Do not use a stretched smile or finger-pulled corner as a fixed ruler.
If one hair crosses the corner, trace its root and release it before deciding whether it is excess. Edge cleanup around the mouth is separate from reducing length within the goatee body and should not be bundled into an unplanned first pass.
Map the Lower Chin Edge
View the lower edge from the front and both three-quarter angles with the head in an ordinary position. Identify the point where the retained chin body ends and hair below it begins to behave as neck transition or unrelated growth.
Do not raise the chin sharply to draw this edge; that changes skin tension and projection. Record natural irregularities rather than removing them during setup. The lower edge can be refined later only after its relationship to the chin anchor and intended shape is explicit.
Separate Neckline and Cheek Decisions
A goatee may leave most cheeks clear while retaining a small amount of transition hair near the mouth or jaw. Neck hair may begin close to the lower goatee or remain separated by a clean area. Preparation labels those areas; it does not automatically remove them.
Use the beard neckline guide only when the next task is specifically a neck boundary, adapting it to the retained goatee rather than copying a full-beard formula. Do not combine cheek cleanup, neckline creation, and chin-body shortening in one first pass.
Map Natural Growth Direction by Zone
Trace representative hair from root through the visible body to the released end. Mustache hair may travel outward, connectors may angle down or inward, chin hair may project forward, and lower hair may turn toward the neck. There may be several directions inside one goatee.
Wahl’s official GroomsMan trimmer instructions show model-specific use of guide combs and detail trimming around a mustache or goatee. Use exact instructions for the actual model; the example does not establish one universal direction, pressure, or unguarded method.
Identify Crossing Hair and Root Ownership
Crossing hair can make a connector look wider, fill a small gap below the lip, or extend a lower corner. With the tool off, separate only enough to trace the visible end toward its root. Return the hair to its released position after ownership is understood.
Do not cut a bundle merely because it crosses a conceptual boundary. Removing one crossing group can change the mustache endpoint, connector, and chin contour together. Preserve any group whose ownership or structural role remains uncertain.
Record Density Without Treating It as Length
Darkness and visual fullness reflect density, strand thickness, curl, overlap, color, lighting, and length. A darker side is not automatically longer. Compare boundary position and released projection before considering any future reduction.
Do not shorten a sparse side to match the darkness of a dense side. Trimming changes retained length; it cannot create follicles or promise fuller growth. The patchy short-beard guide explains density-versus-length observation that can be applied conservatively without turning this preparation stage into a growth or treatment claim.
Set a Protected Shortest-Length Floor
Find the shortest released zone that still supports the current center, connection, coverage, or lower contour. Treat that zone as a floor that the first trim must preserve. Do not infer its length only from a printed guard number or neighboring darker hair.
Guard labels are model-specific and describe a documented setup; they cannot predict the same visual result for every goatee. If no verified setting can preserve the floor, reject the planned powered pass and keep the current length until a compatible method is established.
Compare Sides With Stable Landmarks
Compare center alignment, mouth corners, connector widths, lower corners, chin projection, and the distance from each retained edge to a stable facial landmark. View the whole shape at ordinary distance before inspecting individual ends.
The mustache balance guide provides a landmark-based comparison method for the upper goatee. During preparation, leave both sides unchanged. Natural anatomical and growth differences can remain, and visual coherence does not require mirror-image strand placement.
Verify the Complete Tool Identity
Record the tool category, full model number, regional suffix, cutter system, compatible guard identity, adjustment mechanism, power mode, wet-use status, cleaning method, lubrication rule, and any documented attachment sequence. A similar housing or brand family is not enough.
Use the manufacturer’s current manual or support page for that exact identity. Do not rely on an unverified marketplace title, a guard from another kit, or a printed number without confirming what it means on the actual model. The beard trimmer buying guide provides a broader model, attachment, power, and support checklist when the current tool identity cannot be established.
Inspect Cutter, Guard, and Housing Powered Off
Disconnect charging power where the instructions require it and keep the device off. Inspect teeth for bends, chips, corrosion, contamination, or misalignment. Inspect the guard frame, rails, tabs, locks, and adjustment travel for cracks, looseness, or incomplete seating.
Do not hold, tape, glue, or wedge a loose attachment in place. Do not touch moving teeth or use a finger to stabilize the guard. The loose-guard checks cover attachment fit in detail. Stop if the housing is cracked, the control is unreliable, or any part identity remains uncertain.
Clean and Lubricate Only as Documented
Remove compacted hair using the supplied brush, approved rinse procedure, or other model-specific method. Let approved rinsed parts dry as instructed. Apply only the lubricant and amount specified for that cutter system; some systems require oil while others do not.
The cleaning and oiling guide provides a general decision framework, but it cannot make a handle washable or a cutter oil-compatible. Maintenance should reduce an identified equipment variable, not become an improvised repair.
Check Power and Controls Away From the Face
After correct assembly, run the tool briefly away from hair. Listen and observe for stable operation. Stop at abnormal rattle, impact, surging, slowing, odor, smoke, unusual heat, guard movement, or an intermittent control.
Switch off before clearing, touching, or adjusting any part. A normal off-face check does not prove a specific cutting result or safe suitability for every user; it only screens obvious equipment problems before the planned task.
Rehearse Future Access With Power Off
Hold the powered-off guarded tool near, but not against, the intended first zone. Confirm that the complete contact path, mouth corner, lip, connector, chin edge, fingers, and lift-away point would remain visible. Keep the hair released rather than stretched into the guard.
If access depends on hiding the cutter, pressing into soft tissue, combining several zones, or lifting hair under tension, reject the setup. Preparation may properly end with no powered plan.
Create a Zone Record Before Cutting
Record the current state in a short note or neutral reference photograph: center, chin anchor, connectors, mouth corners, lower edge, neck and cheek boundaries, direction map, shortest floor, selected tool, and protected zones. Use the same relaxed posture and lighting for later reassessment.
The record is for change control, not proof of a cosmetic defect or professional result. Do not publish identifying photographs without appropriate privacy and consent handling. A written map is sufficient when images are unnecessary.
Choose the First Future Test Zone
Select one fully visible area inside the retained body, away from the center, shortest floor, mouth corner, connector, lower edge, sparse zone, and opposite-side reference. The test zone should have clear root ownership and a direct lift-away path.
Do not power the tool in this preparation stage. Merely confirm that a later guarded test could isolate one variable. If the mustache or connector remains compressed or poorly mapped, repeat the baseline in the mustache preparation guide. If no area satisfies the constraints, revise the objective or obtain exact-model guidance before proceeding.
Set Stop Conditions in Advance
Write equipment stop conditions: pulling, snagging, stalling, abnormal noise, odor, smoke, heat, impact, guard movement, damaged teeth, loose housing, unstable power, or loss of visibility. Add task stop conditions: unclear ownership, shifting boundary, compressed hair, mouth movement, or a target that expands beyond one zone.
Add skin stop conditions: pain, bleeding, broken skin, swelling, active irritation, or an area that should not receive a grooming pass. Stop conditions are not a guarantee against harm; they are explicit reasons not to continue.
Goatee Preparation Checklist
- Define one observable objective and list protected features.
- Use even light, relaxed posture, and ordinary viewing distance.
- Check skin and stop over painful, broken, or concerning areas.
- Remove residue and follow the exact wet-or-dry boundary.
- Let hair dry, release compression, comb gently, and release again.
- Map center, chin anchor, connectors, mouth corners, and lower edge.
- Separate neck and cheek decisions from chin-body length.
- Trace natural direction, crossing hair, and root ownership by zone.
- Protect the shortest retained floor and compare stable landmarks.
- Verify the exact tool, guard, cutter, maintenance, and power rules.
- Inspect and rehearse access only while the tool is powered off.
- Record the baseline, first future test zone, and stop conditions.
Frequently Asked Questions
Should a goatee be wet or dry before trimming?
Follow the exact trimmer instructions. For a dry workflow, wash only when needed, remove residue, and let the goatee and skin dry completely before mapping length or boundaries. Damp, compressed, or product-held hair can hide the ordinary released shape.
Should I outline my goatee before choosing a guard?
Map the existing center, chin anchor, mouth-corner connections, lower edge, and neck or cheek boundaries first, but do not cut an outline during preparation. Once the retained shape is observable, guard choice can be handled as a separate exact-model decision.
How do I check whether both sides of a goatee are even?
Relax the mouth and compare stable landmarks at ordinary viewing distance: center line, mouth corners, connection widths, lower corners, and chin projection. Do not use darkness or strand count as rulers, and do not shorten either side during the preparation check.
When should I stop before trimming a goatee?
Stop if the target shape or hair ownership is unclear, the skin is painful or broken, a guard will not lock, teeth or housing are damaged, wet-use status is uncertain, or the tool runs with abnormal noise, odor, heat, impact, surging, or movement.
Sources and Claim Boundary
- Philips beard-trimming support guidance for washing, drying, comb use, and higher-setting familiarization on the covered products.
- Wahl GroomsMan trimmer instructions for model-scoped guide-comb and detail-trimming context around facial-hair zones including a goatee.
- American Academy of Dermatology healthy-beard guidance for the general boundary that care includes the skin beneath facial hair.
Claim boundary: This page provides generic pre-trim observation, cleaning, drying, release, zone mapping, root-ownership, tool-inspection, and stop-condition guidance for maintaining an established goatee. It does not perform the trim, design a style, prescribe a universal guard, direction, pressure, speed, wet-use method, cleaning method, lubricant, product, or pass count; diagnose or treat skin or hair; report hands-on testing; rank equipment; promise safety, comfort, symmetry, density, growth, performance, or a result; or replace exact-model instructions and qualified care.
