
Disclosure: This site may use affiliate links. Product specifications should be checked against manufacturer or retailer pages before purchase.
Direct Answer
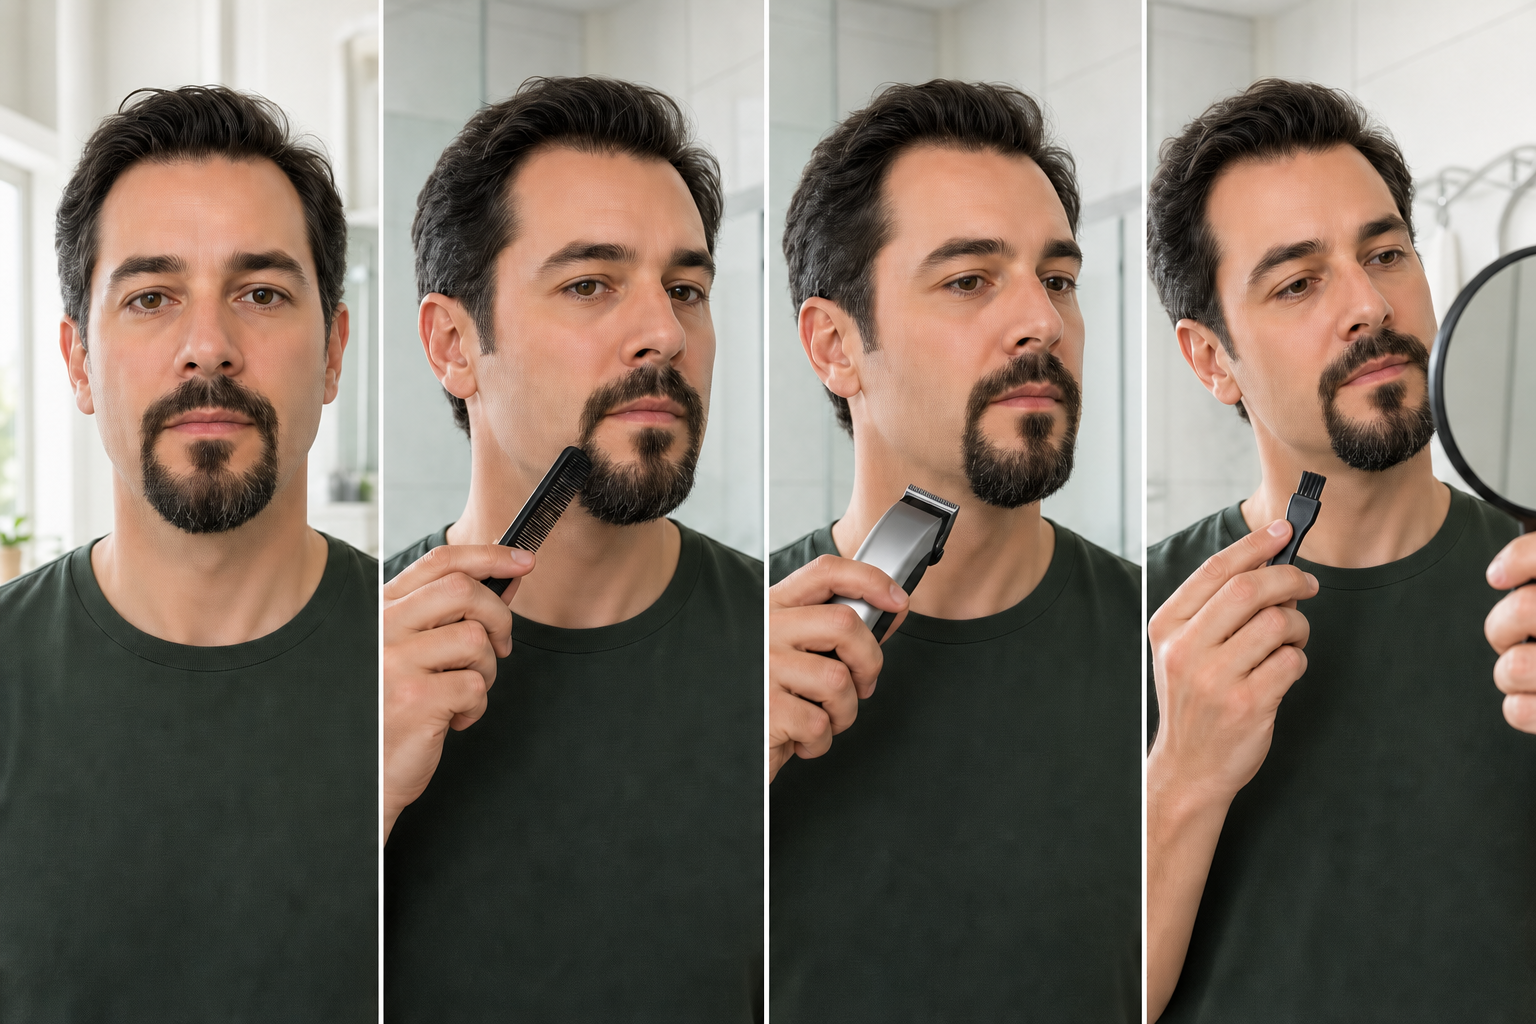
Direct answer: Touch up a goatee without overtrimming by recreating its dry released baseline, protecting the under-lip patch, central column, mustache connectors, outer endpoints, lower edge, and neckline, and selecting one stable maintenance target. Reuse only a verified setup, make one bounded outer-chin correction, then switch off, clear, recomb, release, compare the complete goatee, and stop.
A touch-up maintains an already approved goatee. It is not a faster version of a full trim and does not authorize a new width, base length, center treatment, connector design, lower edge, or neckline. If more than one structural decision has changed, stop and plan a separate session.
Define Touch-Up Scope Before Cutting
Name one observable target: a stable longer group inside one chin panel, one released end beyond a recorded boundary, a small patch of bulk above an unchanged lower edge, or one endpoint that has grown outside the approved shape. Also name every feature that must remain unchanged.
“Tidy the goatee” is not a bounded task. It can quietly combine center, panel, connector, width, edge, neckline, direction, and balance changes. A valid touch-up has one target, one reference panel, one documented method, and one stop decision.
Keep Touch-Ups Separate From Preparation
The goatee preparation guide owns cleaning as needed, complete drying, gentle combing, natural release, zone mapping, tool inspection, and the no-cut baseline. Repeat that workflow whenever the current goatee cannot be compared reliably with its prior state.
This page begins after preparation has confirmed that the established style still works and only one maintenance target remains. It does not replace the preparation record or permit cutting hair that is wet, compressed, held under tension, or obscured by product.
Recreate the Prior Dry Released Baseline
Use the same ordinary dry state, posture, expression, light, mirror distance, and gentle combing method used for the previous accepted result. Allow compression from sleep, masks, collars, hands, or towels to release before comparing.
Wahl’s current trimmer instructions provide one manufacturer example of combing facial hair in its growth direction before trimming. Remove the comb and let the goatee settle; do not create a target by stretching or holding a panel.
Confirm That the Existing Shape Still Works
Check under-lip patch width, central continuity, left and right panel width, connector endpoints, lowest released point, lower-edge arcs, and neckline transition. If those relationships remain deliberate and only one small change persists after release, a touch-up may be appropriate.
If several zones have shifted, do not repair them one stroke at a time. Return to preparation, guard selection, grain mapping, bilateral balance, outline, and neckline planning as a full session with a new baseline.
Compare With an Untouched Record
Use matched front and three-quarter photographs or a written zone record when available. Match head position, expression, camera height, distance, and light. Compare the same landmarks rather than relying on a general memory of the goatee.
Record only observable change: which group projects, where it originates, where it settles after two releases, and which protected boundary is nearby. A shadow, curl, density difference, or posture change is not automatically a cutting target.
Separate New Growth From Displacement
A group can appear longer because it grew, curled differently, crossed another zone, retained product, or was pressed outward. Gently comb, release, wait, and compare again. Trace the group from root ownership to released end.
If the target disappears, changes sides, or moves into another zone after release, end the touch-up assessment. Maintenance should respond to a stable change, not every temporary position.
Map the Under-Lip Patch Before a Touch-Up
Record whether the patch is separate, connected, narrow, wide, centered, or naturally offset. Keep it outside the first and usually the entire touch-up. A small cut there can change the perceived center and connection of the complete goatee.
If the under-lip design itself needs alteration, define that as a separate style task. Do not hide a center redesign inside an outer-panel maintenance pass.
Protect the Central Column and Chin Anchor
Identify the central column and lowest released chin point. These can be formed by overlapping groups rather than one obvious strand. Preserve them as alignment references while assessing an outer target.
Do not carry a guarded path across the center simply because the target begins nearby. A touch-up should leave the central anchor available for the final released comparison.
Protect Both Mustache Connectors
Trace connector hair from beside each mouth corner into the goatee. Record where connector ownership ends and chin-panel ownership begins. Move hair only long enough to identify it, then release it before any decision.
A broad guard can admit connector hair that overlaps the chin. Keep both connections outside an outer-panel touch-up unless a connector is the separately planned target with its own visible path and stop boundary.
Protect the Existing Outer Width
Record the left and right released endpoints before cutting. Keep the planned path inside those endpoints and away from the chin corner. A width change is structural, not a routine length touch-up.
Do not move both endpoints inward to make one panel look cleaner. If one endpoint itself has changed, confirm it through two matched releases and maintain the other endpoint as an untouched reference.
Protect the Lowest Point and Lower-Edge Arcs
Compare how each lower-edge arc rises from the lowest released point toward the outer panel. Distinguish a longer group above the edge from the edge itself. A bulk correction should not flatten or raise the recorded lower boundary.
Do not use a horizontal sweep across the complete bottom. If the lower edge needs redesign, stop the touch-up and create a separate outline plan with full front and profile visibility.
Keep the Neckline Outside the Touch-Up
Under-jaw hair can support the front shape while the neckline is a skin-boundary decision. Keep the existing neckline visible and stop the touch-up path before its transition. Do not switch from guarded length work to exposed-blade cleanup without a new plan.
The beard neckline guide owns placement and cleanup. A goatee touch-up does not move that boundary or assume one universal distance below the chin.
Set the Shortest Useful Length Floor
Identify the shortest released group that still supports center continuity, panel coverage, connector weight, lower-edge shape, or under-jaw transition. That group is the protected floor beneath the visible target.
Do not choose a setting from the longest projecting end. Use the goatee guard guide to verify exact compatibility and select the longest useful supported setting that keeps the protected floor outside the cutting plane.
Select One Stable Maintenance Target
A suitable target persists after two gentle comb-and-release comparisons, has clear zone ownership, remains away from the center, connectors, endpoint, lower edge, and neckline, and can be reached through one supported path.
Describe it narrowly, such as “one released group in the right outer chin panel extends beyond the prior bulk record.” If no single description fits, end the touch-up and reassess the session type.
Keep the Better Panel Untouched
Use the panel that still matches the accepted record as the reference. Do not alternate sides automatically. The untouched panel preserves the comparison needed to judge whether the correction restored the prior relationship.
The goatee balance guide owns matched landmarks and one-sided correction logic. A touch-up maintains an approved relationship; it does not promise or force geometric symmetry.
Verify the Exact Tool and Prior Setup
Confirm the complete model, head, guard, setting, mounting direction, component condition, supported movement, power rules, and care instructions. Reuse a prior setup only when the same verified components, target zone, and protected length floor still apply.
Philips’ current MG3900 manual is a model-specific example of attachment handling, movement, and cleaning. Its instructions illustrate why setup must be exact; they do not transfer automatically to another trimmer.
Inspect the Guard and Cutter Powered Off
Check guard teeth, rails, tabs, locks, dial stops, head seating, cutter teeth, and visible residue with power off. Stop for cracks, bends, corrosion, looseness, incomplete seating, contacting teeth, or damage that prevents the documented setup.
The guard-size guide explains why a familiar number or similar shape does not prove compatibility. Never hold a loose attachment in place by hand.
Choose Guarded Work or One Isolated End
Use a verified guard when the target is a small patch of bulk whose protected floor remains below the cutting plane. Use an isolated-end method only when one released end is clearly visible, traceable, separated from neighboring groups, and reachable with the selected tool.
The scissors-versus-clippers guide separates tool roles. Do not remove a guard mid-pass and continue freehand; switching methods changes the cutting plane and requires a new bounded plan.
Follow the Local Grain Map
Under-lip hair, front chin hair, outer panels, connectors, lower-edge groups, and under-jaw hair can travel in different directions. Reconfirm the target’s local root-to-end path rather than applying one arrow across the entire goatee.
The goatee grain guide owns detailed direction mapping. The exact model manual controls whether a particular attachment and movement are supported.
Rehearse One Bounded Path With Power Off
Hold the switched-off tool beside the target and verify approach, guard contact, local direction, stopping point, and clearance from the center, connector, endpoint, lower edge, and neckline. Confirm the path can end before the chin surface turns.
If the rehearsal crosses a protected landmark or collects another zone, reduce the target or select another documented method. Do not solve a poor path with pressure or a shorter setting.
Make One Outer-Chin Correction
Use only the operation documented for the exact tool. Correct the selected outer-chin target with one short controlled pass or one isolated-end action, then lift away before the surface angle or hair ownership changes.
Keep the center, connectors, reference panel, lower edge, and neckline untouched. Do not continue because the tool is already running or because close mirror inspection reveals another small difference.
Do Not Round the Chin Corner
The outer chin turn changes visibility, surface angle, hair direction, guard contact, and zone ownership. A path that begins on the front panel can enter side growth or the under-jaw transition without a clear warning.
Stop before the turn, lift away, switch off, clear, and release. A separate side-zone target requires its own map and cannot be added to the current correction.
Do Not Add Pressure When Removal Is Limited
Limited removal can mean the hair is shorter than the cutting plane, lies outside the guard openings, curls into another zone, or is blocked by clippings. Added pressure can change contact and admission without resolving the mismatch.
Lift away and switch off. Do not force the guard into the chin, flatten the lower edge, or repeat strokes simply to make the touch-up feel productive.
Switch Off and Clear Before Reassessment
Switch off before touching, removing, or clearing an attachment. Follow the exact manual for brushing, rinsing, drying, oiling, and reassembly. Inspect again for trapped hair, damage, or movement.
The cleaning and oiling guide supplies general boundaries. Clearing is also a measurement control because a loaded guard can admit the next group differently.
Recomb, Release, and Compare the Complete Goatee
Gently recomb the target and untouched reference, remove the comb, and let all zones settle. Return to the original posture, expression, light, and mirror distance. Compare the under-lip patch, center, both panels, connectors, endpoints, lower edge, and neckline.
Record what changed and what remained protected. Do not judge while stretching one group, pressing the chin, holding hair aside, or viewing only one close angle.
Change Only One Variable If Another Pass Is Justified
If the same stable target remains, change at most one verified variable: a smaller portion of the target, a supported setting, or a manual-approved direction. Keep preparation, tool, posture, pressure boundary, and reference panel unchanged.
Do not shorten the setting, reverse direction, add pressure, cross the chin corner, and trim the reference side together. Multiple changes turn a touch-up into an uncontrolled full trim.
Stop When the Recorded Shape Is Restored
End the session when the released target again fits the accepted panel bulk and protected landmarks, even if individual hairs are not identical. The purpose is to maintain a coherent goatee, not remove every visible variation.
Also stop when the difference is too small to assign reliably. Continuing past the record creates a new shape without a new plan.
Stop for Pulling, Heat, Movement, or Unexpected Removal
Stop for pulling, pinching, painful contact, broken or bleeding skin, unusual heat, odor, smoke, sound, vibration, slowing, guard movement, or more removal than planned. Switch off before inspecting the tool or hair.
Use the trimmer-pulling guide to separate tangles, loading, cutter condition, assembly, maintenance, power, and task mismatch. Do not press harder or shorten another zone to disguise an unexpected result.
Do Not Match an Unexpected Cut on the Other Side
After unexpected removal, stop, clear the tool, and let the complete goatee settle. Record the changed panel and protect the reference panel, under-lip patch, center, connectors, lower edge, and neckline.
The goatee mistake guide owns recovery boundaries. A later decision may retain the difference, wait for growth, adjust one endpoint, or redesign the style; it should not be automatic equalization.
Know When the Touch-Up Has Become a Full Trim
Stop when several zones need work, the base length must change, the center or under-lip patch needs redesign, both panels lack a stable reference, a connector must move, or the lower edge or neckline needs a new position.
Do not expand scope stroke by stroke. Record the broader need and schedule it as a separate full session with a fresh baseline, tool plan, protected landmarks, and stop rules.
Record the Maintenance Result
Record the date, dry baseline, target, reference panel, exact model, head, guard, setting, direction, one correction, clearing step, released comparison, protected landmarks, and stop decision. Update matched front and three-quarter photographs when useful.
Do not describe the result as professionally tested, perfectly symmetrical, irritation-free, more comfortable, or suitable for every face. Record only observable current evidence.
Goatee Touch-Up Checklist
- The existing style, width, center, lower edge, and neckline remain valid.
- The prior dry released baseline can be recreated.
- The under-lip patch, central column, connectors, endpoints, and shortest useful group are protected.
- One stable maintenance target persists after two releases.
- The better panel remains untouched as the reference.
- The exact model, head, guard, setting, direction, and care rules are verified.
- The powered-off rehearsal stays inside one outer-chin zone.
- Only one bounded correction is planned.
- The tool is switched off before clearing or adjustment.
- The complete goatee is recombed and released before another decision.
- Unexpected removal ends the touch-up.
- A broader change is deferred to a separate full trim.
Frequently Asked Questions
What counts as a goatee touch-up?
A goatee touch-up is one limited maintenance correction inside an already approved shape, such as one stable projecting group or one confirmed longer outer-chin section. It preserves the under-lip patch, central column, connectors, outer width, lower edge, neckline, and untouched reference panel.
How do I touch up a goatee without making it too narrow?
Record both released outer endpoints before cutting, protect the center and better-shaped panel, and select one target that remains stable after two releases. Make one bounded correction away from the endpoint, then switch off, clear, recomb, release, and compare before doing anything else.
Should I touch up both sides of a goatee?
Only when each side has a separate confirmed maintenance target. Do not trim the second panel automatically after correcting the first. Keep the better-shaped panel untouched as a reference and reassess both sides under the same posture, light, combing, and released state.
When should a goatee touch-up become a full trim?
Stop the touch-up when the base length, under-lip patch, both chin panels, mustache connectors, lower edge, neckline, or overall style needs change. Rebuild preparation, guard, direction, balance, outline, and stop plans as a separate full-trim session.
Sources and Claim Boundary
- Wahl trimmer instructions for a current manufacturer example of natural-direction combing, exact-tool setup, and maintenance boundaries.
- Philips MG3900 manual for a model-specific example of attachment handling, guarded movement, and cleaning.
- Goatee preparation guide for the dry released baseline and zone map.
- Goatee balance guide for matched landmarks and the untouched reference-panel method.
Claim boundary: This page provides a generic exact-manual-bound goatee touch-up workflow for one stable outer-chin maintenance target. It does not prescribe a universal shape, guard, direction, pressure, speed, pass count, outline, neckline, wet-use method, or schedule; diagnose density, growth, hair, or skin; rank a product; report hands-on testing; promise comfort, safety, symmetry, performance, or a result; or replace exact-model instructions and qualified care.
