
Disclosure: This site may use affiliate links. Product specifications should be checked against manufacturer or retailer pages before purchase.
Direct Answer
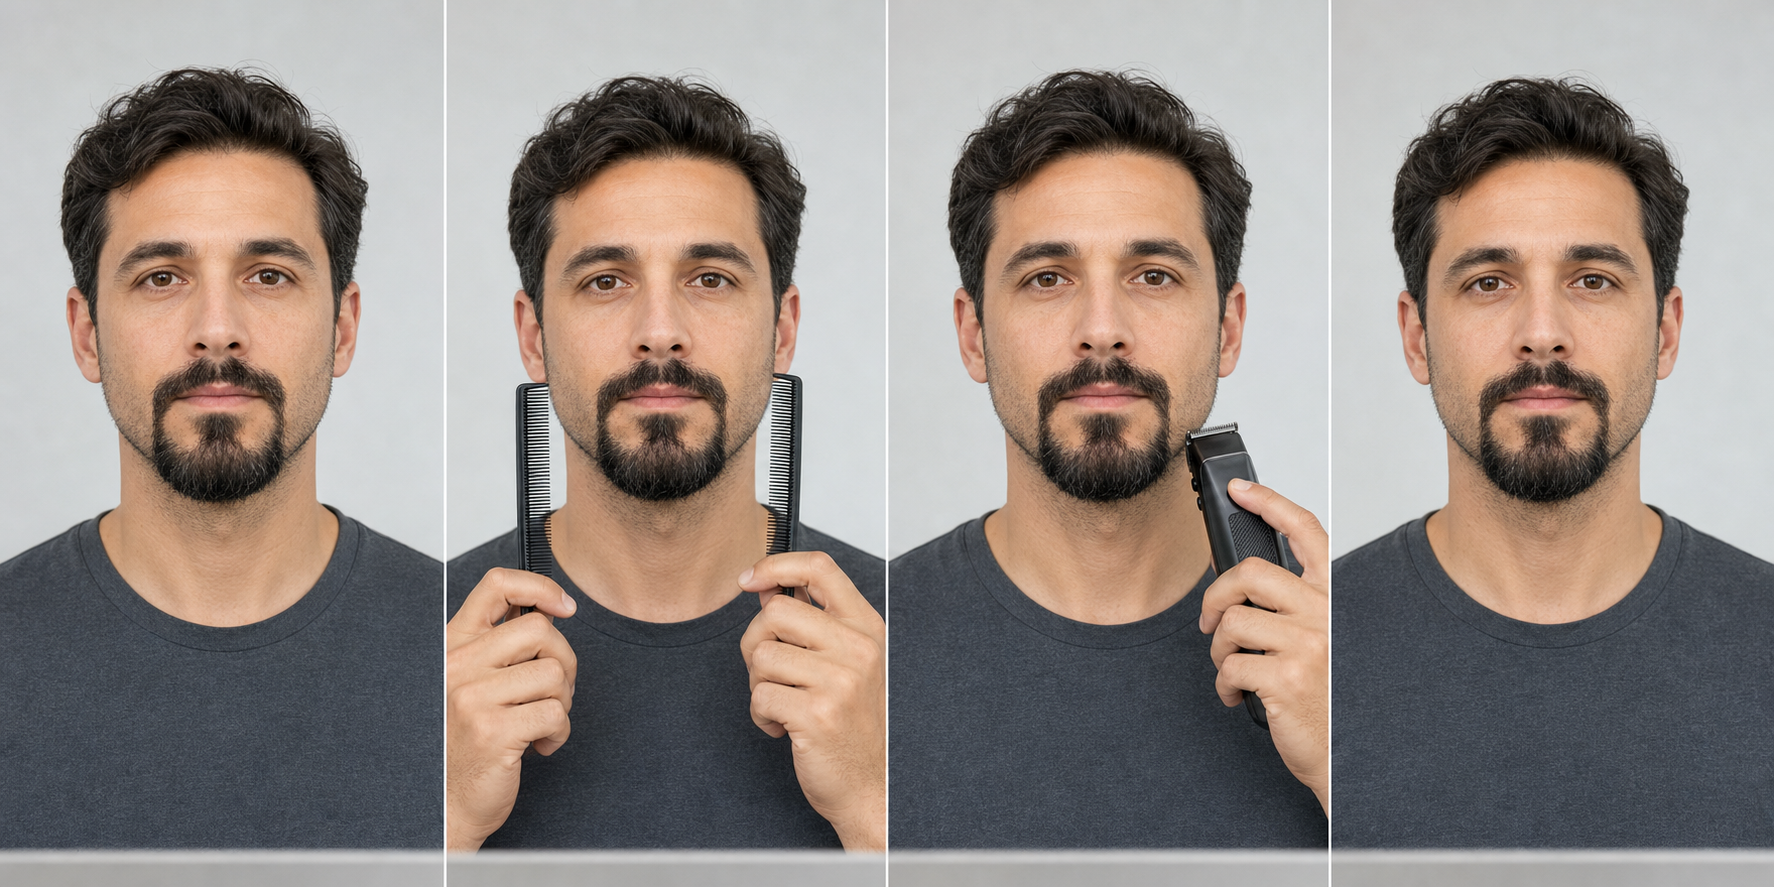
Direct answer: Keep a goatee even on both sides by comparing it dry and released in neutral posture, mapping the under-lip center, left and right chin panels, outer width, lower edge, and neckline transition, then identifying one stable excess. Leave the better side untouched, make one conservative one-sided correction, clear the tool, recomb, release, and compare again before removing more.
Even does not mean perfectly mirrored. Facial structure, density, curl, growth direction, old damage, and an intentional style can differ naturally. The goal is a coherent released appearance around shared landmarks, not identical strand counts, equal skin visibility, or forced removal from both sides.
Keep Symmetry Work Separate From the Full Trim
This guide owns bilateral comparison and one-sided correction after preparation, guard choice, and a supported cutting method are already settled. It does not create a new goatee outline, redesign width, move the neckline, establish a mustache gap, or prescribe a universal trimmer direction.
Use the goatee preparation guide for cleaning, drying, natural combing, tool inspection, and baseline photographs. Use the goatee guard guide for exact-model fit and a protected setting. A symmetry check should not silently redo either decision.
Define an Even Result Before Cutting
Write down what should appear balanced: the two chin-panel widths, visible bulk, lower-edge height, central drop, connector weight, or neckline transition. Select one or two primary comparisons. Trying to equalize every visible difference can turn density, curl, shadow, or anatomy into unnecessary length removal.
Record intentional features that must remain, such as a pointed or rounded lower center, a narrow under-lip patch, tapered side panels, a fuller mustache connector, or an asymmetrical style. The reference is the approved goatee in its released state, not an abstract mirrored template.
Prepare a Repeatable Dry Reference
Clean and dry the goatee as required for the exact tool, remove heavy styling residue, and comb gently in its natural direction. Wahl’s official trimmer instructions describe combing the goatee in the direction it grows so stray hairs become visible. That supports observation; it does not require cutting every visible end.
Remove the comb and let the hair settle. Do not hold, stretch, twist, or press one side flat during the comparison. Record the preparation state because moisture, product, tension, and repeated handling can change apparent width and endpoint position.
Use Neutral Posture and Matched Lighting
Face the mirror with shoulders level, head upright, jaw relaxed, and lips resting naturally. Use diffuse front light plus enough side light to show both outer edges. A side light, tilted head, raised lip, smile, or phone held closer to one cheek can create a false mismatch.
When photographs are used, keep camera height, distance, lens, head position, and exposure consistent. Compare a front view and matched three-quarter views. Return to neutral after speaking or smiling before deciding that a corner is shorter.
Establish the Under-Lip Axis as a Reference
Use the center of the lower lip, the under-lip patch, the central chin plane, and the lowest released point as observation references. Do not draw a cutting path down the skin. Hair from either chin panel can cross the apparent midline, and facial structure can place the visible low point slightly away from a photographic center.
Record whether the under-lip patch is connected, separated, narrow, or offset before symmetry work. Do not widen a gap, narrow the central column, or move the lowest point merely to make a photograph look mathematically centered.
Mark Matched Goatee Landmarks
| Landmark | Compare after release | Do not force |
|---|---|---|
| Under-lip axis | Patch width, central column, and released low point | A mathematically straight skin line |
| Chin panels | Left and right width, projection, bulk, and lower endpoint | Equal density or strand count |
| Mustache connectors | Visible handoff beside the mouth at neutral expression | Removing mustache structure to match shadow |
| Lower edge | Height and curve on both sides of the central low point | A ruler-straight edge across a curved chin |
| Neckline transition | Left and right handoff below the jaw | Moving the neckline during a length correction |
Use several landmarks together. One projecting curl, lighter patch, or crossing hair is not enough to declare an entire side longer.
Separate Length From Density, Curl, and Direction
A side can look larger because it is longer, denser, curlier, more outward-facing, darker, or better lit. Record outer length, visible bulk, density transition, and local direction separately. Trimming length cannot safely equalize every category.
Do not shorten a denser side until equal skin is visible. Do not remove an outer curl when the apparent mismatch disappears after gentle release. Name the removable variable before choosing a correction.
Trace Crossing Hair to Its Source
Use a clean comb to separate one small hair group, trace its visible origin, then release it. A long hair can cross the central chin, rest below the opposite panel, or appear at the lower edge while originating in another zone. Assign it to its root panel before comparing endpoints.
The goatee grain-direction guide explains local direction zones and hair ownership. Symmetry work uses that map to avoid shortening the wrong side merely because an end rests there.
Compare the Left and Right Chin Panels
Observe each panel from the under-lip boundary to the outer chin turn and from the mustache connector to the lower edge. Compare released width, projection, and lower endpoint under the same light. Do not flatten one panel against the chin or pull it downward as a measuring method.
A panel can look wider because its hair grows outward, catches more side light, or overlaps the central column. If width is the actual design problem, stop before shortening length and map a separate outline decision.
Compare Both Lower-Edge Arcs
Use the lowest central point as the common anchor. Compare the left and right arcs as they rise toward the outer chin. Record a stable projecting group rather than trying to make a ruler-straight line across a curved and naturally asymmetric surface.
Do not carry a length correction through the central low point or into the opposite panel. A small lower-edge difference may come from curl release, jaw shape, camera angle, or shadow rather than removable excess.
Protect Mustache and Neckline Transitions
Trace mustache connector hair, chin-panel hair, under-jaw support, and neckline hair separately. Record where each transition begins and the visible weight it contributes. Keep neighboring zones outside a guard or scissors path intended only for one chin panel.
The beard neckline guide owns neckline placement and cleanup. Symmetry work must not move that boundary. The tool-role comparison helps separate guarded length work from close cleanup without ranking a device.
Repeat the Comparison Before Declaring a Longer Side
Comb gently, release, wait for the hair to settle, and compare again under the same light and posture. Repeat once from the beginning. A difference that changes sides or disappears after release is not a stable correction target.
Record the exact zone and observable mismatch, such as “left outer section extends beyond the matched endpoint after two releases.” Avoid broad labels such as “the left side is bad” or “the whole goatee is uneven.”
Choose the Better Side as the Untouched Reference
Select the chin panel that already matches the intended under-lip axis, outer width, lower arc, and transitions. Leave it untouched during the first correction. The reference panel should remain available for comparison after the corrected side is released.
Do not alternate automatically between sides after every stroke. Chasing both sides can shorten the reference, move the target repeatedly, and erase the evidence needed to decide when to stop.
Confirm the Exact Tool and Method
Verify the complete model, head, attachment, setting, mounting direction, and condition. Philips’ current MG3900 manual notes that hair grows in different directions and gives model-specific guarded movement and cleaning instructions. Those instructions apply to the covered product, not every trimmer.
Use only a method supported by the exact manual. A symmetry plan cannot override guard contact, cutting direction, wet/dry limits, maintenance, or damaged-equipment warnings. Switch off before attachment changes or clearing.
Protect the Shortest Useful Section
On both sides, identify the shortest released hair group that still contributes useful shape or coverage. Record the under-lip patch, central low point, lighter-density area, connector, lower edge, and neckline transition that must remain outside a setting or path that could shorten them.
Use the guard-size guide for system-specific numbering boundaries. Do not assume the same number means the same length across products, and do not select a shorter setting merely to make a difference easier to see.
Select One Low-Consequence Correction Zone
Choose the smallest confirmed longer outer-chin group with clear hair ownership, stable direction, visible access, and distance from the under-lip center, lowest point, connector, and neckline. Record an untouched close reference before the tool approaches.
Do not begin at the center or the shortest, curliest, lightest, or least visible section. If no small bounded zone explains the mismatch, the symmetry problem is not ready for cutting.
Make One Conservative One-Sided Correction
Use the exact manual-compatible guard or isolated-end method already chosen for the task. Correct only the confirmed longer section, then lift away before the direction or boundary changes. Do not continue across the center or “match” the untouched side in the same movement.
The correction should test whether one observable excess can be reduced while the reference remains stable. It is not a promise of a final result. Stop before adding pressure, shortening the setting, changing direction, or entering another zone.
Switch Off, Clear, Recomb, and Release
Switch off before touching, removing, or clearing an attachment. Follow the manual for brushing, rinsing, drying, oiling, and reassembly. The cleaning and oiling guide explains why model-specific care matters between passes.
Recomb both sides with matched gentle handling, remove the comb, and let the hair settle. Compare the complete goatee under the original posture and light. A loaded guard or hair held under tension can make the second pass unlike the first.
Change Only One Verified Variable at a Time
If a stable mismatch remains, change at most one verified variable: the bounded portion of the same zone, a supported setting, or a manual-approved method. Keep posture, light, preparation, protected boundaries, and the reference side stable.
Do not shorten the setting, press harder, reverse direction, enter the corner, and trim the reference side together. Multiple changes remove the evidence needed to explain the result.
Do Not Chase Density With Length Removal
A lighter side may reveal more skin or a narrower edge even when its hair is not shorter. Removing length from the denser side can reduce useful coverage without making density equal. Compare endpoints and shape separately from darkness or strand count.
If density is the main difference, document it as a retained natural variation or choose a style decision that accounts for it. Do not make medical, growth, or treatment claims from a grooming comparison.
Do Not Chase Curl or Temporary Spring-Back
A curled end may project farther before recombing and retract after release. Do not pull it straight and trim to a stretched reference. Observe at least two natural releases and trace the curl to its source zone.
If curl behavior controls the mismatch, pause this basic symmetry workflow. A curl-specific process should own grouping, spring-back, and layer protection rather than hiding those variables inside repeated corrections.
Stop at Pulling, Heat, Movement, or Unexpected Removal
Stop immediately for pulling, pinching, painful contact, broken or bleeding skin, unusual heat, odor, smoke, sound, vibration, slowing, guard movement, or more removal than planned. Switch off before inspection.
Use the coarse-hair control guide for conservative section admission and pulling stop conditions, and the cleaning guide for equipment checks. Do not shorten the reference side to disguise an unexpected change.
Know When the Correct Result Is to Stop
Stop when the difference disappears after release, changes with posture or expression, comes from density or facial structure, cannot be assigned to one hair group, requires crossing a protected boundary, or keeps moving after repeated comparisons.
Also stop when visibility is poor, equipment is damaged, the exact manual is unclear, or the correction would require repeated shortening of the reference. A documented retained asymmetry is safer and more auditable than an endless moving target.
Record the Final Released Comparison
Record the date, preparation state, posture, light, center treatment, matched landmarks, reference side, target zone, exact tool setup, one correction, clearing step, released comparison, and stop decision. Photograph the same front and three-quarter views when appropriate.
Do not describe the result as assured, perfectly symmetrical, safer, more comfortable, or professionally tested. Record only observable changes and the boundaries that remained intact.
Goatee Balance Checklist
- The goatee is dry, gently combed, released, and product-free as needed.
- Posture, expression, camera distance, and lighting are repeatable.
- The under-lip axis, chin panels, connectors, lower edge, and neckline transition are mapped.
- Length is separated from density, curl, direction, and facial structure.
- A stable mismatch appears after at least two released comparisons.
- The better side is protected as the untouched reference.
- The exact tool, attachment, setting, direction, and care instructions are verified.
- One small longer outer section has clear hair ownership.
- The correction stays away from the under-lip center, lowest point, connector, and neckline.
- The tool is switched off before clearing or adjustment.
- Both sides are recombed, released, and compared before another decision.
- Natural retained asymmetry is accepted when no stable removable target remains.
Frequently Asked Questions
How can I tell which side of my goatee is longer?
Compare the released dry goatee in neutral posture using the under-lip center, left and right chin panels, outer width, lower edge, and neckline transition as matched landmarks. Recomb and repeat before deciding that a visible difference is removable length rather than curl, density, light, or facial structure.
Should both sides of a goatee be perfectly identical?
No. Facial structure, density, growth direction, curl, and intentional style may differ. Aim for a coherent released appearance around shared landmarks, not identical strand counts, skin visibility, or a mathematically mirrored outline.
Which side should I trim first when balancing a goatee?
Keep the shorter or better-shaped chin panel untouched as the reference. On the confirmed longer panel, use one small manual-compatible correction away from the under-lip center, lowest point, connector, and neckline, then switch off, clear, recomb, release, and compare again.
When should I stop trying to make a goatee even?
Stop when the difference disappears after release, comes from density or facial structure, shifts with expression, cannot be assigned to one hair group, would cross a protected boundary, or requires repeated shortening of the reference side.
Sources and Claim Boundary
- Wahl trimmer instructions for a current manufacturer example of combing facial hair in its growth direction and following exact-tool setup.
- Philips MG3900 manual for a model-specific example of direction-aware guarded trimming, attachment handling, and cleaning.
- Goatee preparation guide for the dry released baseline and zone map used before bilateral comparison.
- Goatee grain-direction guide for root ownership across the under-lip patch, chin panels, connectors, lower edge, and neckline transition.
Claim boundary: This page provides a generic bilateral landmark, reference-panel, one-sided correction, release, and stop-budget workflow. It does not redesign a goatee, move a neckline, prescribe a universal guard, direction, pressure, speed, pass count, wet-use method, or maintenance schedule; diagnose density or growth; rank a product; report hands-on testing; promise symmetry, comfort, safety, or a result; or replace exact-model instructions and qualified care.
