
Disclosure: This site may use affiliate links. Product specifications should be checked against manufacturer or retailer pages before purchase.
Direct Answer
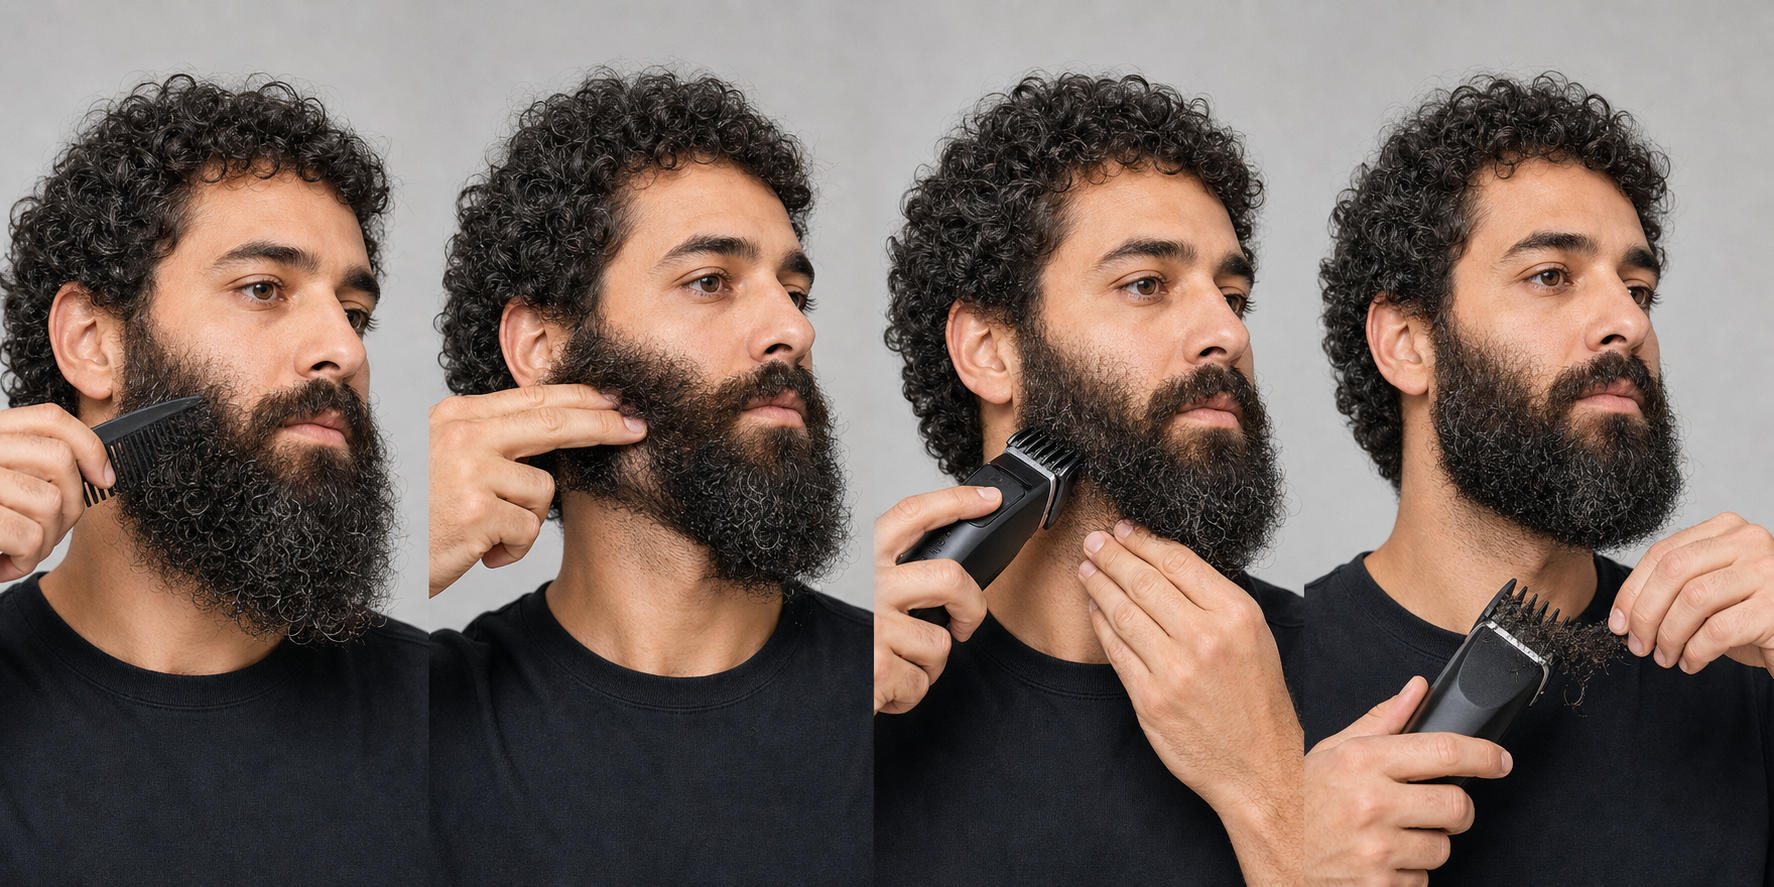
Direct answer: Trim a curly medium beard with better control by assessing it clean, dry, released, and naturally settled; supporting and separating small sections; mapping outer curls, the shorter underlayer, and local grain; and testing a longer verified guard. Use short visible passes, clear clipped curls after each zone, recomb, allow spring-back, and stop before repeated corrections reduce useful structure.
This is a medium-length curl-control workflow, not a straightening method or a promised result. It does not prescribe one guard, direction, pressure, product, trim frequency, curl type, or final style for every beard. The exact model manual controls attachments, wet or dry use, charging, cleaning, lubrication, and safety.
Why Medium-Length Curls Need a Separate Workflow
A curly medium beard has enough length for outer curls to overlap shorter underlayers, cross neighboring zones, hang differently under product or moisture, and retract after support is released. One apparent shelf can contain several curl directions and retained lengths.
The curly short-beard guide focuses on a compact guarded surface near the face. This page adds supported sectioning, outer-versus-underlayer mapping, hanging-length checks, curl-weight changes, staged jaw and chin structure, and longer reset intervals. It is not a longer keyword copy of the short-beard page.
Separate Curl, Coarseness, Density, and Tangles
| Observation | What it can change | Do not assume |
|---|---|---|
| Curl or coil | Visible length, direction, spring-back, and guard entry | That every strand is coarse |
| Coarse-feeling strand | Stiffness and feed behavior | That the beard is dense |
| High density | Amount of hair entering one pass | That a lower guard is required |
| Tangle or product grouping | Resistance and false section boundaries | That cutting through force will solve it |
| Damaged or packed cutter | Pulling, sound, heat, and incomplete feed | That natural curl is the cause |
Describe the visible variable before changing the trim. A curl-control decision should not hide an equipment fault, unexplained hair change, or skin problem.
Set the Medium-Beard Structure First
Define minimum chin projection, jaw width, cheek coverage, mustache length, under-jaw drop, and sideburn connection. Mark the specific outer curls or bulk zones that exceed the target. “Make the curls even” is not measurable; “reduce the longer outer shelf at the right jaw while preserving the central chin” is.
The medium-beard preparation guide covers stable lighting, dry-state reset, tool identity, and minimum retained length. Do not start section cutting while the complete silhouette and protected zones remain uncertain.
Follow the Exact Wet-or-Dry Rule
For a conventional dry guarded method, remove heavy product and allow hair and skin to dry fully. Damp curls can group, lengthen under water weight, lie closer to the face, or change again after drying. A wet result is not automatically the final worn result.
The current Philips Multigroom manual is one product-family example that instructs clean dry hair, combing before trimming, beginning at a maximum length while learning, and deliberate direction changes. Apply only the instructions that match the exact model in hand.
Support and Detangle Without Choosing Length Under Tension
Use clean fingers and a suitable wide-tooth comb. Support a small section near the working area, begin at the free ends, and work toward the base gently. Stop at resistance and isolate the tangle instead of pulling the entire section straight.
Release every section and let it return to its natural dry shape before deciding how much length to remove. The American Academy of Dermatology’s healthy-beard guidance describes combing for detangling, styling, and scissor trimming while caring for the skin beneath. It does not prescribe straightening, a guard, or a universal curl routine.
Map Outer Curls and the Underlayer Separately
Comb the beard into its worn shape, then lift only enough to see where longer outer curls overlap shorter structural hair. Trace each outer curl back to its source zone. Do not cut an underlayer merely because an outer curl crosses it.
Release the lifted section and note how far it retracts. The objective is to control the amount of hair entering the guard while preserving the relaxed structure, not to hold the beard straight against a running cutter.
Map Grain and Curl Travel by Zone
Divide the beard into upper cheek, lower cheek, sideburn, jaw corner, chin side, central chin, under-jaw, mustache, and neck zones. Record both the direction near the base and where the curl end rests. These can point to different visual zones.
The medium-beard grain guide explains local direction mapping. Curly medium-length work adds a second question: where does the released curl settle after the guard, comb, or supporting fingers leave it?
Inspect the Cutting System Away From the Face
Switch off and disconnect charging power before touching the cutter or attachment. Clear dry debris as directed. Inspect fixed and moving teeth, head seating, guard rails, locks, adjustment stability, housing, port, cable, battery area, and any part that can change contact.
Follow model-specific lubrication instructions. Run the tool briefly away from the face and stop for abnormal sound, speed change, vibration, odor, heat, loose parts, damaged teeth, or a guard that rocks. Curl technique cannot compensate for a failing cutting system.
Choose a Longer Verified Guard
Use only a guard or setting documented for the exact trimmer. Start from the shortest released length you are unwilling to lose, then select that setting or a longer one for the first test. Guard numbers do not transfer reliably between systems.
The medium-beard guard guide provides a longer-first calibration sequence. Confirm that the guard sits level and locks before every section. Do not hold a loose attachment in place or use pressure to change its effective cut.
Test One Dense Low-Visibility Section
Choose a small dense area inside a confirmed excess-bulk zone, away from the cheek line, neckline, lip, central chin point, and lighter-density area. Support and separate it, release unnecessary tension, then make one short light model-approved pass with the longer guard.
Switch off, clear clipped curls, recomb the complete zone, and wait for spring-back. Inspect retained length, outer-to-underlayer transition, feed, guard stability, and whether the section now sits inside the intended silhouette.
Feed One Released Section at a Time
Let one small mapped section enter the guard rather than pushing the complete cheek or jaw bulk into it. Keep the supporting hand outside the blade path and avoid stretching the hair straight while the cutter moves.
If the next section changes base direction, curl travel, density, or retained structure, end the pass and reset. One long sweep across cheek, jaw, and chin can combine several unknowns before the first result is visible.
Use Short Passes With a Visible Exit
Plan the start and end of each pass. Keep the guard position and exit visible, use only light stable contact, and lift away before crossing a corner or hidden underlayer. Do not hold a running cutter stationary in dense curls.
Philips’ OneBlade trimming instructions require correct comb seating and full contact for covered models. They are a model-family example, not permission to copy the same orientation, pressure, or direction to another tool.
Clear Curled Clippings Before They Bridge the Guard
Curled clippings can bridge across comb teeth, collect behind the attachment, and hide the cutter path. After each small zone, switch off and clear hair as the manual allows. Reinstall the guard securely and reconfirm the setting.
Use visible loading rather than a fixed pass count. Continuing with a packed guard can reduce feed and invite pressure. The cleaning and oiling guide covers full after-session care; between-zone clearing is only a narrow dry-debris step.
Allow Spring-Back After Every Zone
Recomb the section into its normal shape, release support, and wait briefly before comparing. Removing outer weight can change where a curl rests even when the guard setting stays the same. A second pass made too early can remove more than the settled silhouette requires.
Inspect from front, profile, and three-quarter views at normal distance. Stop when the complete zone fits the target, even if individual curls do not form identical arcs.
Stage the Jaw and Chin Structure
The jaw corner and chin can combine long curl travel, high density, and direction changes. Treat left chin side, central projection, right chin side, and each jaw corner as separate zones. Preserve the planned central length while reducing only confirmed outer excess.
Do not drive a wide guard straight across the complete chin curve. Recomb between sides and compare the released projection. The medium-beard symmetry guide uses matched landmarks without promising identical density or curl.
Keep Under-Jaw Curl Work Visible
Use mirror and head positions that expose the guard and section without extreme neck stretching. Map where under-jaw curls begin and where their released ends contribute to front or profile volume. Protect the established neckline.
Do not make blind passes behind the jaw or cut a curl at the zone where its end happens to rest. Trace it to the base, support the correct section, and keep the complete cutter path visible.
Change Direction Only After a Full Reset
If genuinely longer hair remains after clearing, recombing, and spring-back, confirm that the difference is length rather than curl orientation, density, or a crossing strand. Change only direction when the exact instructions allow it; leave guard, pressure, and target unchanged.
Do not cycle through upward, downward, and sideways passes automatically. A direction that lifts more curl can also increase cutter load and expose the shorter underlayer.
Preserve Length During Side-to-Side Correction
Compare matched cheek, jaw, and chin landmarks in the same light and posture. One side can look darker or shorter because curls group differently. Confirm a longer released outer shelf before cutting.
Apply one correction to the confirmed zone and reassess both sides. The medium-beard touch-up guide uses strict scope and pass limits so a small maintenance task does not become an unplanned full reshape.
Separate Curl Control From Pulling
This page addresses section visibility, spring-back, and retained structure. If the tool snags, pulls, stalls, rattles, heats, or needs force, stop and diagnose preparation, section size, guard loading, attachment fit, blade condition, lubrication requirements, and power stability.
The coarse medium-beard guide covers supported feed and pulling prevention, while the trimmer-pulling guide covers broader equipment checks. Curly, coarse, dense, and tangled are not interchangeable diagnoses.
Use One-Variable and Pass Limits
For each zone, allow one test, a complete clear-and-recomb reset, and at most one justified correction before moving away or stopping. Change only section size, direction, or verified setting.
Do not lower the guard while adding pressure and changing direction. If the result cannot be judged before the next cut, the evidence needed for a controlled correction is missing.
Curly Medium-Beard Checklist
- The medium-beard structure and minimum retained length are defined.
- Curl is separated from coarseness, density, tangles, and equipment condition.
- The beard is clean, dry when required, released, and naturally settled.
- Sections are supported and detangled without final-length tension.
- Outer curls and the underlayer are mapped separately.
- Base grain and released curl travel are recorded by zone.
- The blade, guard, setting, power, and care checks pass.
- A longer guard is tested in one dense low-visibility section.
- Only one released section enters each short pass.
- The guard is cleared after visible clipping buildup.
- Spring-back is assessed after every zone.
- Jaw, chin, neckline, cheek line, and lighter areas remain protected.
Repeatable Curly Medium-Beard Workflow
- Confirm exact tool, guard, wet-or-dry rule, and care instructions.
- Set minimum cheek, jaw, chin, mustache, and under-jaw structure.
- Remove heavy product and let the beard dry and settle when required.
- Support and detangle small sections without stretching final length.
- Map outer curls, underlayer, base grain, and released curl travel.
- Inspect and test the cutter and locked guard away from the face.
- Choose a longer verified setting and one low-visibility test section.
- Make one short light pass through one released section.
- Switch off, clear clippings, recomb, and allow spring-back.
- Stage jaw, chin, and under-jaw zones while preserving structure.
- Make at most one justified one-variable correction per zone.
- Stop, clean as directed, and record the successful setup.
Stop Conditions
Stop for repeated pulling, stalling, a packed guard that cannot be cleared, loose or incompatible attachments, damaged or contacting teeth, slipping adjustments, abnormal noise, odor, vibration, or heat, unstable power, or a pass that requires pressure. Do not tape a guard, force a head, or open a sealed handle.
Also stop over painful, broken, bleeding, swollen, or actively irritated skin; for sudden or unexplained hair loss; when the section or cutter path cannot remain visible; or when repeated corrections reduce coverage without improving the target. Seek appropriate help for persistent symptoms or unresolved equipment problems.
Frequently Asked Questions
Should I straighten a curly medium beard before trimming?
Do not make straightening a universal preparation step. Assess the beard clean, dry, released, and in its normal worn shape unless the exact method says otherwise, then support and separate small sections without choosing final length under tension.
Should I trim a curly medium beard with or against the grain?
Map cheek, jaw, chin, and under-jaw zones separately and follow the exact trimmer instructions. Start with the direction that feeds one section predictably, then change only direction after clearing, recombing, releasing tension, and reassessing.
Why does a curly medium beard look shorter after trimming?
Curls can retract after tension is released, and removing outer weight can change how a section sits. Judge the dry relaxed silhouette after every zone instead of cutting to a stretched length or making several passes before spring-back.
Can trimming make both sides of a curly beard identical?
No. Trimming can balance confirmed excess length and silhouette, but curl pattern, density, growth direction, facial structure, and spring-back can remain different. Compare matched landmarks without chasing identical darkness or strand shape.
Sources and Claim Boundary
Primary references reviewed in July 2026 are the linked Philips Multigroom manual, Philips OneBlade instructions, and AAD healthy-beard guidance. They support clean preparation for covered tools, combing, longer-first model-aware setup, deliberate guard use, tool care, and skin observation.
This page applies those principles to a generic sectioned curly medium-beard workflow. It reports no hands-on testing and does not straighten hair, change curl type, prescribe one guard or direction, diagnose hair or skin conditions, create growth or density, or guarantee comfort, symmetry, or a particular result. The exact model manual controls.
