
Disclosure: This site may use affiliate links. Product specifications should be checked against manufacturer or retailer pages before purchase.
Direct Answer
Direct answer: Clean the trimmer blade as its manual allows, remove all loose hair, let every rinsed part air-dry completely, apply only model-approved oil when required, and protect the teeth with the correct cap, comb, or ventilated case. Store the switched-off tool in a clean, dry place with its cord loosely coiled and accessories separated.
Storage begins before the blade enters a drawer or pouch. Hair, moisture, excess oil, a crushed guard, or a tightly wrapped cable can turn a tidy-looking setup into a maintenance problem. The correct process depends on whether the blade is fixed, screw-mounted, detachable, ceramic, coated, or part of a sealed cartridge, so the exact model manual remains the controlling source.
Blade Storage Checklist
| Checkpoint | What to verify | Reason |
|---|---|---|
| Clean | No clipped hair, skin oil, or product buildup remains | Debris can stay packed between moving surfaces |
| Dry | All permitted-to-rinse parts have air-dried completely | A closed case can trap moisture |
| Protected | The correct cap, comb, or case shields the teeth | Loose metal objects can bend or chip an edge |
| Stable | The tool cannot fall, roll, or carry weight on the blade | Impact and pressure can disturb alignment |
| Power-safe | The switch is off and the cable is undamaged and loosely coiled | Sharp bends and heat sources can damage power parts |
| Organized | Guards and replacement parts remain identifiable | Similar attachments are not proof of compatibility |
Philips currently advises owners cleaning a compatible groomer to let parts air-dry and to attach a comb or protection cap for storage to protect the blade from accidental damage. See the official Philips groomer cleaning guidance. Wahl’s official Clipper & Trimmer Care guide says blades should be kept in a clean, dry place and a cord should be coiled instead of wrapped around the tool. These are useful examples, not universal permission to copy every cleaning, oiling, or charging step to another model.
Step 1: Remove Hair Before Storage
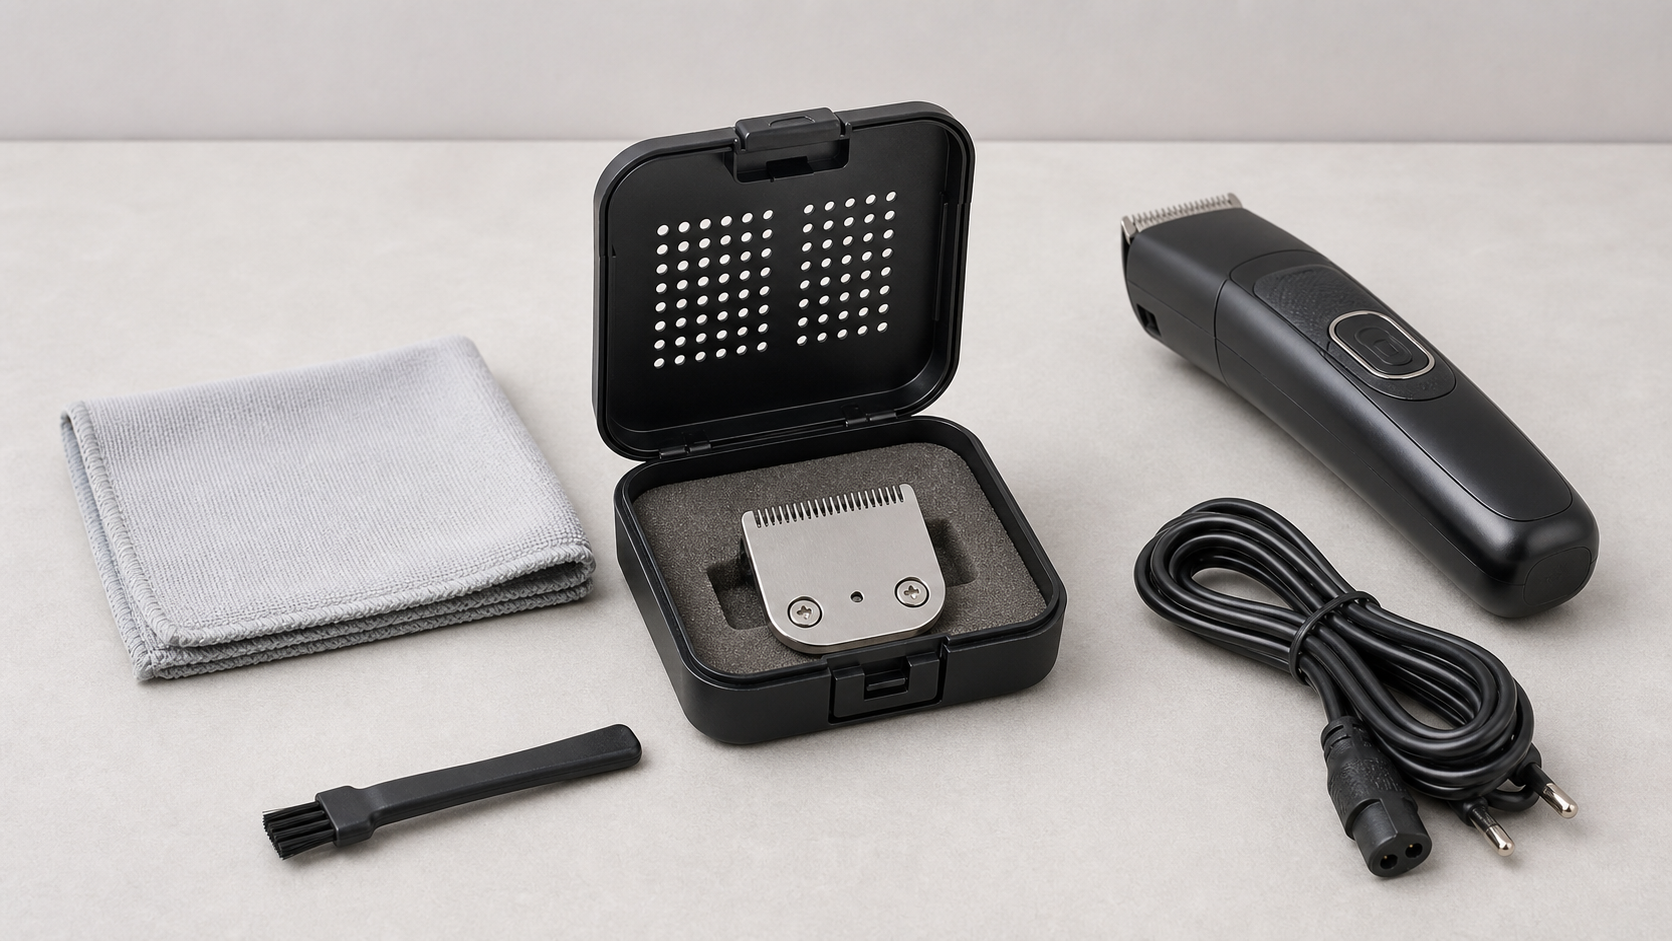
Switch the trimmer off and disconnect it from charging power before removing a guard or touching the blade area. Use the supplied dry cleaning brush to move clipped hair away from the teeth, rails, underside, and accessible mounting surface. Point debris away from openings in the handle rather than pushing it toward the motor.
Remove a detachable blade only through the documented release point. Do not loosen alignment screws merely to clean or store the tool. A foil, rotary cutter, integrated blade, or coated cartridge may require a different brush angle or may prohibit direct contact with delicate surfaces. If the blade is damaged or no longer locks, storage is not a repair; separate the tool from normal use and follow the manufacturer support route.
The broader beard trimmer cleaning and oiling guide explains dry brushing, model-specific rinsing, and lubrication boundaries. Use that sequence before storage, while letting the exact manual override any general instruction.
Step 2: Air-Dry Every Rinsed Part
If the manual permits rinsing the blade or attachment, shake off water only as instructed and place the part on a clean, stable surface with airflow around it. Let it air-dry completely before reinstalling it or closing a pouch. Do not rub delicate teeth, foils, or cutters with a towel unless the manufacturer explicitly permits that method. Philips warns that a towel or tissue can damage some cutting units.
Do not use a hair dryer, radiator, oven, microwave, open flame, or direct high heat. Heat can affect plastics, coatings, adhesives, lubrication, and batteries. Never power or charge a tool when water may have entered a non-washable handle, switch, charging port, or battery compartment. Move the device away from power and contact the manufacturer when liquid exposure exceeds the model’s rating.
A blade that feels dry on top may still hold moisture under a carrier, spring, screw head, or guard rail. Inspect it in good light. Keep the case open until the entire assembly is dry rather than using the case as a drying chamber.
Step 3: Lubricate Only When the Manual Requires It
Many conventional metal clipper and trimmer blades require a small amount of approved blade oil after cleaning and drying. Other replaceable cutters require no oil. Use only the product, location, amount, and timing stated for the exact blade. Do not substitute cooking oil, skin oil, essential oil, penetrating spray, or another household lubricant.
When oil is required, apply it through the documented method, run the blade only when the instructions call for that step, switch the tool off again, and wipe away visible excess without dragging fabric across sharp teeth. Excess oil can collect dust, hair, and residue inside a closed case. The official Wahl blade-oil page links oiling to a complete blade-care process for compatible Wahl tools; it does not establish an oiling schedule for every trimmer.
Step 4: Protect the Teeth Without Trapping Moisture
Use the model’s protective cap, correctly fitting guard comb, blade box, or supplied pouch. A protector should sit without pressing moving teeth sideways. Confirm that a comb belongs to the exact attachment family and locks normally. Do not force a similar-looking cap over a wider or taller blade.
A ventilated rigid container can shield a fully dry detachable blade from impact while keeping it separate from loose screws, coins, scissors, or chargers. A soft pouch may organize a complete tool, but it should not carry heavy objects against the teeth. Avoid placing the trimmer blade-down in a crowded drawer or balancing it where it can fall.
The beard trimmer guard guide explains why attachment numbers and shapes are not standardized. Label spare blades and guards with their exact model or part number rather than relying on memory.
Step 5: Store the Handle, Cord, and Charger Safely
Switch the handle off. Close any model-approved lock or travel-lock setting only as documented. Keep the tool in a clean, dry location away from sinks, steam, direct sunlight, heaters, children, pets, and places where it can be crushed. Do not leave a lithium-ion device in a hot vehicle or beside a heat source.
For a corded tool, make a loose coil that follows the cable’s natural curve. Do not wind the cord tightly around the handle, fold it sharply at the strain relief, knot it, or hang the tool by the cable. Store the approved charger beside the trimmer so it remains identifiable, but do not let metal plug ends scrape the blade.
For a rechargeable tool, follow the exact instructions for charging frequency and long-term storage. A connector that fits physically does not prove electrical compatibility. The loose charger and port guide covers dry visual inspection and stop conditions without authorizing internal repair.
Organize Guards and Maintenance Records
Brush guards clean, wash only when allowed, and dry them before placing them in a compartment. Store thin comb teeth without weight on top. Keep each attachment with its model family, especially when the household or workstation has more than one trimmer. A numbered guard from one system may not produce the same length or mount safely on another.
Record the blade part number, cleaning date, and any visible wear. A short note makes it easier to identify increasing noise, pulling, heat, corrosion, or looseness without claiming a universal replacement interval. Use the blade replacement guide when inspection shows damage or the manufacturer identifies the part as due for replacement.
Before the Next Use
Remove the protector and inspect the teeth, mounting points, guard, cord, charger, and housing. Confirm that no moisture, dust, corrosion, leaked battery material, swelling, cracking, or unusual odor appeared during storage. Reattach parts only in the documented order and test the trimmer briefly away from the face.
Stop for a loose blade, damaged tooth, scraping, rattling, unusual heat, smoke, sparks, swelling, liquid ingress, or a damaged cable or plug. Do not use storage accessories to conceal a damaged component, and do not open a sealed handle for battery or wiring work unless the manufacturer provides a user-service procedure.
Frequently Asked Questions
Should a trimmer blade be stored wet or dry?
Store it completely dry. Follow the model’s cleaning method, let permitted-to-rinse parts air-dry, and keep the blade out of a closed pouch or case until no moisture remains.
Can I leave a guard on the trimmer during storage?
Yes when the exact model instructions recommend a comb or protective cap and the attachment is clean, dry, undamaged, and correctly seated. Do not force an incompatible guard onto the blade.
Should I wrap the cord around a beard trimmer?
No. Coil a cord loosely without sharp bends and store it beside the tool. Manufacturer guidance warns that wrapping a cord tightly around a clipper can strain the cable over time.
Should a stored trimmer stay plugged in?
Use the charging and long-term storage instructions for the exact model. Do not assume continuous charging is permitted, and never charge a wet, damaged, swollen, unusually hot, or incompatible device.
Sources and Claim Boundary
Primary references reviewed in July 2026 are the Philips groomer cleaning and storage guidance, Wahl Clipper & Trimmer Care guide, and Wahl blade-oil instructions linked above. This page provides a generic storage sequence. It does not report hands-on testing, guarantee corrosion prevention or blade life, certify a case or charger, or replace model-specific cleaning, lubrication, charging, battery, transport, and service instructions.
