
Disclosure: This site may use affiliate links. Product specifications should be checked against manufacturer or retailer pages before purchase.
Direct Answer
Direct answer: If a beard trimmer charger fits poorly, unplug it, confirm the exact model and approved charger, inspect the plug and cable, check the dry port for visible debris or damage, and reconnect only in the documented orientation. Stop if the plug needs pressure, twisting, tape, or an angle to charge, or if anything is loose, wet, hot, corroded, cracked, or bent.
A loose charging connection can come from a simple identity mismatch, but it can also indicate worn contacts, a damaged plug, a loose port, debris, moisture, or housing damage. Do not keep moving the connector until the charging light appears. Intermittent contact is a reason to stop and verify the system, not a workaround.
Quick Charger-Fit Checklist
| Check | Acceptable condition | Stop condition |
|---|---|---|
| Charger identity | Exact approved part for the complete model | Unknown, visually similar, or wrong regional supply |
| Plug | Straight, clean, complete, and undamaged | Bent shell, cracked insert, loose tip, or corrosion |
| Cable | Flexible insulation with secure strain relief | Split jacket, exposed wire, kink, heat mark, or loose end |
| Port | Dry, fixed, aligned, and visibly clear | Moisture, movement, pushed-in contact, damage, or residue |
| Connection | Seats in the documented direction without force | Requires twisting, pressure, tape, or a charging angle |
| Charging behavior | Indicator follows the manual without heat or odor | Repeated dropouts, unusual heat, smell, sparking, or swelling |
1. Match the Complete Model and Charger
Read the full model number and regional suffix from the trimmer rating plate, packaging, or official support record. Then identify the supplied or approved charger by its part number, output marking, connector, and regional specification. A connector that enters the port does not prove electrical or mechanical compatibility.
Manufacturers can use several power systems across tools with similar names and bodies. Philips, for example, lists USB-A charging for the current BT3620/40 beard trimmer, while an official QT4018 manual describes its own model-specific supplied cord and corded-use rules. These sources show why power instructions cannot be transferred between models.
Do not substitute a cable or adapter because the plug shape appears correct. Confirm voltage, current, polarity where applicable, cable type, and whether an adapter is included or separately specified. If the original part number is unavailable, ask manufacturer support for a documented replacement rather than relying on a marketplace compatibility claim.
2. Disconnect Power Before Inspection
Remove the adapter from the wall first, then disconnect it from the trimmer. Switch the tool off and place it on a dry, well-lit surface away from the sink. Do not inspect a questionable connection while it is energized, and do not touch the plug or port with wet hands.
Allow a recently used or charged tool to return to normal room temperature before close inspection. If the trimmer, charger, plug, or cable is unusually hot, smells burnt, makes noise, sparks, or shows swelling, stop using it and move it away from combustible clutter only if that can be done safely. Contact the manufacturer or an appropriate local service route.
3. Inspect the Plug, Cable, and Adapter
Look at the connector from the front and sides. It should be straight, symmetrical, and firmly attached to its molded housing. Check for a bent metal shell, cracked internal tongue, pushed-back contact, chipped plastic, oxidation, residue, or a tip that moves relative to the cable body.
Run your eyes along the cable without sharply bending it. Pay attention to both strain-relief areas, where repeated wrapping or pulling often concentrates stress. Stop for split insulation, exposed wire, a flattened section, a hard kink, discoloration, melted plastic, or an end that rotates or pulls away from its housing.
Inspect the adapter case and prongs. Do not use a cracked case, loose prong, scorched surface, improvised plug converter, or adapter with unreadable specifications. The trimmer-not-charging guide covers outlet and indicator checks after the physical fit has been confirmed.
4. Check the Dry Port Without Probing It
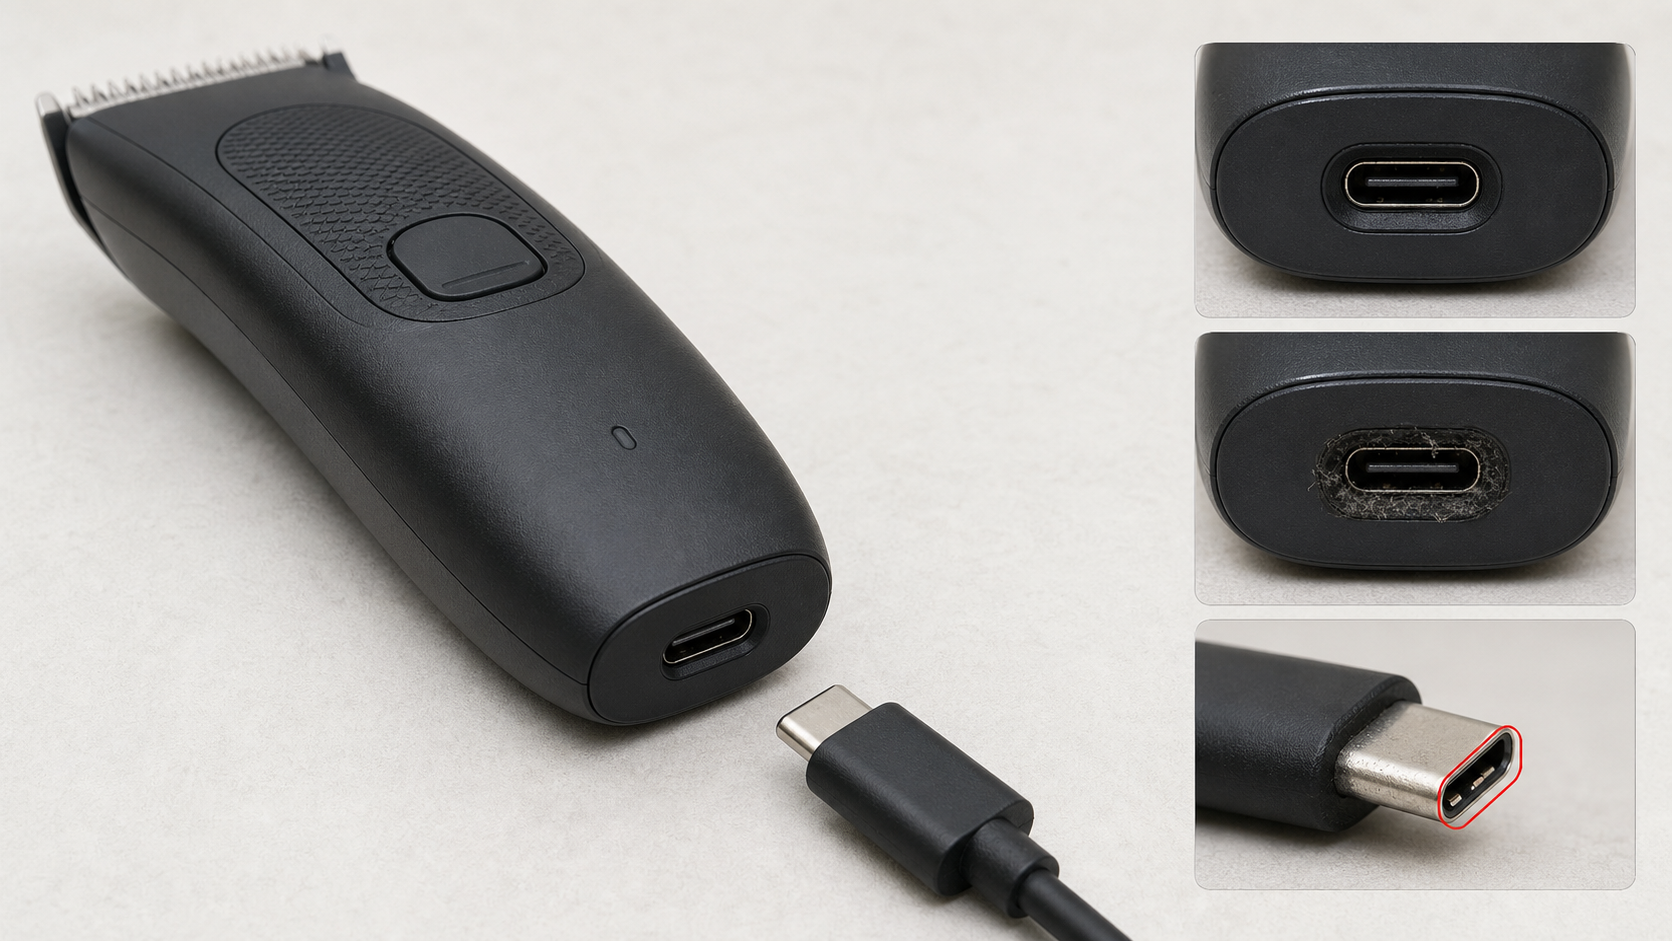
Use bright light to look into the charging opening without inserting anything. Compare the opening with the generic illustration on this page: the image shows an intact port, visible dry lint near an opening, and a damaged plug tip, but it is not a repair diagram for a real product.
Loose hair and dry lint may collect around a recessed port. Follow the exact manual for cleaning. If it permits a dry exterior brush, keep the brush at the opening and away from internal contacts. Do not use a metal pin, knife, paper clip, wire, compressed liquid, solvent, oil, or a wet cotton swab. Do not open the housing to reach the port.
Stop if the port moves inside the handle, sits crooked, has a pushed-in or missing contact, shows green or white corrosion, contains moisture, or has a cracked surrounding housing. Drying the outside does not make internal water exposure safe. Use the manufacturer service route.
5. Reconnect in the Documented Orientation
After both parts pass inspection and are fully dry, align the plug as the manual shows. Support the plug body rather than pushing on the cable. Insert it with light, straight pressure. A keyed or reversible connector should seat through its intended geometry; do not rotate, rock, or force it past resistance.
The plug may not sit completely flush on every model, so compare its normal depth with the manufacturer’s images or instructions. The important test is that it reaches the documented position without force and remains stable when left alone. Do not pull the cable sideways to test retention.
If the connection works only when the plug is partially withdrawn, tilted, pressed upward, twisted, or secured with tape, disconnect it. That behavior can indicate worn contacts, a damaged connector, or a loose port and should not be treated as a charging method.
6. Observe the Indicator Without Repeated Reconnection
Connect the approved adapter to the specified power source and observe the charging indicator for the time described by the manual. Some indicators illuminate continuously, blink, change color, or turn off after a period. Absence of a light does not prove the same fault on every model.
Do not repeatedly insert and remove a loose plug to make the indicator flash. A brief response followed by a dropout is evidence of an unstable connection. Disconnect the charger, record the model, charger part number, and behavior, and contact support. The corded versus cordless guide explains why rechargeable does not always mean a tool can operate while plugged in.
What May Have Changed After Cleaning or Storage?
After cleaning, check whether the port or cable end was exposed to water, cleaning solution, oil, or loose hair. A washable cutting head does not automatically make the charging port washable. Let only manufacturer-approved parts dry as instructed, and do not attempt charging until the exact manual says the device is ready.
After storage, inspect for tightly wrapped cables, weight placed on the plug, dust, corrosion, pest damage, or a charger mixed with accessories from another device. Store cables in loose curves and keep the approved charger with its trimmer. The cleaning and oiling guide separates blade care from power-component care.
Repair, Replace, or Contact Support?
Replace the charger only with an exact manufacturer-approved part when the cable, adapter, or plug is damaged and the trimmer port remains intact. Do not splice a grooming-device charging cable or transfer a plug from another adapter. A same-shape connector can still have the wrong electrical specification.
Contact manufacturer support when the port moves, multiple approved chargers fit poorly, the model-specific replacement is unclear, charging drops out, or the tool has corrosion, water exposure, heat, odor, or swelling. Provide photos of the model label, charger label, plug, and port without including personal purchase information.
Replace or professionally service the trimmer when the port is not user-serviceable and cannot maintain a stable approved connection. A working motor or remaining battery charge does not prove that continued charging is safe.
Frequently Asked Questions
Why does my beard trimmer charger feel loose?
The plug may be wrong for the model, incompletely inserted, obstructed by dry debris, worn, bent, or damaged, or the trimmer port may be loose. Stop charging and compare the exact charger and model before trying again.
Can I hold the charging plug at an angle?
No. A connection that works only when pushed, twisted, taped, or held at an angle is not a stable charging setup. Disconnect it and have the exact charger and port assessed through the manufacturer support route.
Can I clean a beard trimmer charging port with a metal pin?
No. Disconnect all power and follow the exact manual. Do not insert a pin, blade, wire, liquid, or conductive tool into the port; those methods can damage contacts or create an electrical hazard.
When should I stop using the charger?
Stop for a bent or cracked plug, exposed wire, loose port, corrosion, moisture, unusual heat, odor, sparking, swelling, or a connection that repeatedly drops. Use manufacturer support rather than forcing the fit.
Claim and Safety Boundary
This page provides generic visual and identity checks, not electrical diagnosis, hands-on testing, or authorization to open, probe, splice, or repair a charger or trimmer. The exact model manual and manufacturer support route control charger compatibility, cleaning, water exposure, charging behavior, service, battery handling, and disposal.
