
Disclosure: This site may use affiliate links. Product specifications should be checked against manufacturer or retailer pages before purchase.
Direct Answer
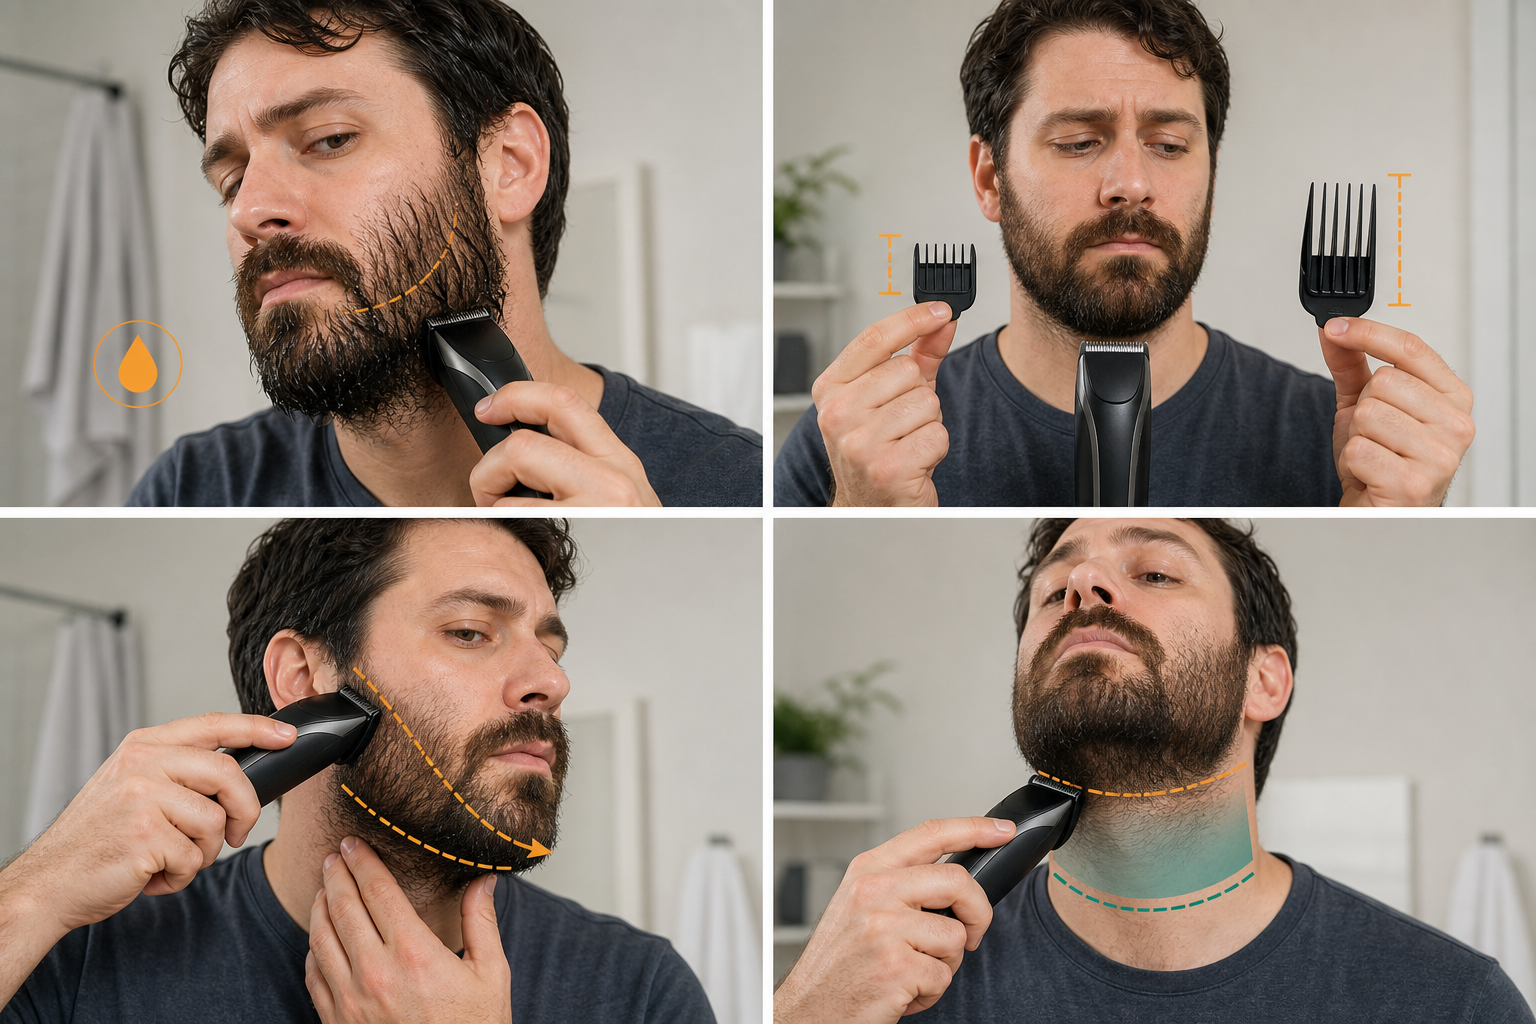
Direct answer: Avoid medium-beard trimming mistakes by judging the beard only when clean, dry, and relaxed; mapping cheek, jaw, chin, mustache, and under-jaw zones; using an exact-model longer guard; and changing one variable at a time. Preserve structural length, clear clippings before reassessing, delay edge work, and stop rather than correcting uncertainty with another shorter pass.
This page is an error-prevention and recovery guide, not a complete medium-beard trim. It focuses on mistakes that become more consequential once the beard has enough length to form cheek projection, jaw width, chin structure, and an under-jaw silhouette. It does not promise symmetry, density, comfort, growth, or a particular style.
Medium-Beard Mistake Map
| Mistake | Why it changes a medium beard | Safer correction |
|---|---|---|
| Judging damp or compressed hair | Temporary clumping or stretch hides relaxed length and curl | Dry fully, recomb, and let the beard settle |
| Trimming without zones | One broad pass can erase chin, jaw, or cheek structure | Map small structural zones before cutting |
| Jumping to a shorter guard | Longer visible length leaves little correction room after a large step | Start longer and move one documented setting at a time |
| Changing several variables | The result cannot be attributed to setting, direction, pressure, or zone | Change only one variable, then reassess |
| Chasing apparent unevenness | Density, curl, grain, and lighting can imitate length differences | Compare matched dry zones before removing hair |
| Moving boundaries too early | A raised neckline or lowered cheek line changes the beard even if bulk length stays equal | Stabilize bulk and silhouette before edging |
Mistake 1: Trimming a Damp or Unsettled Beard
Water, heavy product, sleep compression, comb tension, and heat can change how medium-length hair groups or stretches. Cutting while the beard is temporarily elongated can reveal a shorter or uneven relaxed result after it dries. Cutting while clumped can also hide hairs that spring outward later.
Unless the exact tool and task explicitly require another condition, establish a clean, fully dry, naturally settled baseline. Comb gently without pulling the beard straight. Use the medium-beard preparation guide for drying, detangling, growth mapping, tool inspection, and target definition. This mistake guide begins after that baseline should already exist.
Mistake 2: Starting Without a Zone Map
A medium beard is not one uniform surface. Separate upper cheek, lower cheek, sideburn, jaw corner, chin shoulder, center chin, mustache, under-jaw, and neck. Record which zones should remain fuller and which only need loose length removed.
Without a map, one cheek setting can travel across the jaw and center chin, flattening intended projection. A broad pass under the jaw can also cross several growth directions. Mark the target in plain language and keep structural zones outside the first test pass.
Mistake 3: Treating One Guard Number as Universal
Guard numbers, colors, dial positions, and lever combinations are system-specific. Identify the complete trimmer model and compatible attachment, then verify the documented millimeter or inch value. Do not copy a number from another brand, another model suffix, or a social video.
The official Philips OneBlade trimming instructions show that fixed and adjustable comb systems, ranges, and markings vary by covered model. The medium-beard guard-choice guide explains exact-model identification and shortest-zone preservation.
Mistake 4: Jumping Several Settings Shorter
When a longer guard removes little hair, the common reaction is to skip several settings. That combines uncertainty about the starting length, guard contact, direction, and target. A large jump can remove the chin or jaw structure that made the beard medium length.
Begin longer than the shortest acceptable result. Test one small dense zone, clear clippings, recomb, and move only one documented setting shorter when the assessed result requires it. Philips’ instructions cited above recommend a longest-first approach for covered adjustable OneBlade systems. That supports conservative calibration, not one universal setting sequence.
Mistake 5: Changing Guard, Direction, Pressure, and Zone Together
A trim becomes difficult to control when a shorter guard, reversed direction, harder pressure, and wider zone are introduced in one pass. If too much hair is removed, there is no clear cause to correct. If little changes, the user may repeat all four variables more aggressively.
Change one variable at a time. Keep the same guard and pressure while testing a local direction, or keep direction and contact stable while changing one documented setting. The general beard-trimmer workflow provides a complete one-variable operating sequence.
Mistake 6: Using Hard Pressure to Force Contact
Pressing harder can compress the guard, change skin contact, tilt the teeth, repeat work over one strip, and hide a packed or damaged cutter. It does not prove that the model is underpowered or that a shorter result will be more even.
Use the light, smooth contact specified by the exact manual. A current Philips groomer manual describes model-specific comb roles and smooth, gentle strokes. Stop to inspect guard fit, clear clippings, and check blade condition rather than adding pressure.
Mistake 7: Assuming the Whole Beard Has One Grain Direction
Cheek hair may angle toward the jaw, jaw hair can turn forward, chin hair may point down, and under-jaw hair can form swirls. One downward pass can be with the grain in one zone and against it in another.
Map local direction and keep each pass inside that zone. The medium-beard grain guide separates conservative with-grain reduction from a model-approved finishing direction. This mistake page does not prescribe one universal direction.
Mistake 8: Carrying a Cheek Setting Through the Chin
Many medium-beard shapes retain more projection at the center chin than on the cheeks. A broad pass from sideburn through cheek, jaw, and chin can remove that structural reference. The same risk applies when a jaw-corner blend spreads too far inward.
Isolate the center chin and chin shoulders before trimming. Finish cheek and jaw tests without crossing the protected boundary. If the chin is intentionally shorter, document that choice rather than letting one continuous pass make it accidentally shorter.
Mistake 9: Ignoring Guard and Blade Condition
A cracked comb, loose rail, slipping dial, packed guard, damaged tooth, or poorly seated head can create inconsistent contact. Shortening the setting does not fix a mechanical problem and can make the consequence larger.
Inspect the switched-off tool before every session. Confirm that the guard sits level and stays locked, the blade teeth are intact, and the head seats securely. Use the loose-guard checks or trimmer-pulling guide before continuing with an unstable or pulling tool.
Mistake 10: Judging Before Clearing Clippings
Cut hair can remain inside the beard, pack the guard, or hold surrounding hairs away from their natural lay. A freshly passed zone may look uneven until loose clippings are removed and the beard is recombed.
Switch off as required, clear the attachment according to its manual, comb the zone into its relaxed shape, and step back into consistent light. Do not repeat the same strip merely because the first close-up view contains loose hair.
Mistake 11: Completing One Side Before Comparing
Finishing the entire right side and then copying it on the left relies on memory and can compound small differences. Medium-beard density, curl, facial structure, and growth direction can also make equal measured lengths look different.
Alternate matched cheek, jaw, chin-shoulder, sideburn, and under-jaw zones. The medium-beard side-comparison guide explains same-light assessment, alternating corrections, and the point at which natural asymmetry should be preserved.
Mistake 12: Chasing Natural Density Differences
A darker or fuller-looking side is not always longer. It may contain more hairs, coarser strands, tighter curl, a different grain, or stronger light contrast. Repeatedly shortening that side can expose skin without producing visual symmetry.
Compare matched dry zones from the same distance and head angle. Correct only obvious excess length. Preserve sparse coverage and stop when remaining differences arise from density or structure. Trimming cannot create new hair or diagnose a sudden change in coverage.
Mistake 13: Moving the Neckline Too Early
Raising a neckline can make the beard look smaller and less connected even when the guard length is unchanged. Repeated corrections can move the boundary upward toward the jaw while the actual bulk shape remains unsettled.
Stabilize cheek, jaw, chin, and under-jaw volume before defining the edge. Mark the intended boundary with the trimmer off, then use the neckline guide for conservative placement and short outward strokes.
Mistake 14: Lowering the Cheek Line During Bulk Trimming
Bulk reduction and cheek-line design are separate tasks. A broad unguarded cleanup can remove hairs that define the existing upper boundary, making one side look lower or thinner and forcing a larger style decision.
Keep the cheek line protected while guarded length is being assessed. Edge only after the silhouette is stable, using an attachment and unguarded mode the exact manual permits. Restore an existing line rather than inventing a lower one in response to one stray hair.
Mistake 15: Repeating Passes Without a Limit
Repeatedly covering one area can turn a small comparison into a correction loop. Each pass can compress hair differently, remove another group of strands, or make the target less clear. Harder pressure and faster strokes add more uncontrolled variables.
Set a pass limit for each small zone: one test, one reassessment, and at most one justified correction before moving away. Philips’ groomer irritation guidance warns against repeated coverage and excessive pressure for covered tools. Stop for discomfort instead of treating it as a normal part of an even trim.
Mistake 16: Cleaning the Wrong Component With Water
A washable guard, rinseable detached head, wet-and-dry handle, and dry-only trimmer are different configurations. Rinsing one permitted attachment does not authorize immersing the handle, charging port, cable, or power supply.
Read the exact component-level cleaning and drying instructions. Lubricate only when and where the manufacturer requires it. The cleaning and oiling guide provides a generic decision path while leaving water and lubrication rules to the exact model.
How to Recover From an Over-Short Zone
Stop immediately and let the entire beard settle dry. Identify the affected zone and protect it as a temporary lower limit. Do not shorten every other zone automatically. Compare whether reducing only clear excess around the transition would create a more intentional silhouette without erasing chin or jaw structure.
If the shorter area is central or highly visible, the best correction can be no further cutting. Record the setting and zone, allow length to return, and use conservative edge maintenance meanwhile. Another pass cannot restore removed hair.
How to Recover From an Uneven Pass
Clear clippings, inspect guard fit and blade condition, recomb both matched zones, and compare under the same light and head angle. Determine whether the difference is removable length, compressed hair, density, curl, or direction.
When excess length is confirmed, make one light correction only in the fuller matched zone with the same verified guard. If the guard shifted, blade pulled, or direction was wrong, resolve that cause before touching the beard again.
Pre-Trim Error-Prevention Checklist
- The beard is clean, fully dry, detangled, and naturally settled.
- The target and protected cheek, jaw, chin, mustache, and under-jaw zones are recorded.
- The complete trimmer model and compatible guard value are verified.
- The guard is intact, level, locked, and clear of packed hair.
- The blade and head show no damage, contact, residue, or loose seating.
- The first setting is longer than the shortest acceptable result.
- The local grain and model-approved contact direction are known.
- Bulk trimming, symmetry checks, touch-ups, and edge work are separate stages.
- One test zone, one-variable changes, and a pass limit are defined.
- Stop conditions and the exact cleaning method are understood.
Repeatable Mistake-Prevention Sequence
- Establish the clean, dry, relaxed baseline.
- Define the intended silhouette and structural zones to preserve.
- Verify the exact model, guard value, blade, head, and power condition.
- Map local growth direction and choose one small dense test zone.
- Attach a longer verified guard while the tool is off.
- Make one light model-approved pass inside the mapped zone.
- Switch off, clear clippings, recomb, and compare from ordinary distance.
- Change only setting, direction, or zone when another test is justified.
- Alternate matched sides without chasing density or facial asymmetry.
- Protect chin and jaw structure from broad cheek passes.
- Complete cheek and neckline edges only after bulk is stable.
- Clean, dry, lubricate if required, record the setup, and stop.
Stop Conditions
Stop for a cracked, loose, tilted, or incompatible guard; damaged or contacting blade teeth; a slipping adjustment; pulling; abnormal noise, odor, vibration, or heat; smoke; battery swelling or leakage; damaged power parts; or water exposure outside the exact rating.
Also stop over painful, broken, bleeding, or actively irritated skin, when the target boundary is uncertain, or when each correction makes the goal less clear. Do not tape a guard, force a head, open a sealed handle, add pressure, or keep shortening both sides to escape a correction loop.
Frequently Asked Questions
What is the most common medium-beard trimming mistake?
Removing length before the dry beard is mapped by zone causes several later mistakes. Establish the natural shape, protected chin and jaw structure, exact guard, and one small test area before a full pass.
How do I recover after using a guard that was too short?
Stop trimming, recomb the dry beard, preserve the shorter zone as a temporary limit, and reduce only obvious excess elsewhere if that improves the silhouette. Cutting every zone shorter cannot restore removed length.
Should I fix an uneven medium beard immediately?
Clear clippings, recomb, use consistent light and head angle, and identify whether the difference is length, density, curl, or direction. Correct one small matched zone only when removable excess length remains.
When should I stop trimming a medium beard?
Stop for a loose guard, damaged blade, pulling, abnormal heat, odor, noise, power damage, painful or broken skin, uncertain boundaries, or a correction loop in which each pass makes the target less clear.
Sources and Claim Boundary
Primary references reviewed in July 2026 are the Philips OneBlade trimming instructions, current Philips groomer manual, and Philips groomer irritation guidance linked above. They support exact-model comb differences, longer-first calibration, model-specific contact and direction, smooth light strokes, cleaning boundaries, and avoiding repeated pressure for the products they cover.
This article applies those mechanics to a generic medium-beard error-prevention framework. It does not report hands-on testing, prescribe one setting or direction for every trimmer, diagnose skin or hair conditions, create density or growth, or guarantee symmetry, comfort, or a particular result. The exact model manual controls.
