
Disclosure: This site may use affiliate links. Product specifications should be checked against manufacturer or retailer pages before purchase.
Direct Answer
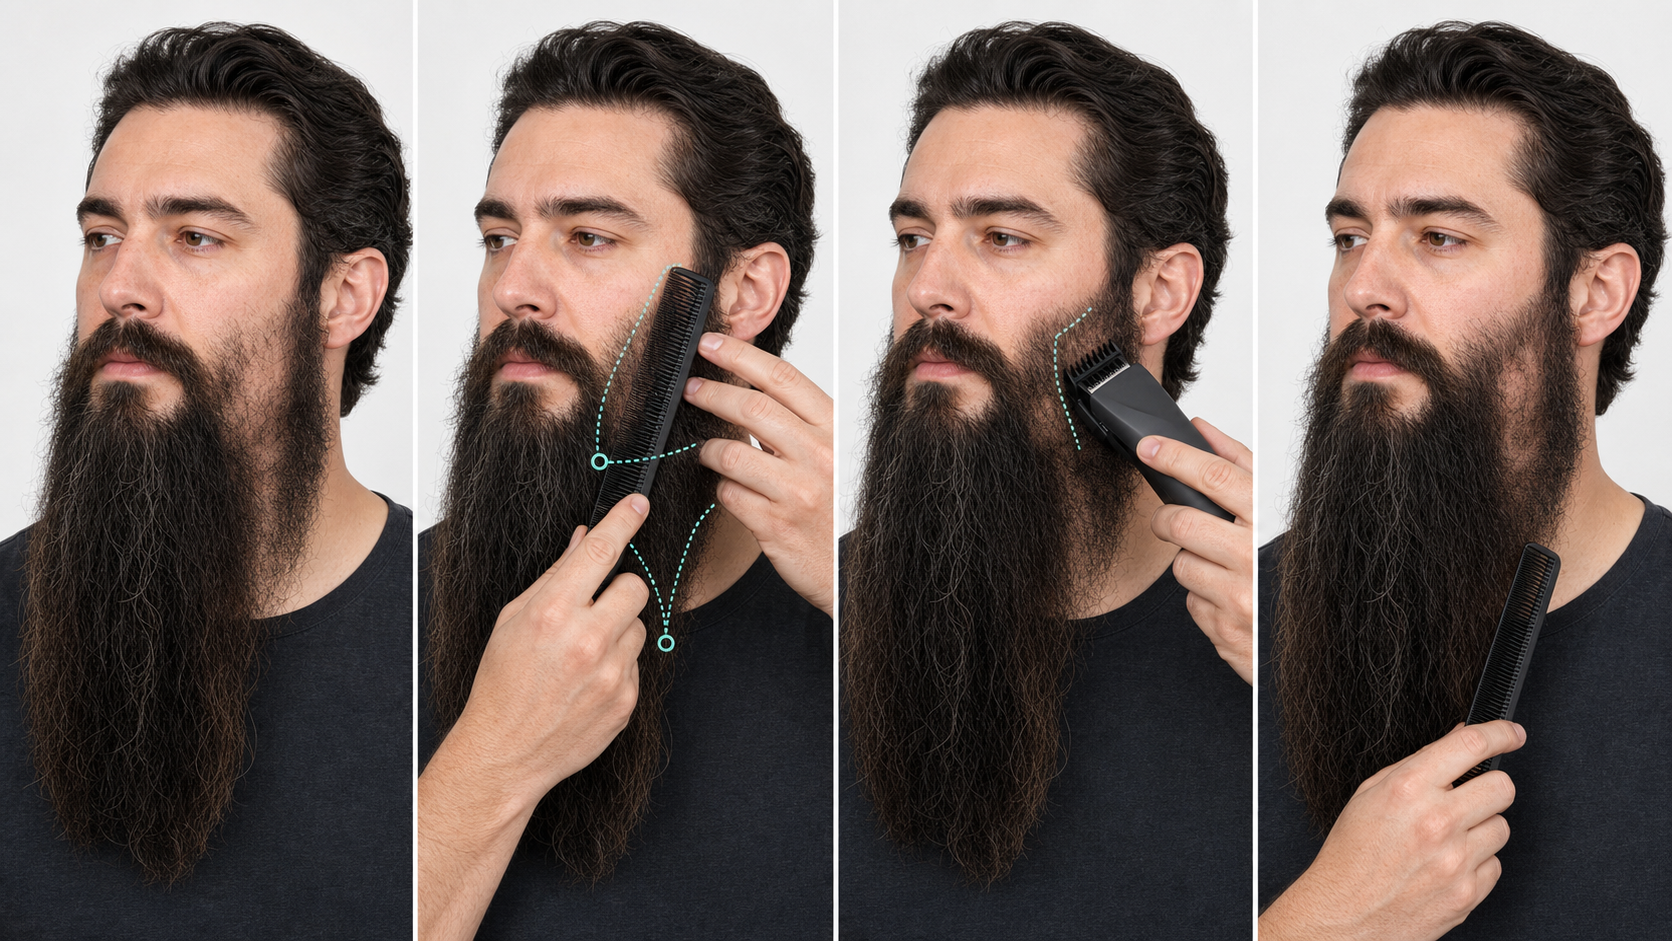
Direct answer: Trim a patchy long beard more evenly by evaluating it fully dry and released, mapping true root density separately from curl and layer overlap, and protecting longer coverage over lighter zones. Use an untouched reference, reduce only confirmed projection in fuller outer sections with a conservative verified setup, then switch off, clear clippings, recomb every layer, release, and reassess.
Trimming cannot create follicles, increase density, or treat hair loss. The practical goal is to manage the visible silhouette with the hair already present. Do not cut a lighter area shorter merely because it appears sparse, and do not reduce the entire fuller side until both areas have been compared under the same release, lighting, angle, and layer position.
Patchy Long-Beard Decision Table
| Observation | First interpretation | Conservative response |
|---|---|---|
| Skin shows through one side only in direct light | Could be lighting, curl separation, or true density variation | Recreate matched views before choosing a cut |
| Long outer hair naturally crosses a lighter root zone | Existing coverage layer | Protect its source and released fall |
| A dense outer section projects beyond the intended contour | Possible length or curl-volume target | Test one longer verified setup on that isolated section |
| A sudden smooth or expanding patch appears | Not a routine trimming diagnosis | Stop and seek qualified evaluation |
| Both sides differ only after one is stretched or compressed | Comparison conditions are not matched | Fully release and reassess before cutting |
Define What “Patchy” Means in This Beard
Use observable language: lower root density, visible skin between separated curls, a shorter growth zone, a sudden smooth area, or an outer layer that no longer covers the section beneath it. Do not assume every lighter-looking area has the same cause.
Long beards add overlap. Hair may begin at the cheek, jaw, chin, or neck and fall across another zone. The visible surface therefore combines root density, strand length, curl, direction, color, lighting, product, and layer position. Record which factor changes when the beard is recombed or released.
Separate Long-Beard Grooming From Hair-Loss Diagnosis
The American Academy of Dermatology’s common beard-problems guidance discusses naturally sparse growth and advises professional evaluation for continuing skin problems or hair loss. Use that source to set the boundary: a grooming plan can arrange current hair but cannot identify or treat a medical cause.
AAD also notes that alopecia areata can begin as round or oval smooth hair-loss patches on the beard in its signs and symptoms guide. Do not diagnose a patch from a photograph. Stop cosmetic trimming and seek qualified care for sudden, expanding, sharply defined, smooth, symptomatic, or otherwise concerning change.
Build a Fully Released Baseline
Remove bands, clips, tight collars, prolonged hand tension, and heavy styling that fixes hair in a temporary direction. Follow the exact tool’s approved wet or dry method, but judge the final beard only when roots, outer hair, supporting hair, and ends have returned to their usual dry position.
The long-beard preparation guide covers end-first detangling, drying roots and underlayers, recording anchors, and staging tools. Patchy-beard comparison fails when one side remains compressed or damp while the other is fully expanded.
Use Matched Lighting and Camera Distance
Check front, both profiles, and both three-quarter views in broad even light. Repeat the check with ordinary room light to understand real-world visibility. Avoid a close wide-angle phone view or a spotlight from one side, both of which can exaggerate gaps and distort proportions.
Keep camera distance, head angle, beard release, clothing clearance, and exposure similar across comparisons. A patch that disappears when the light moves is still useful to record, but it should not trigger automatic cutting of the opposite side.
Map Root Zones Before Following the Ends
Support one strand near its middle and trace it toward the skin without pulling. Mark whether it begins at the upper cheek, lower cheek, jaw, chin, or neck. Release it and observe where it normally falls. Repeat with only a few representative strands.
A long end over a lighter area may belong to a denser zone elsewhere. Cutting that end at the visible patch can remove useful coverage and create a short projecting end later. The long-beard grain guide explains root, middle, and released-end ownership.
Map Outer, Supporting, and Coverage Layers
The outer layer creates much of the visible contour. Supporting layers add body beneath it. A coverage layer is not a separate biological structure; it is nearby existing hair that naturally rests over a lighter root zone without tension. Record all three functions before selecting a guard.
Lift only enough hair to see the layer beneath. Do not comb every strand straight outward, which can erase the normal overlap and make the beard appear more uneven. If a useful coverage layer cannot be isolated from the cutting path, defer powered trimming in that section.
Protect the Central Chin and Jaw Corners
Mark the lowest central chin point, forward projection, chin width, and both jaw-corner turns as protected anchors unless one is the explicit target. These zones connect side density with front length. Shortening one to match a light patch can change the entire structure.
The long-beard mistake guide explains anchor loss, hidden-layer admission, and double-sided overcorrection. Patch management should preserve the established design rather than convert natural density variation into repeated bulk reduction.
Choose an Untouched Reference
Select the side or section whose released contour is closest to the intended shape, not automatically the darker or denser side. Record matched landmarks at the sideburn, upper cheek, jaw corner, lower side, and chin transition. Leave that reference untouched during the first correction.
The long-beard symmetry guide distinguishes silhouette from density. Equal guard settings do not create equal hair counts, color, curl, or skin visibility. The reference is a shape control, not a promise of biological symmetry.
Preserve Useful Coverage Length
Identify strands that naturally settle over the lighter zone after ordinary movement. Preserve their roots, middle length, and released ends unless they extend beyond the intended complete silhouette. Do not tension them across the face or depend on a style that collapses immediately when released.
Coverage should remain compatible with washing, drying, wind, clothing, and normal touch. If it requires glue, fibers, dye, medication, or force, it is outside this trimming workflow. This page does not evaluate cosmetic concealers or hair-growth products.
Do Not Cut the Sparse Area Shorter by Default
A shorter guard on the lighter zone can increase skin visibility and remove overlap without changing root density. First ask whether any hair in that area is actually beyond the planned contour. If not, leave it available for coverage and structure.
The short- and medium-beard workflows use different recovery margins. Compare the patchy short-beard guide and patchy medium-beard guide only for their respective lengths. A long beard requires explicit layer and anchor protection.
Identify Confirmed Projection in Fuller Zones
A target is a dense outer section that remains outside the intended silhouette after full release, matched lighting, gentle recombing, and clipping clearance. Trace its source, confirm it does not supply coverage to a lighter area, and mark the shortest protected result.
Darkness alone is not a target. A section may look darker because of hair color, overlap, curl compression, or shadow. The target must be based on released shape and ownership, not a desire to make every zone show the same amount of skin.
Verify the Exact Trimmer and Guard
Read the complete model and regional suffix. Inspect the blade, guard teeth, rails, locks, setting control, housing, power system, and documented use. Guard numbers are not universal measurements, and a similar attachment may admit long outer and support layers differently.
Philips’ current OneBlade guidance says covered adjustable systems can be learned by beginning at a longer setting and confirms that combs vary by model. That supports conservative exact-model verification, not a universal patchy-beard setting.
Set a Protected Length Floor
Write the shortest acceptable released length for the target section. Verify the exact guard or setting can remain longer than that floor. When uncertain, begin one or more documented steps longer than the estimated result and test only the isolated outer section.
The long-beard guard guide covers outer-layer admission, shortest-layer protection, guard contact, and section calibration. Do not shorten the guard simply because the fuller area appears darker.
Inspect the Assembly Before Hair Contact
With power disconnected, clear debris as the manual allows and inspect cutter teeth, guard teeth, attachment locks, controls, cable, charger, battery, and housing. Confirm the guard is identified for the model and locked level on both sides.
Switch on away from hair. Stop for abnormal rattle, impact, uneven speed, odor, smoke, heat, pulling, or attachment movement. A questionable tool should not be tested in a long coverage layer where one pass can remove substantial length.
Isolate One Fuller Outer Section
Separate only the confirmed projecting section while keeping its root, middle, end, support boundary, nearby light zone, jaw corner, and chin anchor visible. Do not twist or pull the section to an artificial maximum length.
If the target disappears when isolated, it may have been crossing hair, shadow, compression, or part of the coverage layer. Release it and reassess. A prepared tool does not create an obligation to cut.
Make One Short Conservative Pass
Place the verified longer guard only as the exact manual permits and make one short light pass on the isolated dense projection. End before a jaw corner, chin anchor, hidden support layer, or lighter root zone. Do not scoop, tilt, press, or repeat to force more hair into the guard.
The goal is not to make the dense zone biologically match the lighter one. It is to remove one confirmed contour excess while preserving coverage. If the intended effect requires several settings or both sides, stop and create a full mapped trim.
Switch Off and Clear Clippings
Stop after the single pass. Clear cut hair from the beard and non-powered attachment according to the model instructions. Clippings can bridge guard teeth, sit on visible skin, or hold adjacent strands outward, making a corrected section appear unfinished.
Do not make another pass while loose hair remains. Do not tap a powered head on a sink or hard surface. If the attachment must be removed for cleaning, switch off and disconnect it as instructed.
Recomb Every Layer and Fully Release
Recomb gently from the roots through the ends without stretching. Release lifted coverage and support hair, remove clips, restore normal clothing clearance, and let the beard settle. Compare the same front, profile, and three-quarter views.
Judge the complete silhouette first, then skin visibility. If the fuller projection is controlled and useful coverage remains, stop. Do not search for another difference merely because density still varies; that variation was never a trimming defect.
Use a Strict Correction Budget
Allow one test correction, one complete release, and at most one additional justified correction on the same mapped target. Do not use the second correction on the sparse zone, opposite side, neckline, mustache, or a newly discovered section.
The long-beard touch-up guide explains one-target scope and release feedback. If the target remains unclear after two reviews, stop and preserve remaining length.
Keep Edges Separate From Density Work
Cheek and neckline cleanup restores an established boundary; it does not change internal root density. Complete the released bulk assessment before lifting hair for edge access, and do not raise a cheek or neckline to remove a patch from view.
The long-beard edge guide protects the lower connection, jaw corners, and hanging layers. Schedule edge maintenance as a separate target so an outline decision does not expand into unplanned bulk removal.
Track Changes Without Claiming Growth
Use matched photos to record the beard’s current density, length, layer position, and silhouette. A grooming photo cannot prove follicle growth, treatment response, or medical cause. Lighting, hair length, product, curl, and camera exposure can change apparent coverage.
Do not publish or rely on a before-and-after claim unless the conditions and claim are independently supported. For personal planning, label photos with date, release state, lighting, and any cut performed.
Stop Conditions
Stop trimming for a sudden, expanding, smooth, round, oval, sharply defined, painful, burning, itchy, scaly, red, broken, bleeding, or otherwise concerning patch and seek appropriate evaluation. Also stop for damaged equipment, pulling, heat, odor, smoke, abnormal sound, or uncertain wet-use status.
Stop when the target cannot be separated from coverage, when root ownership is unclear, when a jaw or chin anchor would change, when the sparse area is being shortened without contour evidence, or when each correction creates a new target.
Patchy Long-Beard Checklist
- Define the visible difference without diagnosing it.
- Use a fully dry released baseline and matched lighting.
- Trace strands to root zones before judging their ends.
- Map outer, supporting, and natural coverage layers.
- Protect the central chin, jaw corners, and untouched reference.
- Preserve useful length over lighter root zones.
- Identify only confirmed dense projection outside the silhouette.
- Verify the exact tool, guard, protected floor, and assembly.
- Make one short correction, clear clippings, recomb, and release.
- Stop for uncertain ownership, symptoms, sudden loss, or expanding scope.
Frequently Asked Questions
Can trimming make a patchy long beard look more even?
Trimming cannot add density or treat hair loss. It can preserve longer coverage over naturally lighter zones and reduce only confirmed projection in fuller outer sections. Judge the fully released beard after every small correction rather than cutting the sparse area shorter.
Should I trim the fuller side down to match a patchy side?
Not automatically. First compare root zones, outer layers, curl, lighting, and the released silhouette. Keep useful length over lighter areas and use an untouched reference. Shorten only a mapped dense projection that remains outside the intended shape.
Should I comb long beard hair across a patch?
Nearby longer hair can provide natural coverage when it already falls across the area without tension. Do not pull, glue, or force hair from a distant zone. Trace every strand to its root, release it, and confirm that the style survives ordinary movement.
When should patchy beard growth be checked by a dermatologist?
Seek qualified evaluation for sudden, expanding, smooth, round, or sharply defined hair-loss areas, or patches accompanied by pain, burning, itching, scale, redness, broken skin, or other concerning change. A trimming guide cannot identify the cause.
Sources and Claim Boundary
- American Academy of Dermatology: DIY treatment for common beard problems for sparse-growth grooming and professional-help boundaries.
- American Academy of Dermatology: Alopecia areata signs and symptoms for sudden smooth patch warning context, not self-diagnosis.
- Philips OneBlade trimming guidance for covered-model comb variation, longer-first setup, shutdown, and cleaning.
Claim boundary: This page provides a generic long-beard coverage, layer, and silhouette-management workflow. It does not diagnose patchy growth or hair loss; prescribe a treatment, drug, supplement, fiber, dye, oil, or growth product; promise new hair, density, symmetry, concealment, comfort, recovery, or a result; prescribe a universal guard, direction, pressure, pass count, wet-use method, or schedule; report hands-on testing; or replace exact-model instructions and qualified medical evaluation.
