
Disclosure: This site may use affiliate links. Product specifications should be checked against manufacturer or retailer pages before purchase.
Direct Answer
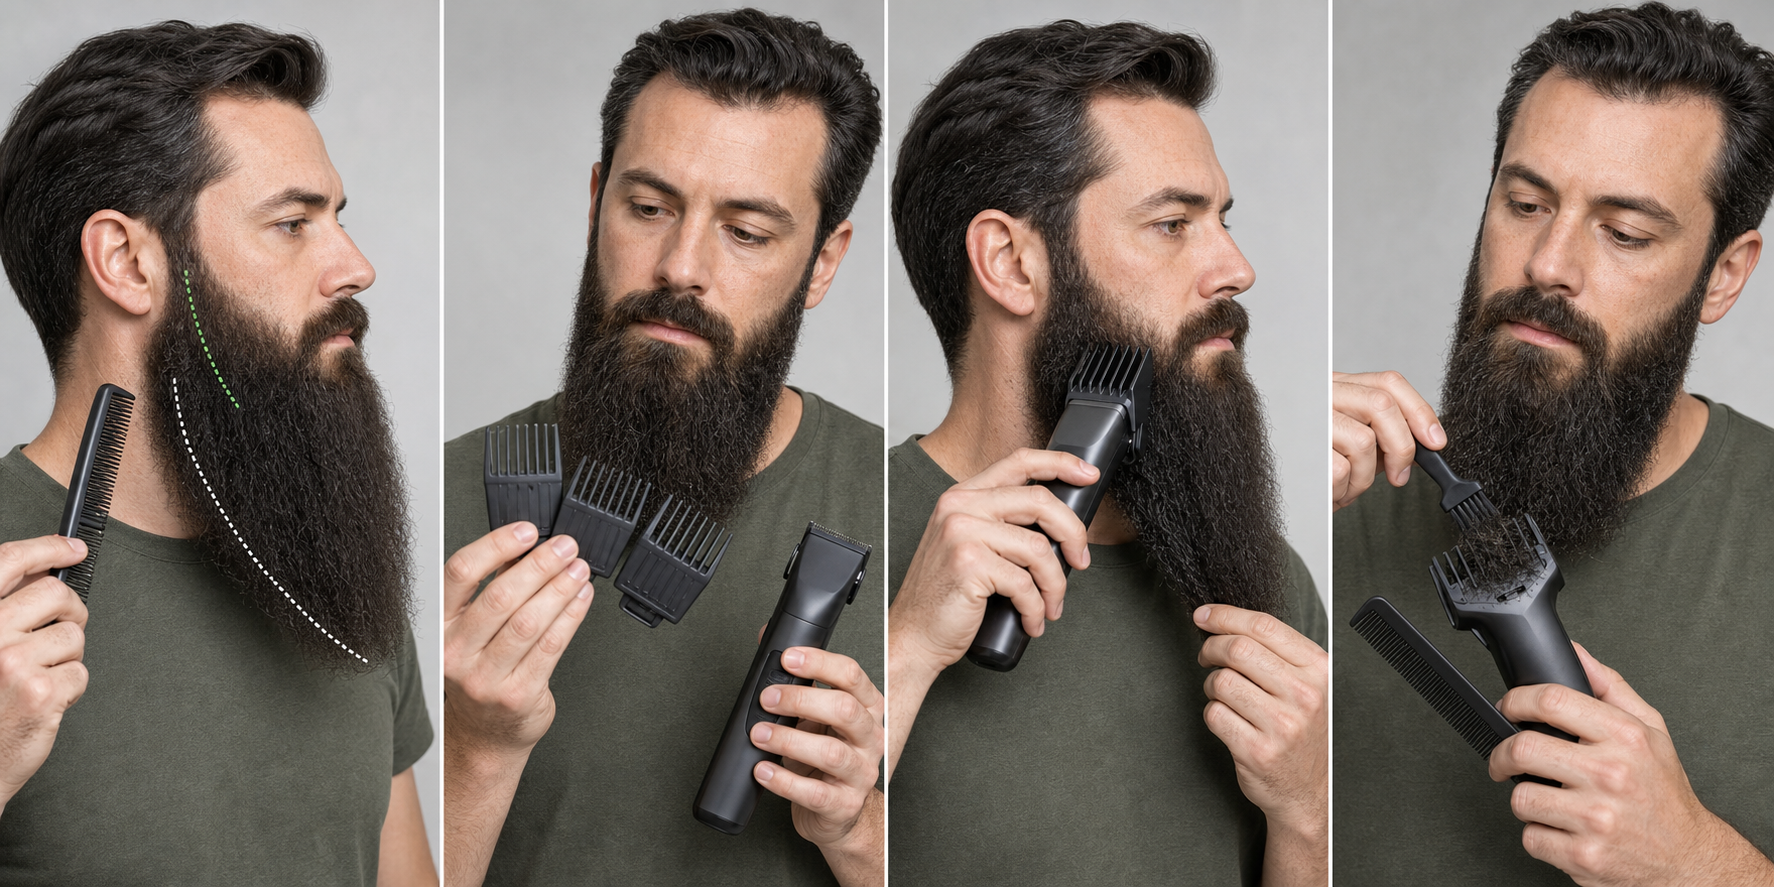
Direct answer: Choose a guard for a long beard by mapping the shortest natural layer you must preserve, verifying the exact trimmer and compatible long guards, and checking whether the comb can admit only the intended outer section. Start with the longest useful documented setting, test one small low-visibility area, clear clippings, recomb, and shorten only after the relaxed shape is reassessed.
This page is a guard-selection and calibration guide, not a complete long-beard trim. It does not prescribe a universal millimeter value, guard number, cutting direction, pressure, schedule, style, or result. The exact model manual, current attachment condition, natural dry beard, and protected shape control every decision.
Why Long-Beard Guard Choice Is a Separate Problem
A long beard is not one uniform layer extending from the skin. Long outer hair can hang across the cheek, jaw, chin, and under-jaw zones while shorter supporting hair remains hidden beneath it. A guard may admit both layers in one pass, miss an outer section that bends away from its opening, or reach the skin while crossing a protected hanging anchor.
The medium-beard guard workflow calibrates settings close to a compact facial shape. This long-beard page adds hanging-length floors, outer-versus-underlayer admission, guard tooth depth, section support, cutter visibility, loading checks, and a decision for when the available range is insufficient. It is not a longer keyword copy of that page.
Separate Guard Vocabulary From the Actual Decision
The guard-size guide explains fixed combs, adjustable guards, dials, printed numbers, and nominal millimeters. Use it for vocabulary. Do not use its general chart as proof that an attachment fits a particular trimmer or will preserve a particular long-beard layer.
Guard choice for a long beard asks a narrower question: can a verified attachment reach and control one intended section while every shorter or structurally important section remains protected? A large printed number alone does not answer that question.
Prepare the Natural Dry Shape First
Complete the long-beard preparation workflow before selecting a final guard. Remove heavy product when needed, let the roots and underlayer dry, detangle from the ends in supported sections, release tension, and record front, profile, and three-quarter views.
Do not choose from a wet, stretched, heat-straightened, tightly banded, or compressed beard unless a documented method deliberately uses that reference. The retained-length floor should come from the normal worn state you intend to preserve.
Map the Shortest Natural Layer to Preserve
Inspect the side panels, jaw corners, central chin, under jaw, mustache connection, sideburn transition, and any lighter-density area separately. In each intended cutting zone, find the shortest released hair that still contributes useful coverage or structure.
That shortest protected layer is the floor for the first test. Do not average it with the longest ends. A chin section can hang far below the jaw while shorter hair beneath it supports width and continuity. A guard selected only from the longest end can remove that support unexpectedly.
Mark Structural Anchors That Receive No Test Pass
Identify the central chin point, two jaw corners, maximum side width, mustache connection, cheek boundary, neckline, and intentional asymmetry. Keep these anchors outside the first calibration pass. A low-visibility outer side section is a better test location than the center of the silhouette.
The long-beard length-preservation guide covers the broader staged trim. Guard selection stops after a safe setting and zone map are established; it does not authorize sweeping through protected anchors.
Record Length by Zone, Not as One Beard Number
| Zone | Length evidence to record | Guard-choice consequence |
|---|---|---|
| Outer side panel | Released endpoint and excess shelf | Potential first test zone when dense and visible |
| Hidden side underlayer | Shortest supporting hair | Sets a protected floor or exclusion boundary |
| Jaw corner | Turn between side and chin | Usually excluded until both adjacent zones are mapped |
| Central chin | Lowest point and shortest supporting layer | Protected anchor, not the first calibration area |
| Under jaw | Root direction, drop, and crossing hair | Needs its own visible path and setting decision |
| Mustache | Lip clearance and connection length | Separate attachment or no guarded reduction may be appropriate |
Write observations in plain language before assigning numbers. “Preserve the shorter side underlayer” is a clearer constraint than “use the long guard everywhere.”
Identify the Exact Trimmer and Cutting Head
Record the complete model number and regional suffix. Confirm the cutting head named in the manual and distinguish beard guards from scalp, body, eyebrow, skin-protection, or unrelated attachments. Similar color, width, or brand identity does not establish compatibility.
The current Philips Multigroom manual lists different guard types and model-dependent adjustable beard and hair ranges, including longer settings only on covered models. It also says to attach documented guards correctly and begin with the maximum setting when learning the product. These details are examples for those models, not universal guard specifications.
Verify the Documented Long-Guard Range
Create a list containing only compatible guards and settings shown by the exact manual or manufacturer parts system. Include the attachment identity, printed value, dial or slider position, cutting head, and any model limitation. Exclude marketplace guesses and cross-model guards.
The beard trimmer buying guide helps assess range, attachment support, adjustment controls, and replacement paths. If the longest verified setting sits below the shortest retained layer, the current guarded system is unsuitable for that zone.
Inspect Tooth Depth, Opening, and Guard Profile
With the tool switched off and disconnected from charging power, inspect how far the guard teeth project, the size of the openings between teeth, the surface intended to contact the beard or skin, and the distance from the front edge to the cutter. Also inspect rails, tabs, hinges, locks, and adjustment travel.
A nominally long setting can still be awkward for a hanging section if the outer hair bends around the opening or the profile requires contact that cannot be maintained without compressing protected layers. This is an off-face geometry check, not a performance claim.
Confirm the Guard Locks and Holds Its Setting
Install the attachment exactly as documented while the tool is off. Confirm that it sits level, clicks or locks as intended, and does not rock, lift, or change adjustment under normal handling. Remove and reinstall it once to check repeatability.
Do not tape, stack, bend, heat, hand-hold, or force a loose guard. Use the loose guard troubleshooting guide when the attachment will not remain stable.
Compare Guard Depth With the Intended Section
Separate one small outer section with fingers or a comb while keeping final-length tension released. Hold the switched-off guarded tool near, but not running through, that section. Observe whether the intended hair can enter the comb without simultaneously capturing a shorter protected underlayer.
If the guard needs the entire beard compressed against the face to reach the outer ends, reconsider the method. Do not use force to turn a poor geometry match into a shorter cut.
Choose the Longest Useful Starting Setting
Among verified compatible settings, choose the longest one that could remove some excess from the test section while remaining at or above its protected floor. If uncertain between two settings, select the longer setting. A pass that removes little provides evidence; a pass below the protected floor cannot be reversed.
Philips’ official OneBlade trimming instructions recommend starting with the longest setting on covered adjustable models and note that comb quantity and type vary by model. The exact model manual controls.
Choose One Low-Visibility Outer Test Section
Select a small, dense, visible section where extra length can remain without changing the core silhouette. Keep the central chin, jaw corner, mustache, cheek line, neckline, lighter-density patches, and hidden crossing hair out of the first test.
Record the section boundary, root direction, protected underlayer, chosen guard, setting, and intended cutter path. The goal is to test one variable, not begin the full trim.
Run the Tool Away From the Beard First
After correct assembly, switch the trimmer on away from hair. Stop for abnormal rattle, speed change, vibration, heat, odor, unstable power, blade contact, or guard movement. Switch it off before adjusting or touching the head.
Use the trimmer pulling guide if the cutter, power, cleanliness, or guard condition is uncertain. A long beard should not be the diagnostic material for a questionable tool.
Make One Controlled Calibration Pass
Use only the contact, orientation, and direction documented for the exact model. Support adjacent long hair away from the path without stretching the test section. Make one short pass with light, stable handling, then move the tool away and switch it off.
Do not press harder, tilt the guard, repeat the strip, or cross into another zone because little hair was removed. Those changes would make the setting impossible to evaluate.
Clear the Guard Before Judging the Setting
Long clippings can bridge between teeth, pack near the cutter, or remain tangled in the beard. With the tool off, clear the attachment exactly as the manual allows. Reconfirm the guard identity and setting after removal or cleaning.
The cleaning and oiling guide provides a generic maintenance boundary. Water exposure and lubrication remain model-specific.
Recomb, Release, and Reassess the Whole Shape
Recomb the test section into the normal worn direction, remove hand tension, and wait for compressed hair to settle. Inspect the local section and the complete front, profile, and three-quarter silhouette. Compare with the baseline rather than judging loose clipped hair.
Ask whether the pass removed outer excess, exposed a shorter layer, narrowed an anchor, changed a density transition, or produced no observable change. Record the answer before touching a shorter setting.
Move Shorter by One Documented Step Only
If the released test section remains clearly above its target and protected floor, choose the next shorter documented compatible setting. Repeat the same section, contact, direction, clearing, and reset so the setting is the only changed variable.
Do not skip several settings merely because the longest guard removed little. No removal can mean the local hair is shorter than the guard, the comb did not admit it, or the path missed the intended layer. Diagnose that condition before reducing length.
Assign Settings to Zones Separately
Once a useful test setting is found, record it only for zones with matching natural length, layer structure, grain, and target. Assign longer settings, shorter settings, or no guarded pass to other zones independently.
A practical map may preserve the central chin entirely, use one long setting on outer side bulk, a different verified setting on a visible under-jaw section, and separate mustache work. The numbers must come from the exact system.
Recognize Guard Loading and Feed Problems
Stop when hair accumulates between the guard and cutter, the section folds around the teeth, the tool slows, the guard lifts, or visibility is lost. Clear and reset rather than pressing through. A fixed pass count cannot replace observable loading.
Coarse or curly long hair can require smaller sections and more frequent resets, but this page does not promise pull-free trimming. The curly-beard control workflow explains sectioning and spring-back principles without prescribing a universal direction.
Know When the Guard Range Is Not Long Enough
The guarded method is not ready when the longest compatible setting is shorter than the minimum retained layer, the guard cannot reach the target without admitting protected hair, the cutter path cannot remain visible, or attachment contact would require heavy compression or force.
The long-beard trimmer checklist can help determine whether another documented guard system provides the needed range. Scissors-over-comb, freehand clipper work, and professional shaping are different methods with different skill and safety requirements; they are not improvised substitutes within this guide.
Common Long-Beard Guard-Choice Errors
- Choosing from the longest chin end while ignoring the shortest supporting layer.
- Applying a general guard chart as a compatibility table.
- Assuming one brand’s number, color, or shape transfers to another system.
- Testing first on the central chin, jaw corner, mustache, or lighter-density area.
- Compressing outer and underlayer hair into one pass without mapping admission.
- Pressing harder when a long guard removes little hair.
- Moving several settings shorter before clearing, recombing, and releasing.
- Using one setting across every long-beard zone.
- Continuing with a loose, cracked, unidentified, packed, or shifting attachment.
Repeatable Long-Beard Guard-Choice Sequence
- Prepare and record the natural dry long-beard shape.
- Map outer hair, shorter underlayers, grain, and structural anchors by zone.
- Record the shortest natural layer that must remain in each intended pass.
- Identify the exact trimmer, cutting head, guards, and documented settings.
- Reject damaged, incompatible, loose, or unidentified attachments.
- Compare tooth depth and opening with one separated outer section off power.
- Choose the longest useful setting at or above the protected floor.
- Select one low-visibility outer test section away from anchors.
- Run the assembled tool away from hair and stop for abnormal behavior.
- Make one model-compliant controlled calibration pass.
- Switch off, clear clippings, recomb, release, and compare the complete shape.
- Move only one documented step shorter when the evidence supports it.
- Record settings by zone and leave unsuitable zones out of guarded passes.
Stop Conditions
Stop when the guard identity or retained length cannot be verified; the attachment is cracked, bent, loose, rocking, or unable to hold a setting; blade teeth are damaged; the head is unstable; or the tool rattles, stalls, pulls, smells abnormal, overheats, or loses power.
Also stop when the cutter path is hidden, the guard captures protected layers, hair packing cannot be cleared safely, the method requires force, or skin is painful, broken, bleeding, swollen, or actively irritated. This page does not diagnose skin or hair conditions.
Frequently Asked Questions
What guard should I start with for a long beard?
Start with the longest documented compatible guard that can reach the test section while remaining at or above the shortest natural layer you need to preserve. Test one small outer section, clear the guard, recomb, and reassess before moving shorter.
Can one guard maintain every part of a long beard?
Not necessarily. Side panels, jaw corners, the central chin, under-jaw hair, and the mustache can have different natural lengths and structural roles. Map each zone and leave protected zones out of passes whose setting is too short.
Why does a long guard remove little or no hair?
The guard may be longer than the local hair, its opening may not admit the hanging section, hair may be crossing from another zone, or clippings may be blocking the comb. Do not press harder; switch off, clear, recomb, and verify the model-specific setup.
When is a guarded trimmer unsuitable for a long beard?
Stop when the documented range is shorter than the retained length, the guard cannot reach the intended layer without admitting protected hair, the attachment is unstable, the cutter path is hidden, or the task requires freehand shape work beyond your controlled method.
Sources and Claim Boundary
Primary references reviewed in July 2026 are the linked Philips OneBlade support page and current Philips Multigroom manual. They support exact-model comb identification, model-dependent guard ranges, secure documented attachment, millimeter interpretation for covered systems, combing before trimming, longest-setting familiarization, gentle movement, and clearing accumulated hair.
This page applies those bounded principles to a generic layered long-beard guard-selection workflow. It reports no hands-on testing, defines no universal guard mapping, and does not guarantee comfort, symmetry, density, growth, cutting performance, or a particular result. The exact model manual controls attachment, setting, contact, direction, cleaning, lubrication, charging, and safety.
