
Disclosure: This site may use affiliate links. Product specifications should be checked against manufacturer or retailer pages before purchase.
Direct Answer
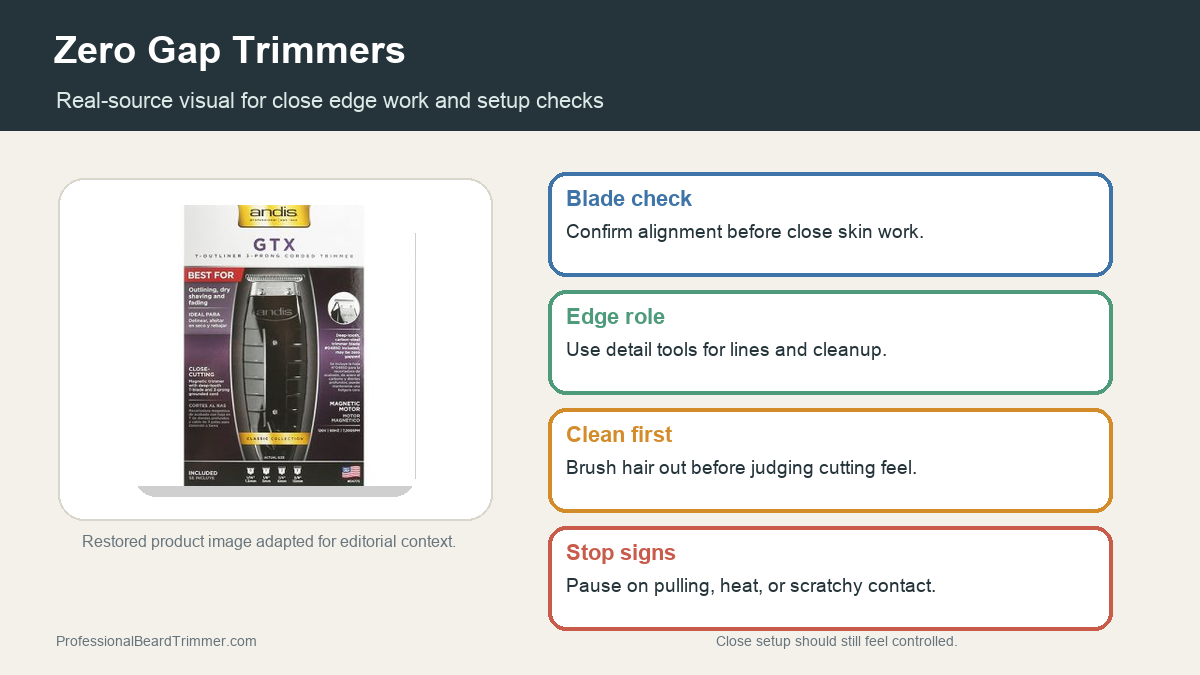
Direct answer: A zero-gap trimmer is a model whose adjustable blade can be set near zero overlap for close detail work without letting the moving teeth project beyond the stationary blade. Buy or adjust one only when the exact manufacturer documents that capability and tool. Verify blade identity, tooth condition, screw security, alignment, power, cleaning, and parts support, then test away from skin before controlled use.
Zero-Gap Trimmer Decision Table
| Check | Evidence to verify | Stop or reject when |
|---|---|---|
| Adjustment support | Exact model manual, blade number, and manufacturer zero-gap or zero-overlap instruction | The blade is fixed or compatibility is inferred from appearance |
| Alignment tool | Correct fixture or gauge for the named blade family | A generic jig does not match the blade guide or screw pattern |
| Tooth position | Moving teeth remain behind the stationary teeth across the full width | Any moving tooth projects beyond the stationary blade |
| Blade condition | Straight teeth, secure screws, clean surfaces, normal movement, and approved lubrication | Teeth are chipped, bent, corroded, loose, or striking |
| Task fit | Lineups, outlines, neckline detail, and other manufacturer-supported finishing work | The tool is expected to replace bulk reduction or every shaving task |
| Support | Compatible replacement blade, screws, guards, power parts, manual, and service path | Critical parts or exact identity cannot be verified |
The official Wahl Professional zero-gap adjustment guide demonstrates a named Wahl Pro-Set adjustment process and explicitly says to test the trimmer before use so the moving blade is not overlapping. Wahl’s Pro-Set tool instructions further limit that fixture to compatible T-wide blades with the required metal guide and require tightened screws after adjustment. These sources apply to documented Wahl systems; they do not authorize the same procedure for another blade or brand.
Understand Zero Gap and Zero Overlap
“Zero gap” is commonly used for a close blade relationship on an adjustable trimmer. Manufacturer documentation may instead use “zero-overlap,” which emphasizes that the moving cutter must not extend past the stationary blade. The adjustment reduces the offset within the allowed blade system; it does not remove the stationary blade’s protective role.
Do not define zero gap as “make both rows of teeth project equally” or “push the cutter as far forward as possible.” The moving blade travels rapidly. If its teeth project beyond the stationary teeth, they may contact skin directly. Exact alignment must be checked across the left corner, center, and right corner rather than at one convenient point.
A closed taper lever is a different control. The open versus closed lever guide explains how a lever changes blade spacing within its normal range. Closing a lever does not prove that a blade is zero-gapped, and zero-gapping is not a substitute for using a compatible guard or blade.
Confirm That the Exact Blade Is Adjustable
Record the complete trimmer model, blade number, regional suffix, and any revision from the body, blade package, manual, and support page. Look for an explicit manufacturer statement that the named blade can be adjusted to zero gap or zero overlap. A T-shape, exposed screws, or similar housing is not enough.
Wahl’s current adjustable T-shaped blade page identifies a compatible model family and zero-overlap capability. Its standard trimmer blade page explicitly describes a different blade as not adjustable to zero overlap. That contrast shows why adjustment status must be verified by exact blade rather than brand name.
Do not loosen screws on a fixed blade, a blade with no documented procedure, or a used unit whose parts do not match the label. Ask the manufacturer or an authorized service source when the identity is uncertain.
Match the Alignment Tool to the Blade
Use only the manufacturer-specified fixture, gauge, or process for the exact blade. Verify the locating surfaces, blade guide, screw order, and orientation before loosening anything. A tool that accepts one T-wide blade may not establish the correct offset for a narrower, wider, curved, or differently guided assembly.
The official Wahl Pro-Set sheet states that the tool is for a specific T-wide blade construction with a metal inserted guide. It warns that blades without that guide will not adjust correctly with the tool. Similar screw spacing or a blade that physically fits into a fixture does not override that restriction.
Keep the instruction sheet available during adjustment. Do not rely on a cropped social-media clip, marketplace photo, or memorized screw order when the manufacturer’s current document is accessible.
Inspect the Blade Before Any Adjustment
Switch the trimmer off and disconnect charging power. Brush loose hair from the cutter, stationary blade, screw heads, guide, and mounting surface. Inspect every tooth in bright light from the front, top, and both sides.
Stop for a chipped, bent, cracked, corroded, or uneven tooth; stripped or missing screw; warped guide; damaged mounting surface; or residue that prevents the blade from seating flat. Adjustment cannot repair structural damage. Replace only with a confirmed compatible part.
Check whether the blade already sits evenly and whether the screws are secure. A blade that has shifted after impact or service needs identity and condition verification before an alignment attempt. The cleaning and oiling guide covers general preparation, while the exact blade instructions control disassembly and lubrication.
Use a Model-Specific Adjustment Sequence
The safe sequence is the exact sequence published for the named model and tool. For the Wahl example, the manufacturer describes removing the blade, placing the compatible parts in the Pro-Set fixture, loosening the internal screws, moving the cutter within the fixture, tightening screws in a specified order, reinstalling the assembly, and testing for overlap.
That summary is not a universal procedure. Other systems can use different screws, guides, offsets, fixtures, and service limits. Do not translate the Wahl numbered positions to an unlisted blade. Do not grind teeth, bend rails, add spacers, omit screws, or hold a blade forward while tightening it by eye.
Take a clear pre-adjustment photograph and keep each part organized. If the blade cannot be reassembled exactly, stop and use authorized service rather than powering an uncertain assembly.
Verify the Moving Blade Does Not Overlap
After tightening, inspect the complete cutting edge under bright, even light. The moving cutter must not project beyond the stationary blade at either corner or through the center. Check the blade square to the eye and from a slight side angle so perspective does not hide a projecting tooth.
Confirm that tightening did not rotate one side forward. Screws must be secure according to the instructions because an offset that changes after adjustment defeats the alignment check. Do not treat a visually close center as evidence that both corners are safe.
If any point is uncertain, reset the blade to a less aggressive documented position or seek qualified service. The target is controlled alignment within manufacturer limits, not the smallest visible offset obtainable.
Test the Reassembled Trimmer Away From Skin
Reinstall the verified blade and guard or blade cover as directed. Power the trimmer briefly away from hair and skin. Observe sound, vibration, cutter movement, screw stability, and whether the blades contact each other abnormally.
Stop immediately for blade strike, rattle, visible movement of the assembly, sparks, odor, smoke, or rapid heat. Disconnect power before inspecting again. Do not press the blade against a finger or other body area as an alignment test.
The Wahl zero-gap tutorial specifically requires testing before client use to ensure there is no moving-blade overlap. A powered test does not replace visual inspection; both checks are needed for the documented system.
Separate Detail Work From Bulk Reduction
A close-set trimmer is principally a finishing and detail tool when its manufacturer supports that role. It may be used for lineups, cheek boundaries, neckline detail, sideburn edges, or design work. It should not be assumed to be the best tool for reducing a medium or long beard.
Reduce bulk with an appropriate guarded trimmer or clipper first. Long, dense, curly, or compressed hair can feed poorly into a close detail blade. Forcing the tool through bulk can encourage pressure, repeated passes, and heat.
The lineup tool guide compares visibility and edge roles, while the tool-role guide separates trimmers, clippers, and shavers. Zero-gap capability does not erase those task boundaries.
Use Light, Visible, Controlled Contact
Follow the exact trimmer instructions for orientation and permitted skin contact. Use short strokes in a fully visible area and avoid hard pressure, repeated scraping, or digging a blade corner into a curved surface. Keep the blade clean enough that hair does not obscure the cutting edge.
Do not chase the closest possible line when a less aggressive setting already defines the boundary. Stop for scratching, pulling, painful contact, broken skin, unusual heat, or a result that requires increasing pressure. This page does not prescribe use over irritated, injured, or medically concerning skin.
For neckline placement before close finishing, use the beard neckline guide. Alignment cannot correct a boundary placed too high or a line widened by repeated passes.
Maintain the Blade Without Losing Alignment
Brush cut hair after use and apply only the lubricant and cleaning method specified for the blade. Keep liquids away from components that must remain dry. Wipe excess oil as directed so it does not run into the motor, attract debris, or coat skin.
Inspect tooth position and screw security after a drop, blade removal, replacement, unusual vibration, or any service that could alter alignment. Do not assume an earlier zero-gap setting remains unchanged indefinitely.
Use a blade guard for storage when supplied. Keep the tool dry, protected from impacts, and separate from loose metal objects. Replace damaged parts with exact compatible components rather than attempting to sharpen, bend, or improvise a protective offset.
Zero-Gap Trimmer Buying Checklist
- Define whether the task is detail finishing, lineup work, or another documented use.
- Record the exact trimmer model, blade number, region, and package.
- Confirm explicit zero-gap or zero-overlap support from the manufacturer.
- Verify that the correct alignment tool and instructions are included or available.
- Inspect every blade tooth, guide, screw, mount, housing, control, and power part.
- Confirm compatible guards, blade guard, oil, brush, charger, and replacement path.
- Check that the moving blade remains behind the stationary blade across the width.
- Review seller condition, hygiene, return terms, and current support separately.
- Reject unverified modifications, missing screws, damaged teeth, or unidentified power parts.
Do not buy from a title alone. “Professional,” “zero gap,” “surgical,” “skin close,” and “factory adjusted” are claims to verify against the exact label, blade, manufacturer instructions, and current condition. This guide does not compare live prices, stock, seller ratings, or warranty entitlement.
Frequently Asked Questions
Is a closed clipper lever the same as zero gap?
No. A lever changes the adjustable blade relationship within its normal operating range. Zero-gap or zero-overlap adjustment is a separate blade-alignment process supported only on specific models and blades.
Should the moving and stationary teeth be perfectly even?
The moving teeth must not project beyond the stationary blade. Use the exact manufacturer fixture and visual checks rather than trying to make the two edges appear equally forward by eye.
Can every T-blade be zero-gapped?
No. T-shape alone does not prove adjustability. Wahl publishes both adjustable zero-overlap blades and a standard blade that is not adjustable to zero overlap, so exact blade identity controls.
Does zero gap guarantee a sharper or irritation-free line?
No. This page makes no result guarantee. Blade condition, alignment, task fit, preparation, pressure, direction, heat, maintenance, and skin response all matter, and a less aggressive setting may be more appropriate.
Sources and Claim Boundary
Primary references reviewed in July 2026 are the Wahl Professional zero-gap tutorial, Pro-Set tool instructions, adjustable T-shaped blade page, and non-adjustable standard blade page linked above. They establish model-specific compatibility, tool, screw, and overlap boundaries for named Wahl systems. This is a non-ranking setup and buying guide, not hands-on testing or a universal adjustment procedure. It does not report measured closeness, sharpness, comfort, performance, price, stock, rating, availability, medical outcome, or warranty coverage.
