
Disclosure: This site may use affiliate links. Product specifications should be checked against manufacturer or retailer pages before purchase.
Direct Answer
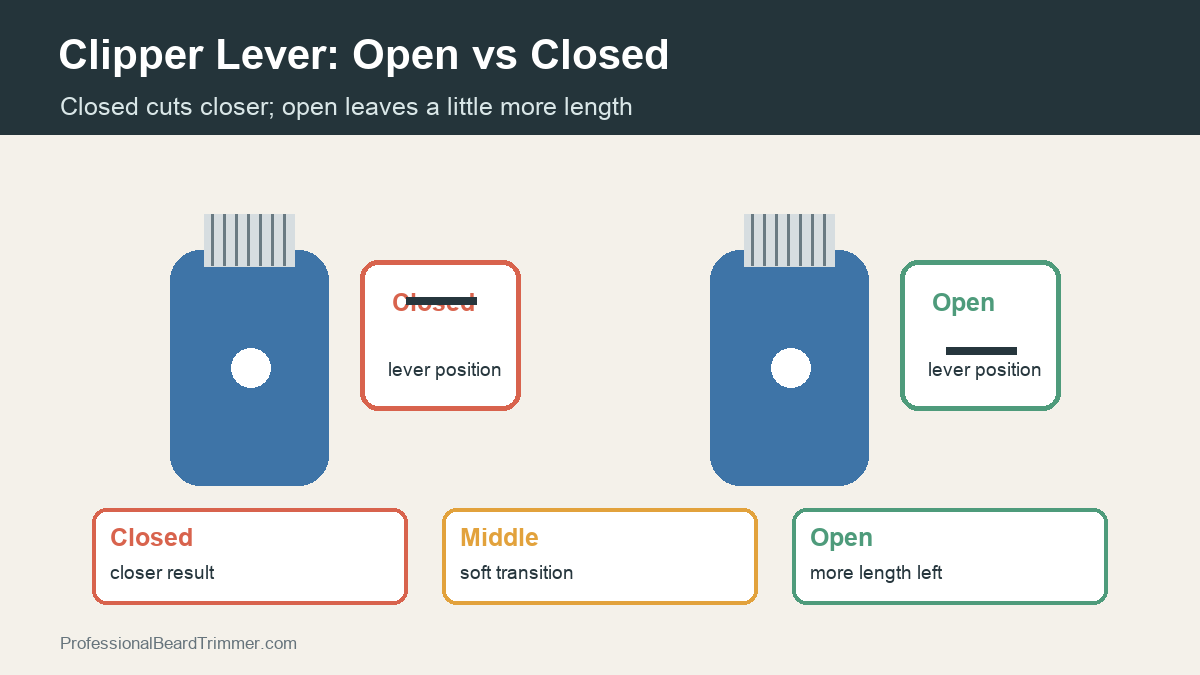
Direct answer: On an adjustable-blade clipper, a closed lever brings the moving and stationary blades into the model’s closer cutting relationship, while an open lever increases the blade spacing and leaves more hair. Intermediate positions bridge that range. Verify the physical lever direction in the exact manual, start open when uncertain, change one increment at a time, and brush away cut hair before judging the next step.
Open, Middle, and Closed Lever Table
| Position | Blade relationship | Typical use | Important boundary |
|---|---|---|---|
| Open | More spacing within the clipper’s adjustable range | Longer pass, first test, or upper side of a short transition | Not a universal measured length across models |
| Middle | Intermediate spacing | Bridging a visible step between open and closed | There may be several useful intermediate points |
| Closed | Closer blade relationship | Shortest part of the same blade-and-guard setup | Does not mean zero-gapped or suitable for every skin contact |
| With guard | Lever fine-tunes the selected guard’s range | Softening the gap between two guard lengths | Guard fit and stated length remain model-specific |
| Without guard | Blade spacing directly changes the close cutting range | Selected taper, outline, or cleanup work when the manual permits | Requires visible blade condition, light pressure, and exact instructions |
The Wahl taper-lever use guide explains that the taper lever changes the distance between blades and supports open, closed, and intermediate adjustment. A current Wahl electric clipper instruction book likewise documents an adjustable lever that changes cutting closeness. These references establish the mechanism for named Wahl systems; they do not make every clipper’s physical lever direction, numerical range, or result identical.
Define Open and Closed by Blade Spacing
The most reliable definition is mechanical rather than directional. “Closed” means the adjustable blade set is in its closer cutting relationship. “Open” means the set has moved toward the longer end of its designed range. The lever changes the relative position of the cutting blades; it does not replace the blade or create an unlimited length range.
Do not memorize “up,” “down,” “forward,” or “back” without checking the exact clipper. Manuals and user descriptions may refer to the lever, the thumb tab, or the blade movement from different viewing angles. Look at the blade relationship while the tool is switched off, read the model diagram, and record which physical position is open and closed on that unit.
The site’s broader open vs closed clipper guide compares the terminology across common cutting decisions. This page focuses on operating one adjustable lever in a controlled sequence.
Understand What the Lever Actually Changes
An adjustable clipper normally has a stationary blade and a moving cutter. Operating the taper lever changes their relative position within a manufacturer-defined range. At the closer end, less hair remains for the same blade and guard setup. At the more open end, the setup leaves more length.
The exact difference is not universal. A manufacturer may publish a nominal range for a named clipper, but that specification does not prove the same range on another model, a replacement blade, a worn set, or a unit with altered alignment. Treat any fractional-inch or millimeter figure as an exact-model specification, not a general law.
The lever also does not measure the final appearance by itself. Hair direction, density, curl, preparation, guard contact, blade condition, pressure, stroke path, and the shape of the cutting area affect how a pass feeds hair.
Check the Lever and Blade Before Cutting
Switch the clipper off and disconnect charging power before inspecting the blade or attaching a guard. Move the lever through its intended range without forcing it. The movement should be secure and repeatable rather than loose, stuck, or able to drift after release.
Inspect both blade corners and the center in even light. Stop if teeth are bent, chipped, corroded, loose, or visibly misaligned; if screws are missing; or if the moving blade projects into an unsafe relationship. Do not use the lever to hide a blade-alignment problem.
Run the clipper briefly away from hair after the visual check. Stop for abnormal rattle, blade strike, smell, vibration, or unusual heat. The cleaning and oiling guide covers the general maintenance sequence, but the exact clipper manual controls lubrication points and water exposure.
Use the Lever Without a Guard
Guard-free use exposes the blade’s own adjustable range. Start at the more open position when the intended area allows a longer test. Make one short, light pass in a visible zone, brush away loose hair, and inspect before moving closer.
Move toward the middle in a small increment. Do not jump directly to fully closed simply because the first pass left hair. A half or quarter movement may be enough to soften a line, and the useful intermediate point can differ across a curved surface.
Use the closed end only in the area intended to be shortest and only when the blade, model instructions, and service boundary support that contact. Closed is not a synonym for zero-gap. The zero-gap setup checklist explains that separate alignment concept and its stop conditions. A closed lever does not authorize moving-tooth projection, hard pressure, repeated scraping, or use over damaged or painful skin.
Use the Lever With a Guard
With a compatible attachment guard installed, the guard establishes the larger cutting-length category and the lever fine-tunes within that setup. Open generally leaves more hair than closed with the same guard on the same clipper. It does not turn one guard into a precisely standardized copy of the next guard.
Confirm that the guard matches the exact blade and locks evenly. A cracked, bent, loose, or cross-model guard can change contact and should not be stabilized by hand while the cutter is moving. Verify the printed length through the manufacturer rather than relying only on a guard number.
The guard-size guide explains why guard labels and millimeter claims must be checked by system. Use the lever for controlled bridging, not as a substitute for correct guard identity.
Bridge Between Two Guard Lengths
A common use for the taper lever is reducing a visible step between two guard zones. Establish the longer and shorter areas first. Then return to the transition with the relevant guard in its open position and work only on the lowest visible part of the line.
If the step remains, move the lever slightly toward the middle and make a short outward motion. Brush and reassess. Continue in small increments only where the line remains. This creates several intermediate cutting relationships instead of treating open and closed as a two-position switch.
Do not carry the closer setting high into the longer zone. A transition is usually controlled by narrowing the work area as the setting gets closer. Natural density and head shape can make one side look darker even when its length path is similar.
Use a Repeatable Adjustment Sequence
- Identify the exact clipper, blade, guard, and manufacturer diagram.
- Confirm which physical lever position is open and which is closed.
- Inspect blade teeth, screws, alignment, guard fit, and lever movement.
- Prepare clean hair according to the exact wet-or-dry instructions.
- Start at the more open setting when the target permits a longer test.
- Make one short pass with light, stable contact.
- Switch off or lift away safely, brush loose hair, and inspect.
- Move one small increment toward the middle only where needed.
- Reserve the closed end for the planned shortest area.
- Record the guard, lever point, zone, direction, and stop point.
Avoid Pressure as a Length Control
The lever and guard should control length, not extra hand pressure. Pressing harder can compress skin, change guard contact, and move the blade through a different path. It does not create a documented setting and can make the result less repeatable.
Keep the clipper moving at a controlled pace without forcing it through a large section. If the tool slows or pulls, stop and check blade cleanliness, lubrication instructions, guard loading, charge or power condition, and the amount of hair entering the cutter.
The clipper taper workflow covers body movement and transition planning. This lever guide does not promise a fade, blend, or irritation-free result.
Clear Hair From the Adjustable Blade
Cut hair can collect between an adjustable blade’s moving surfaces. Follow the exact manual. Some Wahl instructions permit moving the taper lever through its range several times to help free trapped hair, followed by switching off and brushing remaining debris.
That movement is not a substitute for cleaning. Disconnect power as instructed, remove only user-serviceable attachments, brush the blade and guard, and oil only with the specified product and amount. Do not rinse a clipper, blade set, or powered handle unless the manual explicitly permits it.
If the lever becomes stiff, do not force it with pliers or add an unspecified lubricant. Stop and use the manufacturer’s service route. A lever that moves by itself during a pass also needs correction before further use.
Do Not Confuse Lever Position With Blade Alignment
Lever operation changes the designed cutting position during normal use. Blade alignment establishes the safe relationship of the blade set after removal, impact, replacement, or service. They are related but not interchangeable tasks.
The Wahl instruction book linked above provides exact alignment references for named products. Use only the instructions for the actual model and blade revision. Switch off and unplug before loosening screws. Do not grind teeth, enlarge slots, improvise spacers, or set moving teeth beyond the documented safe relationship.
If alignment is uncertain, the blade was dropped, or the cutter contacts the stationary blade, stop using the clipper. A service technician or manufacturer support route is more appropriate than repeated trial cuts.
Common Open-vs-Closed Errors
- Memorizing a physical lever direction without checking the model diagram.
- Treating a published range for one clipper as universal.
- Jumping from fully open to fully closed before trying intermediate points.
- Changing guard, lever position, pressure, and stroke direction together.
- Using a closer setting over the entire transition instead of narrowing the work zone.
- Judging a line before brushing away loose cut hair.
- Using pressure to force a closer result.
- Assuming closed means zero-gapped or safe for every skin contact.
- Operating with a loose guard, damaged tooth, shifted blade, or drifting lever.
Stop Conditions
Stop if the lever is stuck, loose, or drifting; the blade or guard is damaged; the moving teeth appear unsafe; the blade strikes or rattles; the clipper pulls, stalls, smells abnormal, or becomes unusually hot; or the result cannot be judged after brushing away hair.
Do not continue over broken, painful, or actively irritated skin. This page does not diagnose skin conditions, authorize electrical repair, or replace professional training and exact manufacturer instructions.
Frequently Asked Questions
Does an open clipper lever leave more hair?
On an adjustable-blade clipper, open normally means more blade spacing and a longer result than closed with the same blade and guard. Verify the exact model and physical lever direction.
Does a closed lever mean zero-gap?
No. Closed is the closer end of the manufacturer’s normal adjustable range. Zero-gap is a separate blade-alignment concept and must never place moving teeth in an unsafe relationship.
Can the middle lever position replace another guard?
It can bridge part of the difference within one guard setup, but it does not create a universally measured substitute for another guard. Use compatible guards and model-specific lengths.
Should I start open or closed?
Start open when uncertainty and the target length allow a conservative test. Move closer in small increments after brushing and checking the result.
Sources and Claim Boundary
Primary references reviewed in July 2026 are the Wahl taper-lever guide and Wahl electric clipper instruction book linked above. They document adjustable-blade operation for named Wahl systems, not every clipper. This page reports no hands-on testing and makes no universal length, fade, safety, comfort, speed, price, stock, rating, durability, or performance claim. The exact model manual, blade condition, compatible guard, local professional rules, and user or client stop request control.
