
Disclosure: This site may use affiliate links. Product specifications should be checked against manufacturer or retailer pages before purchase.
Direct Answer
Direct answer: Avoid long-beard trimming mistakes by judging the beard only in its normal dry released state, mapping outer and supporting layers, protecting the chin and jaw anchors, and verifying the exact tool and longest safe starting setup. Trim one small visible section, then switch off, clear clippings, recomb, release, and reassess before another correction.
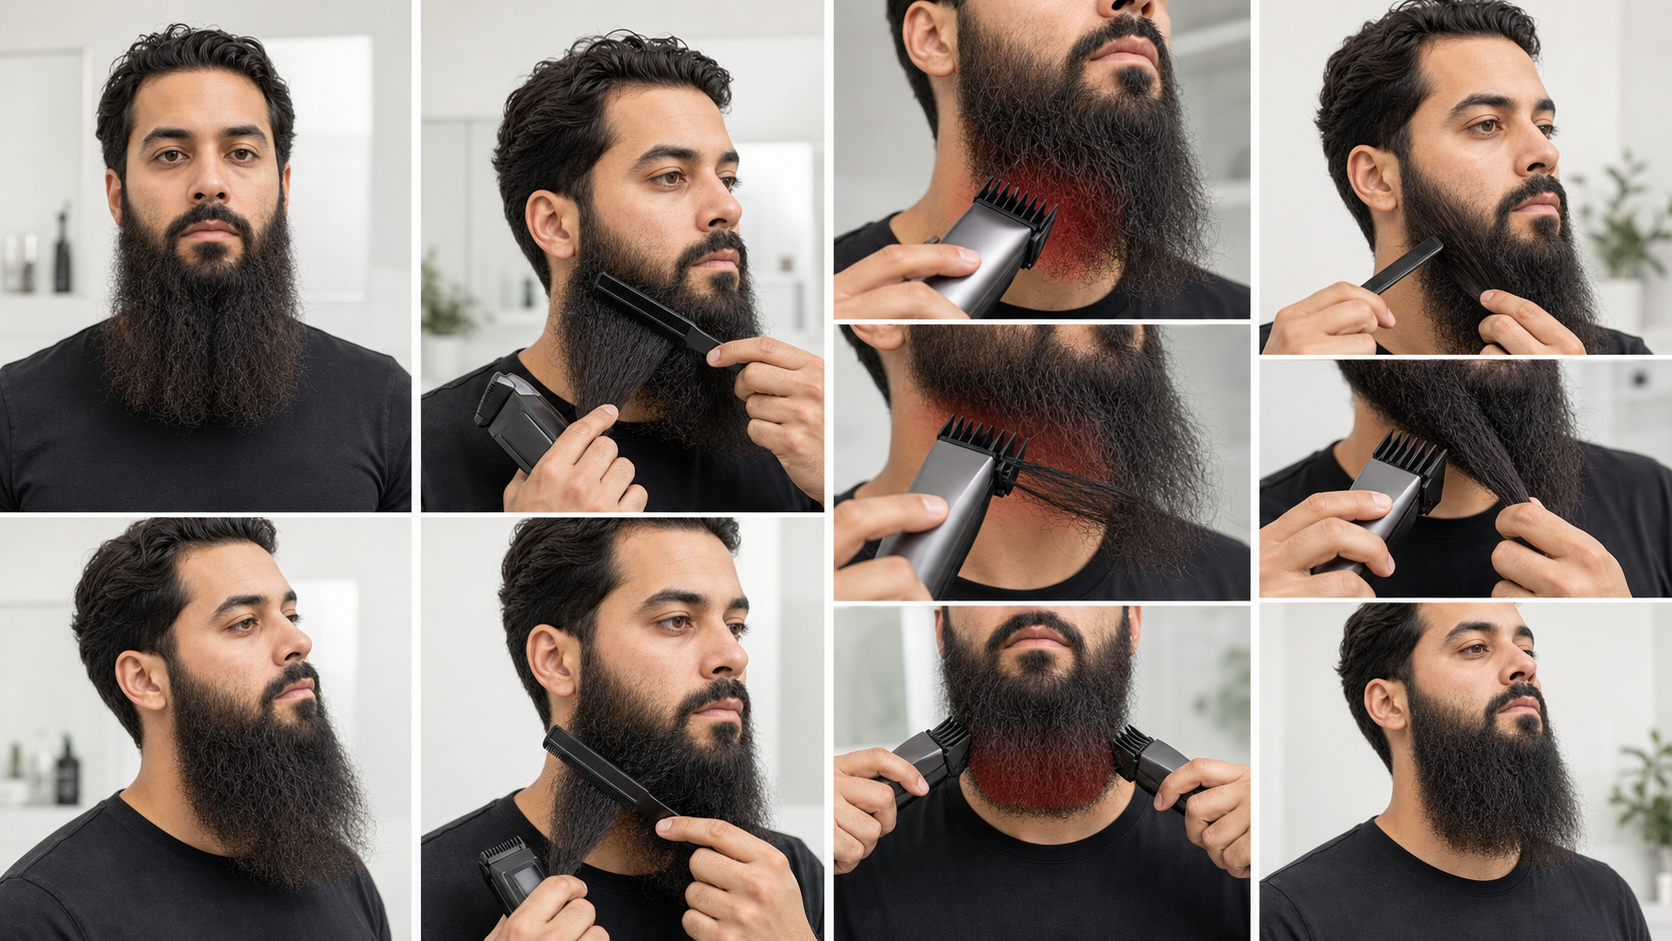
A long beard is not one flat cutting surface. It contains hanging outer panels, shorter support hair, crossing strands, central chin projection, jaw-corner structure, sideburn transitions, and under-jaw hair that can contribute to the front silhouette. Most serious errors happen when those roles are compressed into one guard pass or judged before the beard returns to its natural shape.
Long-Beard Mistake Prevention Table
| Mistake | Why it changes the result | Lower-risk response |
|---|---|---|
| Trimming wet or stretched hair | Temporary length and direction can change after release | Use the normal dry worn state as the final reference |
| Starting with the shortest likely guard | Outer and support layers can enter together | Verify the exact model and begin longer |
| Cutting both sides repeatedly | The stable reference disappears | Leave the shorter or better-shaped side untouched |
| Chasing crossing ends | The visible end may belong to another source zone | Trace each section to its root before cutting |
| Ignoring accumulated clippings | Hair can bridge guard teeth and alter admission | Switch off, clear, and reconfirm the setup |
| Judging one close mirror view | Local detail can hide whole-shape changes | Release and compare matched full-beard views |
Mistake 1: Treating a Long Beard Like a Short Beard
Short facial hair usually stays close to the skin and can be organized by cheek, chin, jaw, and neck zones. A long beard adds hanging distance, independent layers, crossing hair, hidden density transitions, and structural anchors. A guard that behaves predictably on short hair can collect several long-beard layers when the path, support, and clearing sequence are not controlled.
The short-beard mistake guide covers base length, guard contact, neckline placement, and local correction. The medium-beard mistake guide adds zone mapping and shape preservation. This page owns long-beard layer admission, hanging-end ownership, protected projections, clipping bridges, and full release between micro-corrections.
Mistake 2: Using a Wet, Stretched, or Styled Shape as the Baseline
Water, tension, heat, bands, clips, heavy balm, brushing pressure, and hand shaping can temporarily change apparent length and direction. A stretched curl may contract after release. A compressed side may widen later. A wet outer panel may hang below its dry position and invite unnecessary cutting.
Complete the long-beard preparation workflow. Remove heavy residue when needed, allow roots and underlayers to dry, detangle from the ends in supported sections, and let the complete beard settle without persistent pulling. Record the normal worn state before choosing a cutting target.
Mistake 3: Failing to Separate Outer and Supporting Layers
The visible outer panel can hang well below a shorter layer that supports width, covers a lighter-density area, and connects the jaw to the central chin. Feeding both layers into one guard can remove hidden structure while barely changing the longest visible ends.
Lift only enough outer hair to observe the support layer. Record where the shorter layer begins, which source zone it belongs to, and what silhouette role it performs. Release both layers before deciding whether the problem is excess length, excess width, curl, or density.
Mistake 4: Cutting Crossing Hair in the Wrong Zone
A long strand rooted near the chin can end inside a side panel, and cheek hair can cross toward the center. Cutting at the visible endpoint can shorten the wrong source zone and create a gap after the beard is recombed.
Support a small section near its middle, trace it gently toward the root, then release it. The long-beard grain guide explains root, middle, and released-end direction. Assign hair to its source before selecting a pass.
Mistake 5: Removing the Central Chin Anchor First
The central chin often provides the lowest point, forward projection, and visual connection between the two sides. Shortening it to match one uneven side can change the entire beard rather than correct the side difference.
Mark the central chin width, lowest point, projection, and intended shape as a no-pass anchor during early corrections. Handle a centered, angled, rounded, square, forked, or intentionally asymmetric chin as its own design decision.
Mistake 6: Flattening the Jaw Corners
Jaw corners control the turn from side width into front projection. A pass that continues around the corner can remove the transition and make the front look narrower or detached even when side length appears cleaner.
Mark each jaw corner before trimming. End an outer-side correction before the turn unless the corner itself is the reviewed target. Compare the front, profile, and three-quarter views after release because the corner can look acceptable in one view and absent in another.
Mistake 7: Choosing a Guard by Number Alone
Guard numbers, physical depth, tooth spacing, contact surface, attachment method, and documented remaining length vary by tool. A marketplace guard that appears to fit may sit unevenly or admit long hair differently from the intended component.
Use the long-beard guard guide to verify the complete model, head, guard identifier, documented length, locking fit, protected floor, and one-section test. Do not translate an unfamiliar number into a universal millimeter result.
Mistake 8: Starting at the Final Target Length
The final target may be reasonable after the tool, section, direction, and layer admission are understood. It is a poor first test when any of those variables remain unknown. A short setting removes the recovery margin immediately.
The current Philips OneBlade trimming guidance recommends beginning with the longest setting when learning covered adjustable systems. The principle is bounded: verify the exact model and test longer first rather than transferring Philips ranges or directions to another tool.
Mistake 9: Running the Tool Before Inspecting the Assembly
A damaged blade, loose guard, unstable setting, incorrect adapter, packed cutter, or shifted attachment can turn a careful plan into an unpredictable pass. Long hair should not be used to diagnose questionable equipment.
With power disconnected, inspect the cutter, guard, lock, setting control, housing, cord, battery, and contacts. Run the assembled tool away from hair and stop for unusual rattle, vibration, blade contact, speed change, odor, heat, or guard movement. The trimmer pulling guide provides model-safe diagnostic boundaries.
Mistake 10: Hiding the Cutter Path
Long outer hair can fold over a guard and hide where the teeth, cutter, and section boundary are moving. Continuing by feel can capture support hair, cross a jaw corner, or enter the central chin.
Isolate one small dense outer section and keep the complete guard path visible. Do not tilt, scoop, or press harder to reach hidden hair. Stop if the section will not remain separated without force or if the cutting head disappears behind the beard.
Mistake 11: Taking Long Continuous Passes
A long pass changes several variables at once: root zone, grain, layer depth, beard curvature, guard loading, and visibility. If the result is wrong, it becomes difficult to identify which variable caused it.
Use one short pass inside a recorded section and stop before the structural boundary. Move the tool away, switch it off, and evaluate the local result only after loose hair is removed and the section is released.
Mistake 12: Repeating Before Clearing Clippings
Long clippings can bridge guard teeth, gather near the cutter, and change how later hair enters. A second pass through a loaded guard is not the same test as the first pass.
Switch off and clear the guard and cutter only as the exact manual permits. Reconfirm the guard identity, lock, and setting before restarting. The cleaning and oiling guide explains general brushing, water, drying, and lubrication boundaries without overriding the product instructions.
Mistake 13: Trimming Both Sides During Every Check
Alternating removal from both sides can create a shortening loop. Each side becomes the reason to cut the other, and the stable reference disappears. Natural differences in density, curl, anatomy, and direction can never be solved by equal strand removal.
Use the shorter or better-shaped side as an untouched reference. The long-beard symmetry guide explains matched landmarks and one-sided micro-corrections. Change the reference only after a complete release and documented whole-shape decision.
Mistake 14: Confusing Density or Curl With Excess Length
A denser side can look wider and darker without hanging lower. A curl can project outward while its stretched strand is not longer. Trimming those areas for visual equality can expose skin or remove support without resolving the apparent difference.
Record length, width, density, curl, direction, and facial structure separately. Correct only the confirmed category. Do not shorten the denser side until equal skin is visible or pull curls straight to create identical measurements.
Mistake 15: Judging Only the Closest Mirror View
A close mirror is useful for checking guard position and blade clearance. It is weak for evaluating the complete long-beard silhouette. Local straightness can hide lost width, a broken jaw connection, or a shifted central projection.
After every correction, return to neutral posture and compare matched front, profile, three-quarter, and under-jaw views. Keep lighting, mirror distance, camera height, and head angle consistent. Require a suspected mismatch to persist in more than one view.
Mistake 16: Moving the Neckline to Fix Hanging Length
The neckline is a boundary close to the neck. Hanging side and chin length are external silhouette decisions. Raising or flattening the neckline does not safely correct a long outer panel and can expose an abrupt gap beneath the beard.
Use the beard neckline guide to treat placement separately. Map left, center, and right under-jaw source zones before removing hair, because under-jaw growth may support the front and sides.
Mistake 17: Using Bare-Blade Detailing for Bulk Correction
A bare cutter removes every hair it contacts and provides little length protection. It can be appropriate for a verified edge workflow, but it is not a forgiving substitute for guarded outer-layer reduction.
Reserve unguarded work for clearly visible boundaries supported by the exact tool instructions and sufficient control. Do not freehand deep inside a long beard to chase bulk, crossing ends, or an uncertain side difference.
Mistake 18: Pressing Harder When the Tool Does Not Cut Cleanly
Extra pressure can change guard contact, compress hair and skin, hide the cutting path, and increase the chance that more than the intended layer enters. It does not repair a dull, dirty, underpowered, misaligned, or incompatible cutting system.
Stop and inspect blade condition, cleanliness, lubrication requirements, charge, guard fit, section size, and local direction. Follow manufacturer support rather than forcing a questionable assembly through long hair.
Mistake 19: Chasing Every Loose End
One protruding strand can be a curl, crossing hair, damaged end, temporary static, or a valid part of the natural outer texture. Removing every visible end can gradually thin the perimeter and create a transparent or over-shaped finish.
Recomb and release the strand twice, trace its source, and judge it against the complete silhouette. Use scissors or a detail tool only when the exact isolated target and safe method are clear; this guarded workflow does not provide freehand scissor instruction.
Mistake 20: Continuing After the Shape Is Coherent
Repeated refinement can convert a successful maintenance trim into a redesign. A long beard does not need mathematically identical ends or a perfectly straight perimeter to look intentional.
Define stop conditions before beginning: protected anchors remain intact, the target mismatch no longer survives release, both sides read coherently in matched views, and no clearly isolated low-risk correction remains. Stop when the next pass offers less certainty than the current result.
What to Do After an Overtrim
Switch the tool off and stop all correction. Release the complete beard and identify the shortened source zone, its relationship to the outer panel, support layer, jaw corner, and central chin, and how visible it is in normal views.
Do not automatically shorten the opposite side. Preserve surrounding length. A small outer notch may be softened through conservative neighboring blending, normal styling, or regrowth. A lost anchor, exposed support layer, major side difference, or uncertain freehand repair is a reason to consult a skilled barber rather than remove more at home.
Repeatable Mistake-Prevention Sequence
- Prepare and record the normal dry released beard.
- Standardize posture, lighting, mirror distance, and camera position.
- Map root zones, crossing hair, outer panels, and supporting underlayers.
- Mark the central chin, jaw corners, side width, mustache, cheek, and neckline anchors.
- Name the actual difference: length, width, density, curl, direction, or anatomy.
- Verify the exact model, head, guard, setting, attachment, and manual.
- Choose the shorter or better-shaped side as the untouched reference.
- Select one small visible low-risk outer section.
- Run the assembled tool away from hair.
- Make one short longer-first pass within the documented workflow.
- Switch off and clear clippings before any repeat.
- Recomb, release, reset posture, and compare the complete beard.
- Stop when the mismatch is gone, structural, uncertain, or outside the guarded method.
Stop Conditions
Stop when the target cannot be isolated from crossing hair or support layers, the cutter path is hidden, a protected anchor would be shortened, the difference disappears after release, or the issue is density, curl, anatomy, or intentional style rather than excess length.
Also stop when the guard shifts, the tool pulls or behaves abnormally, blade teeth are damaged, the housing or power system is unsafe, the method requires force, or skin is painful, broken, bleeding, swollen, or actively irritated. This page does not diagnose skin or hair conditions.
Frequently Asked Questions
What is the most common mistake when trimming a long beard?
Removing too much before the beard is dry, released, mapped, and divided into outer and supporting layers is the central mistake. Protect the chin and jaw anchors, test one small outer section with a longer verified setup, then clear, recomb, release, and reassess.
Should I trim both sides of a long beard at the same time?
No. Keep the shorter or better-shaped side as an untouched reference. Correct one confirmed longer outer section, then compare the complete released beard from matched front, profile, and three-quarter views before changing either side.
Can I trim a long beard while it is wet or stretched?
Only follow a wet workflow when the exact tool instructions support it, but do not use a wet, stretched, compressed, or heavily styled shape as the final length reference. Let the beard return to its normal worn state before judging balance.
How do I recover after trimming one long-beard section too short?
Stop cutting, release the complete beard, identify the shortened source zone, and preserve surrounding length. Do not shorten the opposite side automatically. Use styling, a conservative blend, professional help, or regrowth according to the location and visibility of the error.
Sources and Claim Boundary
Primary references reviewed in July 2026 are the linked Philips OneBlade guidance, the current Philips Multigroom manual, and the Wahl beard-trimming guide. They support exact-model comb identification, secure attachment, longer-setting familiarization for covered systems, controlled movement, model-dependent direction, cleaning, clipping removal, and manufacturer-specific safety.
This page applies those bounded principles to a generic long-beard mistake-prevention workflow. It reports no hands-on testing, defines no universal guard, direction, pressure, pass count, wet-use rule, ideal shape, recovery time, or professional result, and does not guarantee comfort, symmetry, density, growth, performance, or error-free trimming. The exact model instructions and the released beard remain controlling.
