
Disclosure: This site may use affiliate links. Product specifications should be checked against manufacturer or retailer pages before purchase.
Direct Answer
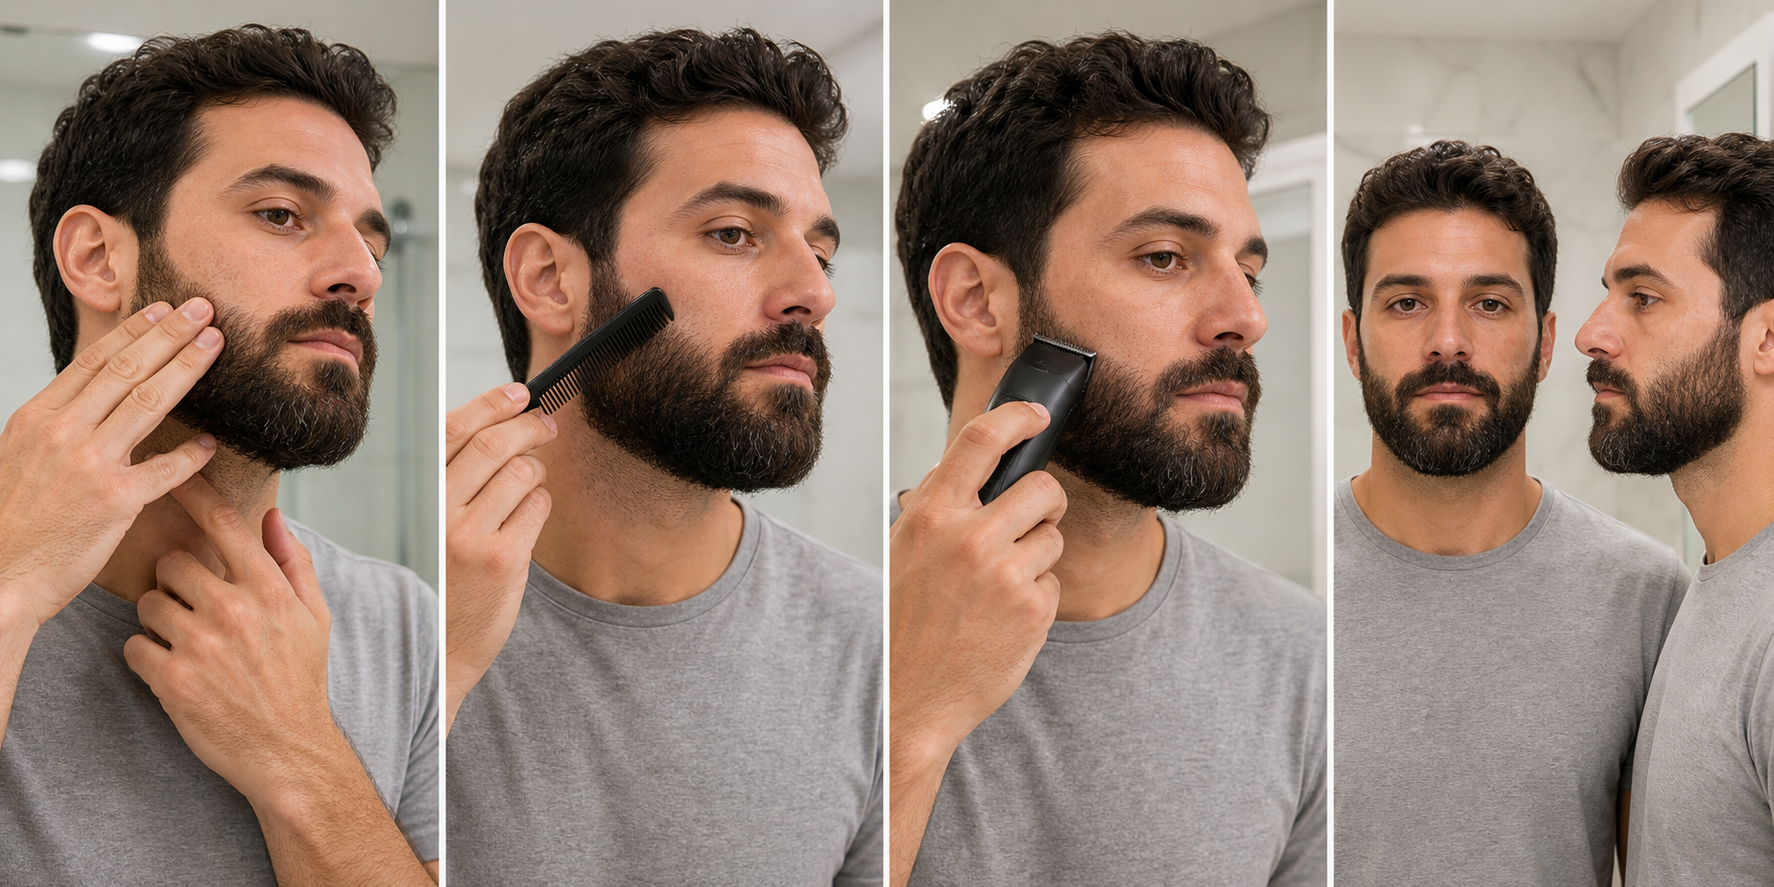
Direct answer: Clean up a medium beard by letting it dry and settle, combing bulk away from the existing cheek line and neckline, and marking those boundaries with the trimmer switched off. Remove only confirmed regrowth outside the lines in short visible segments. Recomb and step back after each segment, preserving beard bulk, chin projection, jaw width, and under-jaw structure.
This workflow maintains established edges; it does not design a new cheek line, raise or lower a neckline, create a fade, shorten the main beard, or promise symmetry. Use the medium-beard touch-up guide for isolated length outside the silhouette and a planned full trim when bulk or shape must change.
Edge Cleanup Versus Beard Reshaping
| Observed issue | Edge cleanup | Separate planned task |
|---|---|---|
| Short regrowth above cheek line | Remove only hair clearly outside the recorded line | Do not lower the complete cheek boundary |
| Short regrowth below neckline | Clear the known outside zone in small segments | Do not raise the neckline toward the jaw |
| Mustache tips cross an existing border | Address visible tips with a suitable narrow method | Do not shorten or redesign the full mustache |
| Sideburn outline has stray growth | Restore the established outer edge | Do not create a new fade or transition |
| Jaw or chin looks too full | Not an edge-cleanup target | Map a guarded bulk-trim workflow |
| Two sides have different density | Preserve their recorded boundaries | Do not cut one line down to imitate density |
The deciding question is whether the old boundary remains visible. If the answer is no, cleanup has no reliable reference. Stop and plan the line position separately rather than letting each pass invent a new edge.
Let the Beard Dry and Return to Its Normal Shape
Water, heavy product, sleep compression, mask pressure, and comb tension can temporarily shift medium-length hair over an edge. Trimming that temporary projection can cut into retained bulk after the beard settles.
Begin with a clean, fully dry beard unless the exact tool and method specify another condition. Comb gently into the normal worn shape. The medium-beard preparation guide covers drying, detangling, grain mapping, and tool checks when the beard needs a complete reset.
Stabilize Bulk Before Looking at the Boundary
Comb cheek, jaw, chin, and under-jaw length into their intended lay. Use fingertips or a comb to hold retained bulk away from the edge without pulling it straight. The goal is to expose the existing border, not stretch hair into a new one.
Step back and view the beard from the front, both three-quarter angles, and each side. Confirm that the silhouette is stable before focusing on close mirror detail. A close mirror reveals individual hairs; distance reveals whether the overall line has actually changed.
Map the Existing Cheek Line With the Tool Off
Use visible density transition, prior photographs, and fixed facial landmarks to trace the current cheek line. Mark where it begins near the sideburn, how it crosses the cheek, and where it joins the mustache. Keep the tool switched off while rehearsing the path.
Do not classify every lighter-density area as outside growth. Natural density and direction can vary along the cheek. The medium-beard symmetry guide explains matched landmarks and why even does not mean mathematically identical.
Map the Existing Neckline Separately
Lift the chin naturally rather than stretching the neck. Identify the existing central point, the curve toward each side, and the connection behind the jaw. Check the line from the side as well as underneath. Medium-beard bulk can hide the boundary from a straight-on view.
If the central height or side connection is uncertain, stop. The beard neckline guide covers placement as a separate planning task. Edge cleanup begins only after the position is already established.
Choose the Exact Head or Guard for the Edge
Identify the complete trimmer model and regional suffix, then read the manual for the intended edging head, blade, guard, and contact method. A narrow exposed cutter offers visibility but less distance from skin; a guard can protect adjacent length but may hide the exact edge.
The official Philips OneBlade instructions distinguish trimming with combs from edging with the blade for covered models. Those instructions do not authorize the same orientation, pressure, direction, or skin contact for another tool. The exact model manual controls.
Inspect Blade, Head, Guard, and Power
With the tool off, inspect stationary and moving teeth for chips, bends, corrosion, residue, impact marks, or visible contact. Confirm that the head seats securely. If using a guard, inspect teeth, rails, locks, and markings and verify that it sits level without movement.
Check the documented power mode and enough charge for stable operation. Stop for damage, swelling, leakage, smoke, odor, abnormal sound, strong vibration, or rapid heat. The loose-guard guide provides a focused attachment check before any guarded edge work.
Protect the Retained Beard Bulk
Comb or hold longer cheek and jaw hair inward, away from the cutter path. Work with one hand controlling the tool and the other positioned safely outside the blade path. Do not trap loose skin folds or pull facial skin into an unfamiliar shape.
Mark the protected zone mentally or with a washable method appropriate for skin. If the visible cutter must cross retained length to reach the target, choose a different angle or stop. Edge cleanup should remove outside regrowth without using the main beard as a guide surface.
Clean the Cheek Edge in Short Segments
Begin at a clearly visible section rather than the most uncertain point. Place the tool as the exact instructions direct and make one short, light pass outside the established line. Keep the cutter visible and move away from retained bulk where the model permits.
Switch off as required, brush away loose hair, and inspect the same segment from close and step-back distances. Continue only while the next segment has an equally clear boundary. Do not connect two clear points by cutting through an uncertain middle.
Clean the Neckline From Known Landmarks
Start at the confirmed center or side connection specified by the planned line and work in short sections. Keep the head angle and skin position consistent. Recheck from the side so the line does not climb toward the jaw as it moves outward.
Do not use the jawbone itself as a universal neckline. Beard style, bulk, neck shape, and prior placement differ. Remove only hair below the existing line. When the line disappears under longer hair, recomb and expose it instead of guessing with the cutter.
Handle the Mustache Boundary as a Separate Zone
Comb the mustache into its usual direction and identify only tips that cross the established lip or corner boundary. Keep the cutting edge away from lips and nostrils and use a model-approved narrow attachment or method that remains visible.
Do not shorten the full mustache to match one displaced hair. Preserve side connections when they belong to the style. If the mustache length or shape needs broader change, schedule it separately rather than extending the cheek cleanup into the center face.
Clean the Sideburn Connection Without Creating a Fade
Compare the sideburn-to-beard border with the previous shape and opposite side. Remove only obvious growth outside the established outline. Keep the haircut, sideburn length, and beard bulk outside the edge pass.
A fade changes length through multiple zones and settings; an outline cleanup does not. Use the beard fade guide only when a new gradient is intentionally planned. Do not improvise a fade because one sideburn edge looks soft.
Recomb and Step Back After Every Zone
Loose cut hair can stick to skin and make the boundary look unfinished. Switch off, clear clippings, release protected bulk, and recomb the beard into its normal position. Compare the current line with the original map before continuing.
Use the same light, head angle, and viewing distance on both sides. Photographing the front and side can provide a record for later maintenance. Do not alternate rapidly between sides; finish one verified segment, reassess, then compare the matching landmark.
Use a One-Variable Correction Rule
If one segment remains unclear, change only one factor: viewing angle, comb position, exact target, or model-approved tool orientation. Do not simultaneously change pressure, direction, head, and boundary position. Multiple changes make the result impossible to attribute.
The medium-beard mistake guide covers hard pressure, broad cross-zone passes, premature edging, and correction loops. An edge session should become smaller and more certain after each check, not expand.
Avoid the Symmetry Chase
Compare corresponding cheek start points, mustache connections, neckline center, and side joins. Distinguish boundary position from density, curl, facial structure, lighting, and camera angle. A line can be correctly maintained even when the hair above it looks different.
Do not lower one cheek line or raise one neckline merely to make two close-up images identical. Preserve the documented side that still matches its landmarks. When an actual boundary error occurs, stop cutting and decide whether a conservative transition is possible.
Recover From a Line That Moved
Stop immediately, clear clippings, release the beard, and assess from normal distance. Mark the changed segment and protect it as the new temporary limit. Do not widen the error by copying it across the entire side or onto the opposite side.
If one small discontinuity can be softened without moving the main line, make at most one planned correction. Otherwise leave it, record the event, and allow regrowth. Removed hair cannot be restored by another pass.
Edge-Cleanup Checklist
- The beard is clean, dry, settled, and combed into its normal shape.
- The cheek line, neckline, mustache edge, and sideburn connection are mapped separately.
- Only regrowth outside an existing boundary is targeted.
- Bulk, chin projection, jaw width, and under-jaw structure are protected.
- The exact model, head, guard, power mode, and manual are verified.
- Blade, head, guard, housing, and power parts show no damage.
- The cutter path remains visible and clear of lips, nostrils, and skin folds.
- One short segment and one-variable correction limit are defined.
- Loose hair will be cleared before every judgment.
- Stop conditions are understood before the tool is switched on.
Repeatable Edge-Cleanup Sequence
- Let the medium beard dry and settle.
- Comb retained bulk into its intended shape.
- Map cheek and neckline boundaries with the trimmer off.
- Separate mustache and sideburn zones from the main lines.
- Verify the exact model, head, guard, and operating instructions.
- Inspect blade teeth, head seating, guard fit, and power condition.
- Protect retained bulk and expose one clear outside-growth segment.
- Make one short, light, model-approved pass.
- Switch off, clear clippings, recomb, and step back.
- Compare matched landmarks without chasing density differences.
- Make at most one justified one-variable correction.
- Clean, dry, record the maintained lines, and stop.
Stop Conditions
Stop for a loose or damaged head or guard, chipped or contacting teeth, pulling, abnormal noise, odor, vibration, or heat, smoke, swelling, leakage, damaged power parts, or water exposure outside the exact rating. Do not tape an attachment, force a head, or add pressure.
Also stop over painful, broken, bleeding, swollen, or actively irritated skin; when the original boundary cannot be identified; when the cutter cannot remain visible; when a line correction would enter retained bulk; or when each pass makes the target less clear. Seek qualified help for persistent skin symptoms or a grooming task outside your control.
Frequently Asked Questions
Which edges should I clean up on a medium beard?
Clean only confirmed regrowth outside an already established cheek line, neckline, mustache boundary, or sideburn connection. Preserve the line position, beard bulk, chin projection, jaw width, and under-jaw structure.
Should I use a guard when cleaning beard edges?
Use the exact model-approved head or guard that fits the documented task. A guard can protect adjacent length, while a precision head may expose the cutter; verify the manual and test visibility before touching the edge.
How do I keep both beard edges even?
Map both existing lines with the trimmer off, clean one short segment at a time, then step back and compare matched landmarks. Do not lower the higher side merely to chase natural density or facial asymmetry.
When should I stop cleaning up beard edges?
Stop when the original boundary is unclear, a correction would move the line, the cutter cannot stay visible, skin is painful or broken, or the blade, guard, head, power system, or target is uncertain.
Sources and Claim Boundary
Primary references reviewed in July 2026 are the Philips OneBlade trimming instructions and current Philips groomer manual linked above. They support model-specific comb and edging distinctions, controlled strokes, local direction awareness, component checks, and cleaning boundaries for the products they cover.
This page applies those mechanics to a generic medium-beard edge-maintenance workflow. It does not report hands-on testing, prescribe one cheek or neckline position, setting, direction, pressure, or schedule for every beard and trimmer, diagnose skin conditions, create hair density or growth, or guarantee symmetry, comfort, or a particular result. The exact model manual controls.
