
Disclosure: This site may use affiliate links. Product specifications should be checked against manufacturer or retailer pages before purchase.
Direct Answer
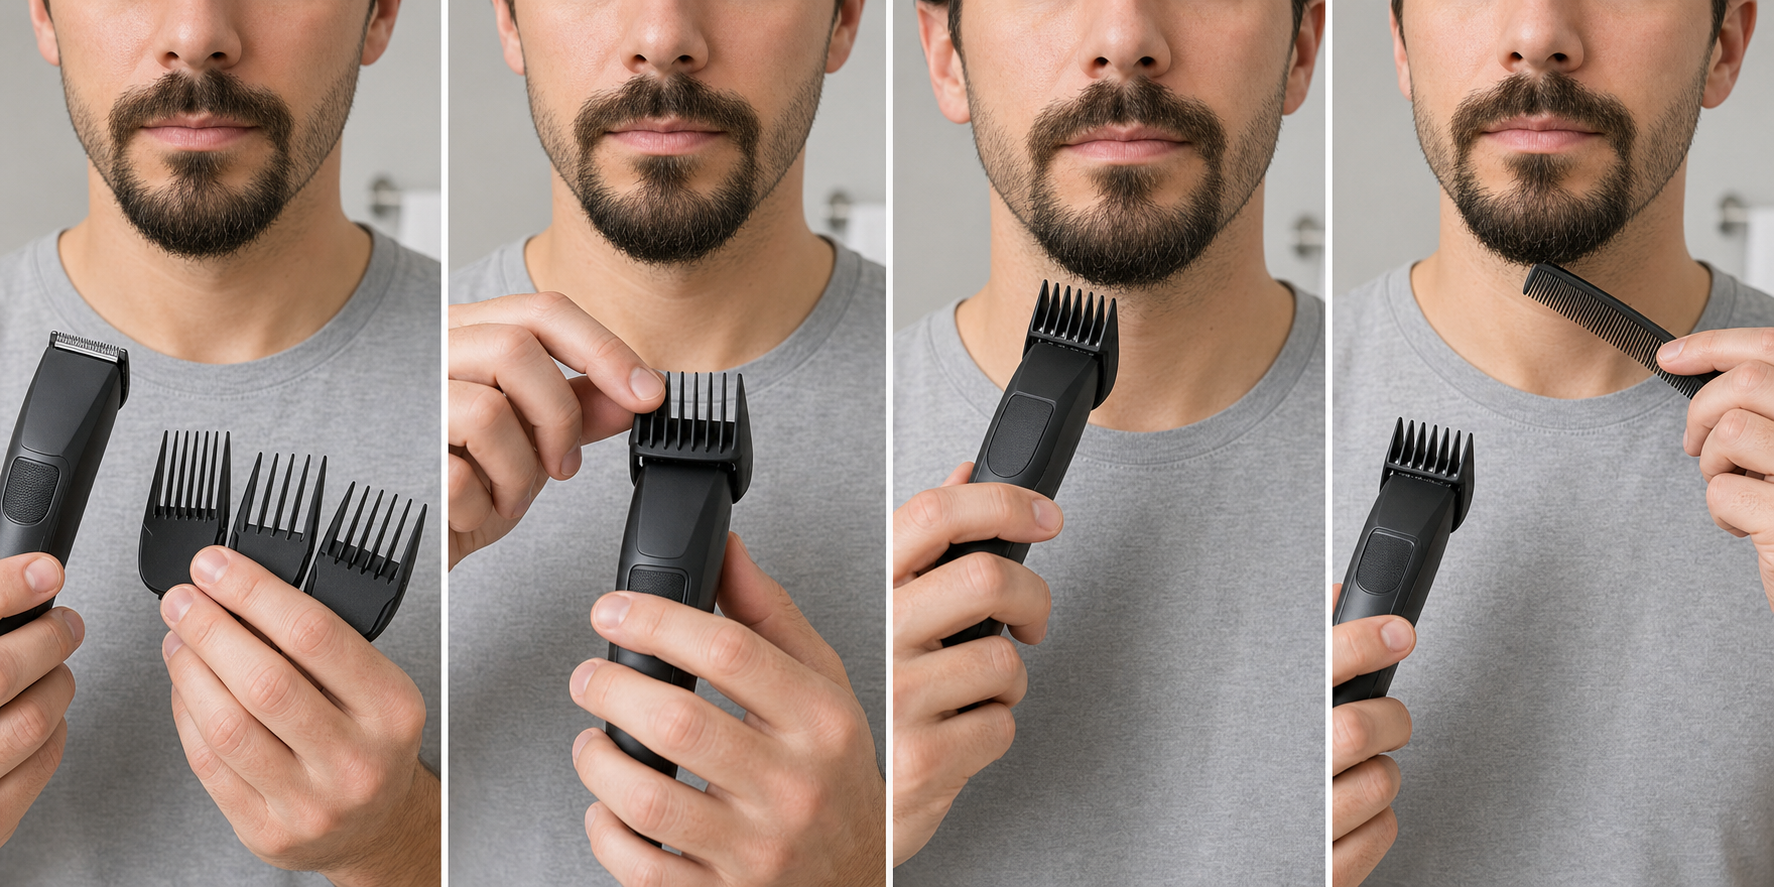
Direct answer: Choose a goatee guard by verifying the exact trimmer and compatible attachment, then protecting the center, mustache connections, mouth corners, chin anchor, lower edge, and shortest released zone. Start with the longest useful supported setting, seat it with power off, rehearse the path, and test one small outer chin section. Switch off, clear the guard, recomb, release, and reassess before changing one variable.
This is a guard-selection and validation workflow, not a complete goatee trim. It does not redesign the style, establish a universal guard number, outline with an exposed cutter, correct both sides, diagnose hair or skin, or promise comfort, safety, control, density, growth, symmetry, or a result.
Goatee Guard Decision Map
| Decision | Evidence to use | Reason to stop |
|---|---|---|
| Exact compatibility | Complete model, regional suffix, manual, head, and guard identity | Unknown attachment, mixed guard set, or unsupported fit |
| Protected shape | Center, connectors, corners, chin anchor, lower edge, shortest zone | Guard path would collect a protected area |
| Working geometry | Tooth spacing, comb depth, head width, approach, and lift-away space | Hair enters only under pressure, stretching, or lost visibility |
| Starting setting | Longest useful verified setting for the exact system | Number, color, or seller claim is the only evidence |
| Test result | One outer chin zone, cleared guard, released comparison | Pulling, heat, movement, unexpected removal, or changed boundary |
Begin Only After Goatee Preparation
The goatee preparation guide owns cleaning, full drying for a dry workflow, release from product and tension, center and chin-anchor mapping, connector ownership, lower-edge observation, tool inspection, and stop conditions. Guard choice begins after those references are stable.
Do not select a setting while hair is wet contrary to the intended workflow, compressed, tangled, heavily styled, or held straight. The shortest protected section and visible boundaries must come from the ordinary released shape, not from a temporary position created to fit the comb.
Keep Guard Choice Separate From Style Design
A goatee may be connected or disconnected, broad or narrow at the chin, and paired with different mustache, cheek, and neck boundaries. A guard controls hair admitted to its cutting plane; it does not decide which goatee design should be worn.
If the objective includes removing connectors, changing the center below the lip, narrowing the chin body, raising the lower edge, or creating a new neckline, stop and plan that redesign separately. Choosing a guard should preserve the existing recorded shape while testing controlled bulk reduction inside it.
Write One Guarded Task
Define one observable task, such as assessing a longer guarded setting on the outer chin body while preserving the center, connectors, mouth corners, lower contour, and opposite side. Avoid combining mustache shortening, chin reduction, edge cleanup, and neck removal in one guard decision.
Also write what must remain unchanged. A valid guard setup has to fit both lists. If the attachment cannot reach the target without admitting a protected feature, reject the setup rather than accepting collateral removal.
Mark the Center and Chin Anchor
Use the relaxed mouth and ordinary head position recorded during preparation. Mark the center below the lip and the stable central mass of the chin body. These anchors help detect whether a broad guard drifts across the shape or collects crossing hair from the opposite side.
Keep both anchors outside the first test. A setting that appears appropriate on an outer zone may behave differently where hair is shorter, denser, crossing, or projecting forward. Guard validation for one area is not permission to sweep through the center.
Map Mustache and Connector Zones
Record whether the mustache remains separate, joins the goatee through narrow connectors, or overlaps visually without continuous root ownership. Trace representative crossing hairs toward their roots with the tool off, then release them.
The mustache preparation guide provides detailed upper-lip mapping. The mustache guard guide treats lip opening, center, corners, and attachment access as a separate compact-zone decision. Do not assume the chin guard should continue across the mustache.
Protect Both Mouth Corners
Mark the relaxed mouth corners, mustache endpoints, connector widths, and any clear skin gap. A guard tip can extend beyond the visible cutter, and a broad comb can collect a connector before the tool appears close to the mouth.
Keep the first test away from both corners. Do not stretch the lips, pull skin, or use soft tissue as a hard stop. If the proposed path cannot stay fully visible with the mouth relaxed, the geometry is unsuitable for that zone.
Protect the Lower Chin Edge
Observe where the retained chin body ends before neck hair or clear skin begins. View the edge from the front and both three-quarter angles without sharply lifting the chin. Record natural irregularities rather than treating every projecting end as excess.
A guarded bulk pass inside the chin body is different from creating or cleaning an outline. Keep the lower edge outside the first test. If the task is primarily a neck boundary, use the beard neckline guide as a separate model-aware workflow.
Set the Shortest Released-Length Floor
Find the shortest released zone that the planned guard path could touch while still supporting the current center, connector, chin coverage, or lower contour. Treat it as a protected floor. Do not pull curly or crossing hair straight to create a longer reference.
The guard-size guide explains why nominal millimeters, numbers, and colors are system-specific. Even a documented setting cannot predict hair admission, release, overlap, density, or visible shape for every goatee.
Verify the Exact Trimmer and Regional Variant
Read the complete model and suffix from the tool or its official record. Confirm whether the attachment belongs to the active trimmer head, detail head, clipper head, multigroomer, or another system. Similar housings and family names can use different rails, combs, settings, chargers, and cleaning limits.
Use the current manufacturer manual or parts information. The beard trimmer buying guide provides a broader model, attachment, power, support, and seller checklist when the tool or guard identity cannot be established.
List Only Supported Guard Options
Create a short list from the exact manual: fixed beard combs, adjustable beard comb, precision comb, stubble comb, or other named attachment. Record the compatible head, mounting direction, available settings, and any restrictions.
Philips’ current MG3900 manual identifies specific beard-and-mustache guards and relates their printed values to remaining millimeters for the covered products. That evidence does not convert another brand’s guard number or establish compatibility with another Philips family.
Do Not Translate Numbers, Colors, or Shapes
A guard marked “2,” a dark comb, or an attachment with similar teeth can represent a different retained length or mounting system elsewhere. Adjustable wheels can also change the blade-to-comb relationship. Record the manufacturer-stated meaning for the exact assembly.
If a label is worn away, the guard came from a mixed drawer, or the official documentation does not identify it, set it aside. Do not run an unknown comb on the face to discover what it removes.
Inspect Every Guard Powered Off
Switch the tool off and disconnect charging power where required. Inspect all comb teeth, rails, clips, tabs, hinges, wheels, locks, and contact surfaces. Stop for cracks, spreading, distortion, missing teeth, sharp seams, contamination, or a setting that will not hold.
The loose-guard checks cover compatibility, seating, tab damage, tool-side mounts, and prohibited tape or wedge repairs. A guard that can move cannot provide a controlled length reference.
Inspect the Cutter, Housing, and Controls
Examine the cutter for bent, chipped, corroded, contaminated, or misaligned teeth. Check the housing, switch, adjustment mechanism, cord, charging parts, and battery condition. Stop for cracks, loose components, unstable controls, abnormal heat, swelling, or uncertain power status.
Guard selection cannot compensate for an equipment fault. Do not continue because the motor still runs or because the attachment appears to cover damaged teeth.
Seat the Guard Exactly as Documented
Install the verified attachment with the tool off, using the orientation and locking points shown in the manual. Inspect both sides. The guard should sit squarely and remain in the selected setting under the permitted light off-tool check.
Wahl’s official FAQ gives one brand-specific example of hooking and snapping a guide comb securely onto a supported clipper. Other systems slide, pivot, clip, or use captive adjustment. Do not force one mounting motion onto another design.
Compare Guard Geometry With the Goatee
Examine head width, tooth spacing, comb depth, leading edge, cutter setback, and the space needed to approach and lift away. Compare these dimensions visually with the outer chin, center, connectors, mouth corners, lower edge, and neck transition while the tool remains off.
A long guard may be protective in nominal length yet too broad for a narrow chin body. A precision comb may access a small area but still be too short for the protected floor. Suitability requires compatibility, retained-length evidence, hair admission, and bounded access together.
Separate Chin-Body and Mustache Length Decisions
The chin body may be intentionally longer than the mustache, while connectors can transition between them. One guard across every zone can erase that relationship. Record each retained floor separately before deciding whether any setting can be shared.
The beard length chart provides visual planning context, not a tool-independent output prediction. Use exact-model settings and local protected zones for the actual decision.
Choose the Longest Useful Verified Setting
Among compatible undamaged options, begin with the longest setting that can still admit the target hair while preserving the shortest floor. “Longest” is not enough if the comb never reaches the section or requires pressure that collects adjacent hair.
Philips support advises users of covered products to begin with a higher or maximum setting while becoming familiar with the tool. See the official Philips beard-trimming guidance. Treat this as a conservative model-scoped pattern, not a universal setting or direction.
Select One Outer Chin Test Zone
Choose a small fully visible outer chin area with clear root ownership and enough room to approach and lift away. Keep it outside the center, connector, mouth corner, shortest floor, lower edge, sparse zone, and untouched opposite-side reference.
Do not begin at the most visible center or at the side that already appears shorter. One low-consequence zone provides interpretable evidence about guard admission and released length without turning the test into a full trim.
Rehearse the Path With Power Off
Hold the assembled powered-off tool near the selected zone. Mark the approach, guard contact surface, travel, stop point, and lift-away direction. Confirm that the complete guard, fingers, mouth, connector, center, lower edge, and skin remain visible.
Reject a path that depends on stretching hair, pressing into skin, hiding the cutter, following a curve into another zone, or rocking the comb. A powered-off rehearsal cannot predict the cut, but it can expose poor geometry before hair is removed.
Run an Off-Face Equipment Check
After correct assembly and power preparation, switch the tool on away from hair if the manual permits. Listen and observe briefly. Stop for abnormal rattle, impact, surging, slowing, odor, smoke, unusual heat, vibration, or guard movement.
Switch off before touching, clearing, or adjusting any part. A normal off-face run only removes obvious equipment problems from the immediate plan; it does not prove suitability, comfort, safety, or performance on the goatee.
Make One Bounded Guarded Test
Use the exact-model technique and one selected outer chin zone. Keep the guard seated as designed, use light stable handling, and lift away at the mapped stop point. Do not add pressure, repeat the path, change direction, or sweep toward the center when little hair is removed.
This guide does not prescribe with-grain or against-grain use universally. Hair direction and manufacturer instructions vary. The purpose is to observe one guard and one zone, not to finish the goatee.
Switch Off and Clear the Attachment
Move the tool away and switch it off. Clear loose hair from the guard and cutter only as the instructions allow. Compacted clippings can block hair admission, change the next contact, or hide a damaged tooth.
Brush, rinse, dry, or lubricate only as documented. The cleaning and oiling guide explains why rinseable attachments, powered handles, cutter lubrication, and reassembly have separate model boundaries.
Recomb, Release, and Compare
Gently recomb the tested zone in its mapped direction, remove the comb, relax the mouth and jaw, and let the hair settle. Compare the zone with its pre-test record and the untouched side under the same light and posture.
Record which hair entered, which remained, whether the guard stayed seated, and whether the center, connectors, corners, lower edge, or shortest floor changed. Avoid conclusions such as perfect, safe, comfortable, or professional.
Change Only One Verified Variable
If no target hair was removed, first confirm that the guard is clear, correctly seated, and able to admit released hair. If a shorter supported setting is justified, change only that setting with power off and use a bounded adjacent area in the same outer zone.
Do not simultaneously shorten the setting, increase pressure, change direction, move to the center, and repeat several passes. Multiple changes destroy the evidence needed to understand the result.
Understand Why a Guard May Remove Nothing
The natural hair may be shorter than the cutting plane, curl or overlap may divert it, root direction may oppose the opening, the path may miss the target, or clippings may obstruct the comb. This does not automatically indicate low motor power or justify the shortest setting.
Switch off, inspect, clear, recomb, release, and reassess. If the geometry cannot admit the target without crossing protected hair, the guarded method is unsuitable for that zone.
Stop at Pulling or Unexpected Removal
Stop immediately for pulling, snagging, pinching, painful contact, bleeding, broken skin, unexpected shortening, lost visibility, guard movement, abnormal noise, odor, smoke, heat, slowing, or unstable power. Do not continue to even out an unplanned result.
Resolve equipment uncertainty away from the face. If the guard, cutter, mount, or power system cannot be verified, use manufacturer support or qualified service rather than another test.
Know When No Guard Is Suitable
Reject all available options when they are unsupported, damaged, loose, shorter than the protected floor, too broad for the retained shape, unable to admit the target, or dependent on pressure or tension. Also stop when the real task is an isolated end or precise outline.
“No suitable guard” is a valid outcome. It preserves the existing shape and information. Removing the guard and continuing freehand would be a new method requiring a new plan, exact-tool support, and separate stop conditions.
Create a Zone-Specific Record
Record the model, head, guard identity, documented setting, installation orientation, test zone, protected landmarks, shortest floor, hair-admission observation, released comparison, and stop conditions. Note whether the attachment was cleared before assessment.
Do not turn one outer-chin result into a formula for the center, mustache, connectors, lower edge, or every future session. Reverify the tool, guard, hair state, and boundaries whenever conditions change.
Goatee Guard Selection Checklist
- Preparation is complete and the released goatee is observable.
- The guarded task and protected features are written separately.
- Center, chin anchor, connectors, mouth corners, lower edge, and shortest floor are mapped.
- The complete tool, head, regional variant, and manual are verified.
- Only supported guards and settings are considered.
- Numbers, colors, and shapes are not translated across systems.
- Guard, cutter, housing, controls, and power parts pass inspection.
- The guard seats squarely with the tool powered off.
- Geometry fits one small outer chin zone without crossing boundaries.
- The longest useful verified setting is selected first.
- The path is rehearsed off and the tool is checked away from the face.
- One bounded test is cleared, recombed, released, and assessed before any change.
Frequently Asked Questions
What guard should I start with for a goatee?
Start with the longest verified compatible setting that can still admit the intended goatee section while preserving the shortest released zone. Test one small outer chin section first. A number, color, or nominal length from another trimmer does not establish the result on your tool.
Should the mustache and chin use the same guard?
Not automatically. Their retained lengths, growth directions, density, access, and attachment geometry can differ. Map the mustache, connectors, center, chin body, and lower edge as separate zones, then validate each guarded path without crossing a protected boundary.
Why does a long guard remove no goatee hair?
The released hair may be shorter than the cutting plane, may not enter the guard, or may be diverted by curl, overlap, direction, or compacted clippings. Switch off, clear and inspect the attachment, recomb and release the zone, then change only one verified setting if justified.
When is a guard unsuitable for a goatee?
Reject it when compatibility is unverified, it is damaged or loose, its geometry crosses the center, lip, connector, mouth corner, lower edge, or shortest floor, or it cannot admit the target hair without pressure or tension. A no-guard decision requires a separate method and plan.
Sources and Claim Boundary
- Philips MG3900 manual for covered-model beard-and-mustache guard identity, retained-length labels, maximum-setting familiarization, installation, movement, and cleaning.
- Philips beard-trimming support guidance for covered-product washing, drying, comb attachment, and longer-setting familiarization.
- Wahl official FAQ for a brand-specific compatible guide-comb seating example.
Claim boundary: This page provides generic, exact-model-bound goatee guard selection, protected-zone mapping, powered-off fit, longest-useful-setting, one outer-zone test, clearing, release, reassessment, and stop-decision guidance. It does not prescribe a universal guard number, millimeter setting, direction, pressure, speed, complete trim, exposed-blade outline, style redesign, symmetry correction, diagnosis, treatment, product rank, price, availability, hands-on test, comfort, safety, performance, or promised result.
