
Disclosure: This site may use affiliate links. Product specifications should be checked against manufacturer or retailer pages before purchase.
Direct Answer
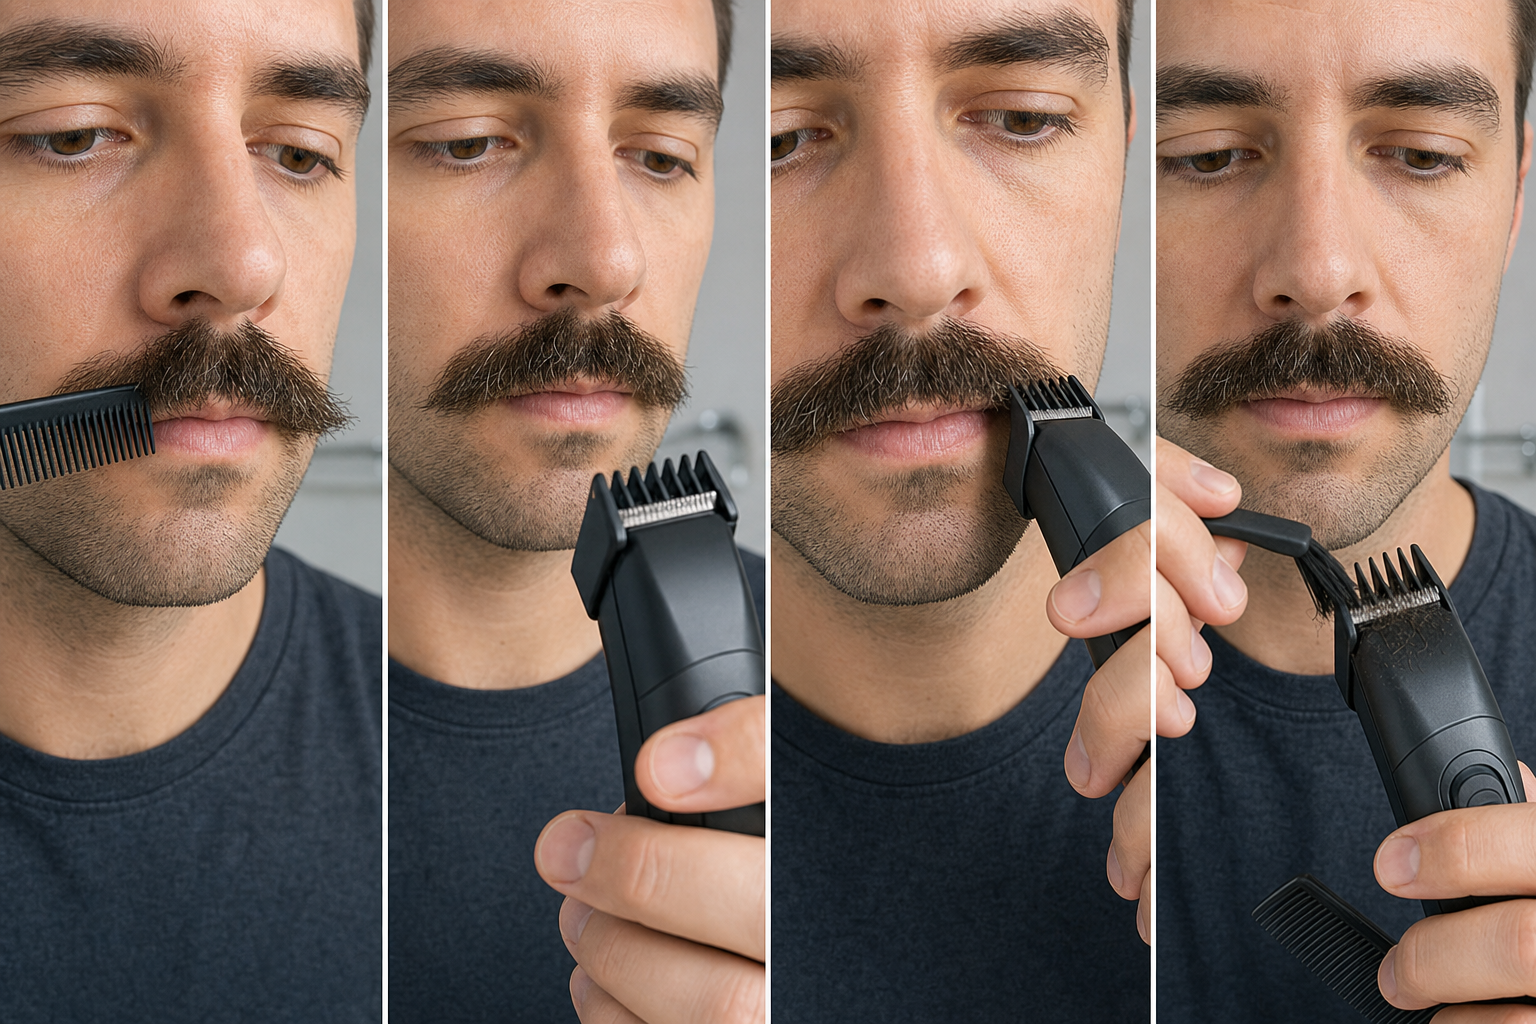
Direct answer: Trim a coarse mustache without forcing the tool by drying and naturally releasing the hair, mapping direction, protecting the center, lip, endpoints, and shortest useful zone, and isolating one small outer section. Verify the exact trimmer, longer guard, cutter condition, maintenance, and power. Make one short low-load pass, then switch off immediately if hair pulls, clear clippings, recomb, release, and reassess.
This workflow reduces avoidable load and creates clear stop points; it cannot promise a pull-free, comfortable, even, or specific result. “Coarse” is an observation about how mustache hair feels or behaves in this grooming task. It does not diagnose hair diameter, density, curl pattern, skin condition, or a tool fault.
Coarse Mustache Decision Table
| Observation | Question to check | Conservative response |
|---|---|---|
| Comb catches in one outer section | Are strands crossed, curled, or compressed? | Release and separate gently before choosing a tool path |
| Guard fills after a very short pass | Is the section too broad or are clippings blocking entry? | Switch off, clear approved parts, and reduce the target |
| Tool pulls immediately on clean released hair | Are guard, cutter, maintenance, power, and tool role verified? | Stop and troubleshoot away from the face |
| Hair cuts only while stretched | Does the test position differ from normal wear? | Release the hair and reject that path |
| Target reaches the lip, center, or endpoint | Has a length task become edge or style work? | Stop and plan the other intent separately |
Define Coarse Hair With Observable Words
Record what actually happens: a comb catches, individual strands feel resistant, hair springs outward after release, a guard stops admitting a small section, clippings bridge the teeth, or the cutter begins to pull. These observations can guide preparation and section size without claiming a biological category.
Do not assume that every dark, dense, gray, curly, wiry, or long mustache behaves the same way. Texture and direction can vary between the center, inner zones, outer zones, lower edge, and endpoints. Name the exact zone and behavior instead of applying one label to the complete mustache.
Keep This Intent Separate From Pulling Troubleshooting
This page owns mustache-specific preparation, protected landmarks, small-section admission, and pulling stop rules. The trimmer-pulling troubleshooting guide focuses more broadly on equipment, buildup, blade condition, lubrication, power, and replacement decisions.
Use both when needed, but do not continue cutting while diagnosing. A mustache can overload a suitable clean cutter through poor sectioning, and a correctly sectioned mustache can still reveal a tool problem. Stop the tool first, then separate hair-path checks from equipment checks.
Prepare the Mustache Before Judging Texture
Remove heavy styling residue and prepare the hair according to the exact tool’s wet or dry instructions. For a dry workflow, let the mustache dry fully and return to its ordinary worn state. Compression from sleep, a mask, a towel, wax, or repeated hand contact can make strands cross or clump.
The mustache preparation guide covers cleaning, drying, natural combing, boundary mapping, and equipment inspection. Repeat that baseline when the apparent coarse section changes after product removal or several minutes of release.
Comb in the Natural Direction and Release
Use a clean fine-tooth mustache comb with light contact. Wahl’s official trimmer instructions describe combing a mustache in the direction it grows so stray hair becomes visible. That supports observation and separation, not forceful detangling or an instruction to cut every visible end.
Remove the comb and let the hair settle before mapping a target. Do not hold a section stretched over the lip or pull it outward to make the teeth pass. A cut made under tension can return to an unexpected position after release.
Separate Crossed Hair Before Powered Work
Trace a catching strand toward its root zone with the tool off. A center hair may cross into an outer section, an outer hair may rest over the lip, and beard hair may enter a mustache connection from below. Gently separate only enough to identify ownership.
If a knot or crossed group cannot be released without force, keep the powered tool away from it. Cutting into an unidentified bundle can shorten several zones at once. Resolve it as a separate combing or visible-end decision rather than using the guard as a detangler.
Map Direction by Mustache Zone
Record the ordinary direction in the center, left and right inner zones, left and right outer zones, lower edge, endpoints, and any beard connections. Direction at the visible end may differ from the root direction that controls how a guard first meets the hair.
The mustache grain guide explains root-zone ownership and direction mapping. Use that map to choose a visible path; do not force every zone into one downward or outward position.
Protect the Center and Its Treatment
Identify whether the center is continuous, naturally divided, overlapping, or deliberately gapped. Keep it outside the first coarse-hair test. The center has high visual influence and hair from either side can cross it, making a small pulling correction turn into an unintended style change.
If the center itself is the concern, plan it separately with the mustache middle-gap guide. Do not widen a gap or cut crossing center hair while testing cutter load in an outer zone.
Protect the Upper Lip and Lower Edge
Keep the mouth relaxed and mark the current lower mustache edge. Do not use the moving lip as a cutting rail, press the guard into soft tissue, or stretch the lip to increase clearance. The complete cutter path and lift-away point must remain visible.
A length correction inside the mustache body is different from edge cleanup. If the task becomes removing isolated hair below an established boundary, finish the current assessment and use the mustache edge cleanup guide as a separate workflow.
Protect Endpoints and Beard Connections
At each mouth corner, identify whether the mustache ends above the corner, extends beyond it, turns downward, or connects to beard or goatee hair. Hair from a connection can enter the guard from another direction and increase load unexpectedly.
Keep endpoints and connections outside the first test unless one is the explicit, fully visible target. Do not shorten the opposite endpoint automatically after one coarse section is trimmed. Endpoint balance and cutter-load control are different decisions.
Set the Shortest Useful Length Floor
Identify the shortest released zone that still supports the current mustache silhouette and coverage. Treat it as a protected floor. A guard number is not a universal measurement, and a setting that appears long enough may still shorten that reference on a different model or attachment.
The mustache guard guide explains exact-model verification and longer-setting-first selection. If the verified guard cannot preserve the shortest useful zone, reject the setup before it touches hair.
Choose One Small Outer Target
Select a stable overlong or heavy section that remains visible after preparation, gentle combing, and release. Prefer an outer zone whose root ownership, lower edge, neighboring hair, and lift-away path can all be seen. Keep the center, sparse or shortest zone, and opposite side untouched.
Do not begin with the broadest or densest part merely because it seems difficult. The first test should admit little hair and preserve a clear reference. If no small stable target can be named, a no-cut result is appropriate.
Verify the Tool Category and Exact Model
Confirm whether the device is a beard trimmer, hair clipper, multi-groomer, detail trimmer, or another cutter. A tool can power on but still have a guard range, blade width, tooth pattern, or intended use that does not fit the small mustache target.
Read the complete model and regional suffix, then locate the current manual or manufacturer support page. Do not transfer guard dimensions, wet-use status, cutter maintenance, charger compatibility, or attachment roles from a similar body or family name.
Inspect the Guard and Cutter With Power Off
Disconnect charging power where instructed. Inspect cutter teeth, stationary teeth, guard teeth, rails, tabs, locks, adjustment controls, housing, cable, connector, and battery condition. Confirm that the selected guard is identified for the model and seats evenly without rocking or releasing.
Stop for bent, chipped, corroded, misaligned, loose, cracked, contaminated, or unidentified parts. A visually similar cross-model guard can change retained length and hair admission. Do not stabilize a loose attachment with a finger while the cutter moves.
Clear Hair and Follow Exact Maintenance Instructions
Compacted hair can obstruct guard slots or the cutter. Brush, rinse, dry, or lubricate only as the exact instructions permit. “Washable head,” “rinseable attachment,” “wet and dry,” and “waterproof” are different statements; a rinseable part does not make the powered handle safe around water.
Wahl’s current trimmer-care guidance discusses cleaning, oiling, blade wear, and pulling for covered Wahl tools. Treat it as a troubleshooting example, not a universal oil amount, schedule, wash method, blade-life claim, or guarantee that maintenance solves every pull. The cleaning and oiling guide keeps model boundaries explicit.
Check Power Before Approaching the Face
Charge, install batteries, or connect power only as documented. A weak or unstable power state may complicate troubleshooting, but a full indicator does not prove cutter condition, battery health, or suitability for coarse mustache hair.
Switch on away from hair and listen for a stable normal sound. Stop for abnormal rattle, impact, surging, slowing, odor, smoke, unusual heat, or attachment movement. Do not substitute a charger because its connector fits or use corded equipment near water contrary to instructions.
Rehearse the Guard Path With Power Off
Hold the switched-off guarded trimmer near the target in the orientation supported by the manual. Mark the start point, end point, contact surface, protected side, and lift-away direction. Check that the lip, center, endpoint, neighboring hair, and fingers remain outside the path.
If the target must be squeezed, twisted, lifted tightly, or hidden behind the guard to fit, reduce the section or reject the setup. A powered-off rehearsal cannot prove cutting behavior, but it can expose an overloaded or poorly visible path.
Do Not Use Tension to Make Hair Feed
Use the comb only to separate and observe, then remove it before the released-position decision. Do not pull coarse strands straight, clamp them between fingers, or push them against the lip so the guard can pass. Tension changes apparent length, direction, and final position.
If the section will enter only while stretched, powered trimming is not a controlled solution for that target. Stop and choose a different section, compatible tool, or separate visible-end method rather than forcing the same path.
Make One Short Low-Load Guarded Pass
Start with the verified longer setting and one small outer target. Use the exact manual’s supported contact and direction, light stable handling, and one short pass. Lift away at the mapped stop point. Do not scoop toward the lip, rock the guard, press harder, or immediately repeat the path.
An older Wahl manual on the manufacturer’s official document route tells users not to force its blade through hair. That supports a stop-and-reassess principle for the covered tool; it does not establish speed, pressure, direction, capacity, or compatibility for another model.
Stop at the First Pull
Switch off immediately if hair catches, the tool stalls, the guard jumps, the section moves unexpectedly, or the user feels a pull. Do not finish the stroke, press harder, change angle while powered, or run repeatedly over trapped hair.
Move the cutter away from the lip and support the hair before withdrawing it. Remove a guard only after shutdown and according to the manual. Confirm that no strand remains wrapped around a moving part. Stopping is the correct control response, not a failed trim.
Troubleshoot Away From the Mustache
Check one variable at a time: crossed hair, section size, direction, guard blockage, guard identity and lock, cutter cleanliness, tooth damage, alignment, model-required lubrication, power state, and whether the tool category fits the target. Record the finding before another test.
Do not assume a closer guard, higher setting, extra pressure, or repeated contact is the answer. If pulling recurs after exact maintenance and setup checks, stop using that arrangement and use the manufacturer’s support or a qualified service route where appropriate.
Clear Clippings After Every Test
Loose coarse clippings can bridge guard teeth, collect in the cutter, or hold uncut strands away from their released position. Switch off, move away from the face, remove only approved attachments, and clear them with the documented brush or rinse method.
Do not tap a powered head against a sink or counter. Dry every rinsed component as instructed before reassembly. A clear guard improves observation, but it does not authorize a larger section or another pass without release and reassessment.
Recomb, Release, and Check Three Views
Gently recomb in the natural direction, remove the comb, and let the mustache settle. Check the front for center and lower-edge continuity, then each three-quarter view for outer projection, endpoints, and connections. Return to ordinary viewing distance before deciding.
If the target no longer projects, stop. If the center, lip edge, endpoint, or neighboring coverage changed, stop and remap. The mustache touch-up guide limits maintenance to one clearly owned target rather than turning a test into a full trim.
Use One Variable and a Strict Correction Budget
Allow one initial pass, one complete clipping-clearance and release cycle, and at most one later justified correction on the same target. Keep guard, direction, tool, side, and protected landmarks unchanged while evaluating the first result.
The mustache mistake guide explains why changing several variables together destroys useful feedback. If the task expands to both sides, several directions, a new guard, center work, or edge redesign, stop and plan a complete session.
Know When Scissors Are a Separate Workflow
Small grooming scissors may be considered when one fully visible released end cannot enter a guard without tension or powered trimming continues to pull after correct inspection and maintenance. This is a method boundary, not a claim that scissors are safer, easier, or suitable for every person.
The scissors versus clippers guide separates isolated-end work from broader machine passes. Use adequate light, keep the lip and hidden hair outside the blades, and do not combine a new scissor technique with an unresolved powered-tool problem.
Do Not Diagnose Texture or Skin
Coarse feel, curl, gray hair, density, direction, dryness, and resistance can have different meanings. This page does not measure hair diameter, identify a medical cause, recommend growth or softening treatment, or predict how hair will change.
Do not apply an unfamiliar oil, serum, conditioner, medication, or other product immediately before trimming to make the cutter pass. Residue can alter guard admission and observation. Keep grooming workflow separate from health or treatment questions.
Equipment and Skin Stop Conditions
Stop for pulling, snagging, stalling, abnormal noise, odor, smoke, heat, impact, guard movement, damaged teeth, loose parts, cracked housing, damaged power components, uncertain wet-use status, or a path that cannot remain visible and clear of the lip.
Also stop over painful, broken, bleeding, swollen, infected-looking, or actively irritated skin. Seek appropriate professional guidance when symptoms or hair changes are sudden, persistent, severe, or concerning. This page does not diagnose or treat them.
Coarse Mustache Checklist
- Describe coarse-hair behavior with observable words.
- Prepare, dry when required, gently comb, and fully release the mustache.
- Separate crossing hair and map direction by root zone.
- Protect the center, lip, endpoints, connections, and shortest useful zone.
- Choose one small visible outer target and leave the other side untouched.
- Verify the exact tool, longer guard, cutter, maintenance, and power.
- Rehearse the complete path with power off and no hair tension.
- Make one short low-load guarded pass and stop at the first pull.
- Clear clippings away from the face, then recomb and release.
- Use one variable and a strict correction budget.
Frequently Asked Questions
Why does a trimmer pull coarse mustache hair?
Pulling can involve tangled or crossed hair, an overloaded guard, compacted clippings, an incompatible or loose attachment, a dirty or damaged cutter, missing model-required lubrication, weak power, or an unsuitable path. Switch off at the first pull and inspect away from the face.
Should I press harder on coarse mustache hair?
No. Pressure can compress the upper lip and push more hair into the cutter without correcting the cause. Stop and check section size, direction, guard loading, clipping buildup, attachment fit, cutter condition, power, and the exact model’s maintenance instructions.
Should a coarse mustache be wet or dry before trimming?
Follow the exact trimmer instructions. For a dry workflow, let the mustache dry and return to its natural released position before judging length. Wet hair can sit differently, and a rinseable attachment does not prove that the powered handle may contact water.
When should I stop using a trimmer on a coarse mustache?
Stop for pulling, stalling, damaged teeth, a loose guard, abnormal noise, heat, odor, smoke, uncertain model identity, or a path that approaches the lip or cannot remain visible. Also stop over painful, broken, bleeding, swollen, or actively irritated skin.
Sources and Claim Boundary
- Wahl trimmer instructions for natural-direction mustache combing and visible stray-hair observation on the covered product.
- Wahl trimmer-care guidance for covered-tool cleaning, oiling, wear, and pulling context.
- Wahl manufacturer-hosted trimmer manual for the covered tool’s do-not-force instruction and maintenance context.
Claim boundary: This page provides a generic coarse-mustache preparation, direction mapping, protected-zone, low-load test, pulling-stop, and reassessment workflow. It does not define a biological hair type; diagnose hair, skin, or tool faults; prescribe a universal guard, direction, pressure, speed, pass count, wet-use method, oil amount, schedule, or replacement interval; rank products; report hands-on testing; promise comfort, no pulling, evenness, safety, power, recovery, or a result; or replace exact-model instructions and qualified care.
