
Disclosure: This site may use affiliate links. Product specifications should be checked against manufacturer or retailer pages before purchase.
Direct Answer
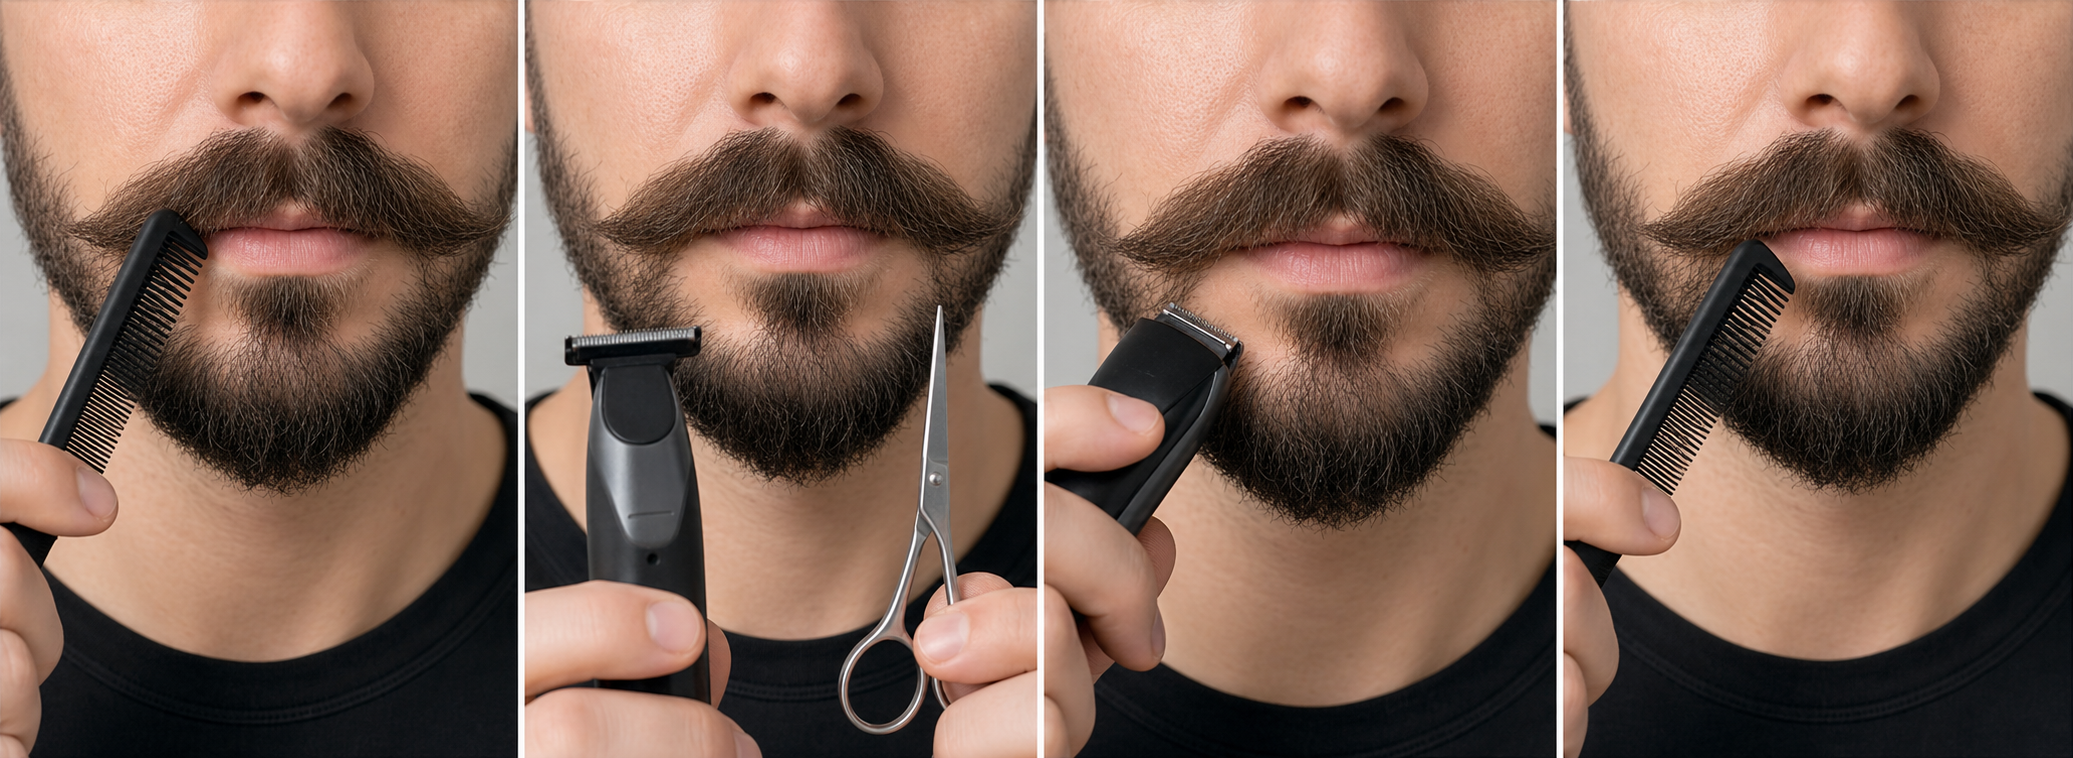
Direct answer: Clean up mustache edges by drying and releasing the hair, identifying one existing upper boundary, lower lip edge, endpoint, or connection, and protecting the center, base length, corners, and bulk. Remove only isolated hair clearly outside that recorded line, then switch off, clear clippings, recomb, release, and reassess before making any second correction.
Edge cleanup is boundary restoration, not a full trim or a new style. If the line cannot be found in the ordinary relaxed state, if several zones need shortening, or if the center and endpoints need redesign, stop and plan those as separate tasks.
Mustache Edge Decision Table
| Observation | Edge-cleanup decision | Protected structure |
|---|---|---|
| One released hair sits below a stable lip edge | Trace its origin and isolate only that visible end | Base length and neighboring coverage |
| A few hairs grow above an established outer boundary | Restore only the previously recorded line | Upper density and center treatment |
| An endpoint changes with expression | Release and reassess; do not cut yet | Mouth corner and beard connection |
| The whole lower edge seems too long | Stop edge work and plan a separate length session | Complete mustache base length |
| The center, both corners, and lip line all need change | Stop maintenance and map a deliberate redesign | All established boundaries |
Define an Edge Before Choosing a Tool
A mustache edge is the boundary between retained hair and the adjacent clear area. Depending on the established style, the relevant boundary may be the upper outer line, the lower line above the lip, one endpoint near a mouth corner, or a mustache-to-beard connection.
Write a narrow target such as “remove isolated hair below the right outer lip edge.” Do not begin with “make the mustache cleaner.” That broad instruction can quietly authorize bulk reduction, center work, endpoint shortening, lip-line redesign, and symmetry correction at the same time.
Keep Edge Cleanup Separate From a Full Trim
A full trim changes length or bulk across one or more zones. Edge cleanup removes only hair that is clearly outside a known retained boundary. The tool may be similar, but the target, path, and stop rule are different.
The mustache touch-up guide covers one bounded maintenance correction inside an established shape. Use this page only when the target is the visible border itself. If the mustache body needs reduction, return to preparation, guard choice, grain, and length planning.
Start With a Dry, Naturally Released Baseline
Follow the exact tool’s approved wet or dry instructions, but judge the outline after the mustache has returned to its ordinary worn state. Remove heavy styling product, release compression, and let damp or stretched hair settle before mapping a line.
The mustache preparation guide owns cleaning, drying, natural combing, boundary mapping, and tool inspection. Repeat that preparation when the current position cannot be compared reliably with the previous outline.
Comb in the Natural Direction and Release
Use a clean fine-tooth mustache comb with light contact. Comb from the root zone toward the ordinary resting direction, then remove the comb and wait for the hair to settle. Do not hold the hair under tension while deciding where its natural edge sits.
Wahl’s official trimmer instructions tell users to comb the mustache in the direction it grows so stray hair becomes visible. That supports a released observation step; it does not define one universal outline for every face or style.
Map Four Different Boundary Types
Record the center treatment, upper outer boundary, lower lip edge, and outer endpoints or connections separately. A mustache can intentionally keep a soft upper line, a continuous center, a curved lower edge, and connected corners. One border should not be inferred from another.
Take a neutral front view and two slight three-quarter views in even light. Keep the mouth closed and relaxed. A smile, pursed lips, raised chin, or close phone lens can move the apparent edge enough to create a false target.
Protect the Center Treatment
Identify whether the center is continuous, naturally divided, overlapping, or deliberately gapped. Keep it outside the first edge-cleanup pass. The center has high visual influence and a small change can turn maintenance into a style redesign.
The mustache middle-gap guide treats center decisions independently. Do not create or widen a gap while cleaning the upper or lower outer edge unless a separate center plan has already been reviewed.
Protect the Base Length and Bulk
The base length is the shortest useful released layer that supports coverage and the current silhouette. Bulk is the density within the retained mustache body. Neither should be reduced merely because one end crosses the boundary.
Trace every projecting hair toward its root zone. If the visible end originates inside the retained body, isolate only the excess beyond the line. Do not run a broad guard across the whole mustache to solve a local edge target.
Protect Mouth Corners and Connections
At each mouth corner, identify whether the mustache ends above the corner, extends beyond it, turns downward, or connects to a beard or goatee. Mark where ownership changes. Hair from the adjacent beard can cross the mustache edge without belonging to it.
The mustache grain guide helps trace root-zone ownership and released direction. If the current endpoint or connection is unclear, preserve both zones and defer the cut.
Do Not Use the Moving Lip as a Hard Ruler
The lip changes shape with speech, expression, and tension. Observe clearance with the face relaxed and compare several moments rather than stretching the lip into a cutting rail. Hair resting on the lip may originate above, cross from the center, or spring back after release.
There is no universal amount of visible skin that every mustache should expose. Restore the existing recorded line. If the desired clearance itself is changing, that is an outline-design decision rather than routine cleanup.
Trace a Projecting Hair to Its Source
Support the hair near its middle with the tool off, follow it toward the root, release it, and observe where the end returns. Repeat once after gentle combing. A stable target should return outside the same edge without tension.
If the hair disappears into the retained body, changes sides, or belongs to a connection, leave it. Cutting a crossing strand at the border can create a short new end that projects later from a different position.
Choose One Edge Segment for the Session
Start with one small segment: the right outer lower edge, one upper outer section, one endpoint, or one clear-skin outgrowth area. Keep all other boundaries as references. Do not move automatically from the right side to the left or from the lower edge to the center.
A one-segment budget creates usable feedback. If the first correction changes how neighboring hair settles, the untouched sections show whether another target still exists after release.
Keep the Better Side as an Untouched Reference
When one side still matches the established outline, leave it untouched. Compare matched landmarks such as center distance, lip-edge endpoint, mouth corner, and connection rather than trying to make every hair position identical.
The mustache balance guide explains how posture, density, direction, and natural asymmetry affect comparison. Edge cleanup should preserve the approved relationship, not force mathematical mirroring.
Choose Scissors or a Detail Trimmer by Target
Small grooming scissors may suit one fully visible released end when the complete blade path and protected hair can be seen. A supported detail head may suit isolated growth on clear skin outside a known line. A guard is generally a bulk-length control, not an automatic edge tool.
The scissors-versus-clippers guide separates isolated-end work from broader machine passes. The exact model manual, tool condition, visibility, and target ownership still control the decision.
Verify the Exact Trimmer, Head, and Manual
Confirm the complete model and regional suffix, then identify the installed head, guard status, intended use, wet-use limits, contact orientation, and cleaning method. Similar-looking detail heads can differ in width, exposed teeth, mounting, and instructions.
Philips’ current beard-trimming support guidance distinguishes guarded length work from use without a comb around an optional lower mustache line. Treat that as covered-product guidance, not permission to use every trimmer bare or to create a universal one-millimeter gap.
Inspect Equipment With Power Disconnected
Clear debris as the manual permits and inspect cutter teeth, foil, scissors, pivot, attachment tabs, housing, controls, cable, and charger. Confirm that the selected head seats fully and cannot rock or release during the intended path.
Switch on away from hair and stop for a new rattle, impact, uneven speed, heat, odor, smoke, slowing, or attachment movement. The cleaning and oiling guide provides general maintenance boundaries; oil only when the exact head instructions call for it.
Rehearse the Path With the Tool Off
Hold the powered-off trimmer or closed scissors near, but not against, the mapped segment. Identify the start point, end point, approach angle, protected side, and lift-away direction. Check that fingers, comb teeth, lip, and neighboring hair stay outside the cutter path.
If the complete path cannot be seen, do not perform it. Reposition light and mirror, shorten the target segment, or defer the work rather than cutting behind hair or around a hidden corner.
Clean an Upper Edge Conservatively
Begin only where the established upper boundary is clear and isolated hair sits above it. Approach in short visible sections using the exact manual’s supported orientation. Lift away before the line becomes soft near the center or a connection.
Do not lower the complete upper line because one side looks denser or because a sharp line seems easier to reproduce. A soft or naturally irregular retained boundary can be intentional. Maintenance restores the record rather than replacing it with a new geometric line.
Clean the Lower Lip Edge Without Resetting Length
With the face relaxed, identify hair that remains below the recorded lower edge after combing and release. Trace its origin and isolate only the excess. Keep the cutter or scissors away from the lip and from neighboring base-length hair.
Do not sweep across the whole lower edge after one isolated correction. Philips’ official MG3900 user manual provides covered-model attachment and movement instructions; it does not establish one transferable path for every tool or mustache.
Handle Endpoints as Separate Targets
An endpoint is where the retained mustache intentionally stops or changes ownership. Confirm it with the mouth relaxed and from a slight three-quarter view. One endpoint may curve, taper, connect, or extend differently because of the chosen style and natural growth.
Remove only stable outgrowth beyond the recorded endpoint. Do not shorten the opposite side automatically. If both endpoints need repositioning, stop edge maintenance and plan a balance or style session with matched landmarks.
Keep Clear-Skin Cleanup Outside the Mustache Body
When isolated growth appears on clear skin above or beside a stable border, mark the retained edge first. Use the verified tool only in the clear area and lift away before reaching dense hair. Keep the path visible from start to finish.
Do not repeatedly approach the same skin area in search of a closer result. This page does not prescribe pressure, pass count, or skin preparation. Exact equipment instructions and current skin condition control whether the task should proceed.
Make One Bounded Correction
Remove the smallest amount needed to restore the known segment, then stop the tool. A bounded correction has one target, one supported method, one protected reference, and one lift-away point. It does not continue simply because more hair becomes noticeable under close inspection.
The mustache mistake guide explains why changing direction, pressure, tool, setting, side, and target together destroys useful feedback. Preserve those variables until the complete release check.
Clear Clippings Before Evaluating the Edge
Switch off and set the tool away. Clear loose cut hair from the face, mustache, comb, and non-powered attachment according to the manual. Clippings can stick below the edge or hold retained hair outward, making the line appear unfinished.
Do not tap a powered head against a sink or hard surface. Follow the exact device instructions for removing, brushing, rinsing, drying, and storing attachments, and do not expose a non-washable component to water.
Recomb, Release, and Check Three Views
Gently recomb in the natural direction, remove the comb, and let the mustache settle. Check the front for center and lip-edge continuity, then each three-quarter view for endpoints and connections. Use ordinary viewing distance as well as a close inspection.
If the edge looks different after release, do not correct it immediately. Record the changed position and wait for the hair to return to its normal state. A line that exists only under tension is not a stable maintenance reference.
Use a One-Correction Review Record
Record the date, dry baseline, target segment, tool and head identity, protected boundaries, one correction, and released result. A simple photo set can help only when posture, expression, light, and distance are comparable.
The record prevents the next session from relying on memory or a guard number alone. It also shows whether the task repeatedly expands into length or style work, which is a reason to redesign the workflow rather than keep trimming locally.
Know When Cleanup Becomes Redesign
Stop edge cleanup when the center treatment, overall lip clearance, both endpoints, upper boundary, or connection pattern needs change. Those decisions interact and require a complete style map rather than several opportunistic corrections.
Also stop when the mustache body needs shorter length or lower bulk. Return to the mustache guard guide and the relevant direction or balance workflow instead of extending a bare-edge pass into retained hair.
Do Not Diagnose Skin During Edge Work
Redness, bumps, flaking, pain, swelling, or broken skin can have different causes. Do not shave closer, change the boundary, or apply an unverified product to diagnose or treat the appearance during a cosmetic cleanup session.
Pause powered or scissor work over painful, bleeding, swollen, or actively irritated skin. Seek appropriate professional guidance when symptoms are persistent, severe, or concerning. This page defines a grooming boundary and does not provide medical diagnosis or treatment.
Stop Conditions
Stop for damaged teeth or blades, loose parts, uncertain model identity, unsupported wet use, pulling, heat, odor, smoke, abnormal sound, slowing, electrical damage, unexpected movement, or loss of visibility. Also stop before contacting the lip or broken skin.
Stop when the old boundary cannot be traced, the target changes after release, the path reaches the center or connection, the base length would be shortened, the untouched reference has been altered, or every correction creates a new target.
Mustache Edge Cleanup Checklist
- Prepare, dry, gently comb, and fully release the mustache.
- Name one existing upper, lower, endpoint, or connection segment.
- Protect the center, base length, bulk, corners, and reference side.
- Trace projecting hair to its source before calling it edge growth.
- Verify the exact model, head, manual, condition, and supported use.
- Choose scissors or a detail head according to the isolated target.
- Rehearse the visible start, stop, and lift-away path with power off.
- Make one bounded correction outside the retained boundary.
- Switch off, clear clippings, recomb, release, and check three views.
- Stop when the known line is restored or the task becomes redesign.
Frequently Asked Questions
What counts as a mustache edge cleanup?
An edge cleanup removes isolated hair that sits clearly outside an already approved upper boundary, lower lip edge, endpoint, or connection. It preserves the mustache’s base length, center treatment, bulk, corners, and overall style instead of creating a new outline.
Should I use scissors or a trimmer on a mustache edge?
Use the exact model manual and the target’s ownership to decide. Small grooming scissors may suit one visible released end, while a supported detail head may suit isolated growth on clear skin. Do not use either until the boundary, tool condition, and stop point are verified.
How much space should I leave above the upper lip?
There is no universal clearance. Restore the lip edge already recorded for the established style, judged with the face relaxed and the mustache dry and released. If the prior line cannot be found consistently, stop and plan a separate outline decision.
When should I stop cleaning a mustache edge?
Stop when the known boundary is visible again, the reference becomes uncertain, the path approaches the center or a connection, or another length or style change seems necessary. Also stop for damaged equipment, pulling, heat, broken skin, or unexpected movement.
Sources and Claim Boundary
- Wahl trimmer instructions for combing a mustache in its natural growth direction and covered-model outline guidance.
- Philips beard-trimming support guidance for covered-product comb, bare-cutter, and optional lower mustache-line distinctions.
- Philips MG3900 user manual for covered-model attachment roles, movement, shutdown, and cleaning instructions.
Claim boundary: This page provides a generic workflow for restoring one already established mustache boundary. It does not prescribe a universal center, upper line, lip clearance, endpoint, tool, head, direction, pressure, pass count, wet-use method, schedule, or style; report hands-on testing; diagnose skin or hair conditions; promise safety, comfort, symmetry, performance, recovery, or a result; or replace the exact model manual and current equipment checks.
