
Disclosure: This site may use affiliate links. Product specifications should be checked against manufacturer or retailer pages before purchase.
Direct Answer
Direct answer: Avoid uneven stubble by trimming clean, fully dry hair with the correct guard locked in place, starting longer than the target, mapping each area’s growth direction, keeping the comb flat, and using light overlapping passes. Clear packed hair and compare in even light before repeating a pass or changing the setting. Stop if the tool, guard, or blade is damaged.
Most stubble mistakes come from process rather than a single wrong millimeter setting. A tilted guard, wet hair, changing growth direction, accumulated clippings, hard pressure, poor lighting, or repeated corrections can all make a nominally simple short trim look uneven. Use the exact model manual as the operating authority and treat each change as a controlled test.
Stubble Mistake Diagnosis Table
| Visible problem | Likely process cause | First correction |
|---|---|---|
| Random long hairs | Mixed growth direction, wet hair, or packed guard | Dry, remap, clear the comb, and use an approved direction |
| One short stripe | Hard pressure, tilted guard, or repeated pass | Stop cutting that stripe and evaluate surrounding length |
| Different left-right appearance | Lighting, density, guard seating, or unequal pass sequence | Use matched zones, one setting, and even light |
| Setting seems inconsistent | Loose attachment, moving dial, debris, or incorrect comb | Switch off and verify model, fit, lock, and condition |
| Pulling or heat | Dirty or damaged cutter, wrong direction, or tool fault | Stop, clean and inspect according to the manual |
| Result keeps getting shorter | Changing settings before clearing and comparing | Return to a longer verified setting and preserve correction room |
Philips’ official uneven-trimming troubleshooting identifies incorrectly fitted attachments, excessive pressure, one-direction movement, wet hair, the wrong attachment, and an unsuitable length setting as common causes. The Philips groomer manual adds starting with the maximum guard, using smooth gentle movement, keeping the guard surface in contact, and removing accumulated hair. Philips’ OneBlade instructions similarly require a fully seated comb, clean dry skin, flat guard contact, multiple directions when needed, and cleaning after use. These sources illustrate common controls; your exact model instructions remain controlling.
Mistake 1: Trimming Damp or Product-Heavy Stubble
Wet short hair can lie against the skin, group into small sections, and enter a guard differently from dry hair. Heavy balm, oil, wax, sunscreen, or cleanser residue can also change how the comb moves and how loose hair collects. Unless the exact tool directs a wet workflow, prepare for a normal dry trim by washing only when needed and allowing both beard and skin to dry fully.
Do not bring a corded or dry-use handle near water. “Washable attachment,” “rinseable head,” “wet and dry,” and “waterproof” are different claims. Read the operating and cleaning sections of the manual separately.
The stubble preparation guide covers drying, lighting, combing, tool inspection, and a longer test setting. If the beard still feels cool, clumped, or slick after preparation, wait rather than using extra pressure to force it through the guard.
Mistake 2: Using an Unverified or Poorly Seated Guard
Guard numbers and colors are not universal. Identify the full model and the documented remaining length for the exact comb or dial position. A similar-looking attachment may be the wrong width, rail shape, latch position, or base height even when it can be pushed onto the cutter.
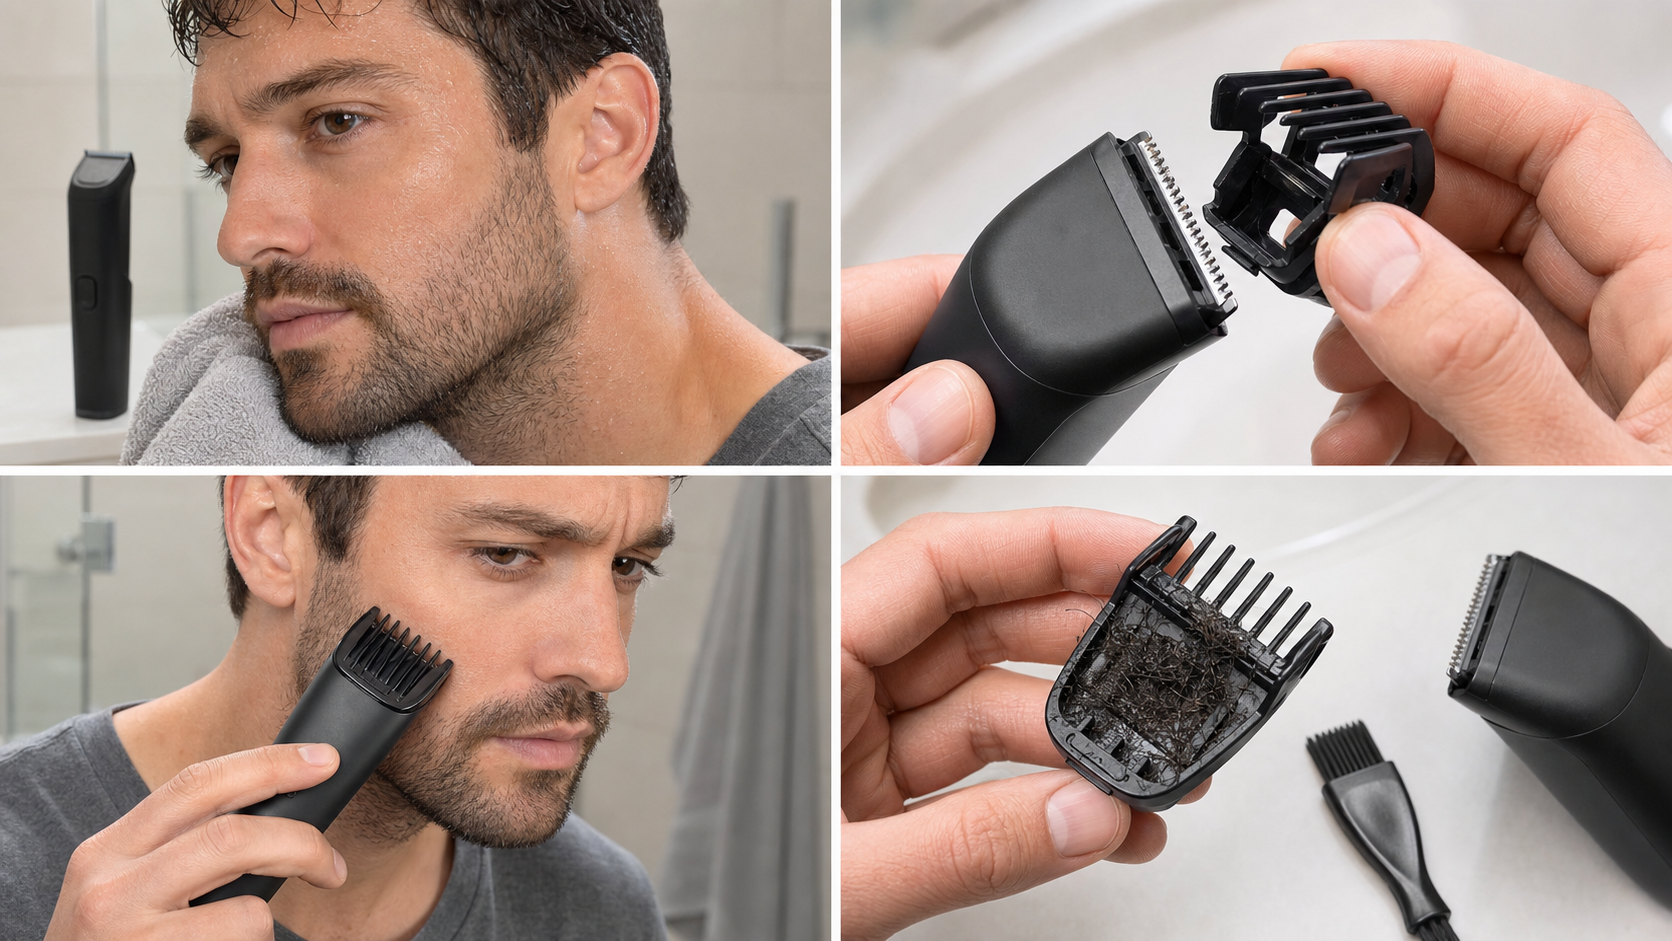
Switch the trimmer off before changing attachments. Inspect the guard for cracks, bent teeth, worn tabs, debris, or an uneven base. Fit it in the documented direction and confirm that both sides sit level. Move the dial or slider through its allowed range while the tool is off, then return it to the longer starting position.
If the guard rocks, lifts, releases, or changes setting, do not hold it in place with a finger or tape. Use the loose guard checklist to verify fit, latch condition, cleaning, and replacement boundaries.
Mistake 3: Starting at the Final Short Setting
A short target does not require starting with the shortest available attachment. Begin longer than the planned result, make one test pass, remove loose hair, and inspect before reducing one documented step. This is especially important with a new tool, replacement blade, unfamiliar guard, or beard that has grown beyond its normal maintenance length.
The stubble guard selection workflow explains how to translate a target into model-specific millimeters. Style labels such as light, designer, or heavy stubble are not standardized lengths, and the same measurement can look different with hair color, density, diameter, and skin contrast.
Record the model, guard, millimeter setting, and hair condition after a successful trim. That record is more repeatable than remembering a generic guard number. Re-test after changing the blade, comb, or tool.
Mistake 4: Pressing Harder to Catch Missed Hair
Hard pressure can compress hair, tilt a guard, push flexible teeth closer to the skin, or move an adjustable setting. It can also make the tool harder to guide around cheek and jaw curves. Keep the intended guard surface in contact and let the cutting system work with light, steady pressure.
If hairs remain, switch off and identify why. The local grain may change, the guard may be packed, the hair may be damp, the cutter may need model-approved cleaning, or the selected attachment may not match the area. Solve the cause instead of pressing harder.
Stop for pulling, rattling, stalling, movement at the cutter, unusual smell, or unexpected heat. The trimmer-pulling guide provides a structured inspection sequence without treating pressure as a repair.
Mistake 5: Moving in One Direction Across the Whole Beard
Facial hair does not share one grain direction. Cheek hair may grow downward, jaw hair may angle back, chin hair may project outward, and neck hair may grow upward or form a swirl. Map each zone before switching on.
A with-the-grain pass can reveal direction or make a conservative first reduction, while many guarded tools instruct an against-growth finishing pass with the comb flat. The grain-direction guide explains how to separate those roles and handle transitions.
Do not assume that “against the grain” always means moving upward. Against local upward-growing neck hair may require a downward pass. Use smooth, controlled movements in the directions allowed by the exact model manual.
Mistake 6: Letting Hair Pack the Guard
Short clippings can collect between comb teeth, around the cutter, or inside a chamber. Packed hair can keep new hairs from entering the cutting path consistently. Check the guard during the trim rather than waiting until the entire face has been covered.
Switch the tool off before removing an attachment or brushing near the cutter. Clear hair using only the method and tool specified by the manufacturer. Rinse components only when the exact instructions permit it, and dry approved rinsed parts fully before reassembly.
Do not tap a delicate blade against a hard sink or counter. Do not insert pins, metal tools, or liquid into a motor opening. If normal cleaning does not restore operation, use the manufacturer service route.
Mistake 7: Repeating Passes Before Evaluating
Loose clippings, compressed hair, close mirror lighting, and shadows can make a completed strip look unfinished. After a controlled pass, switch off, brush away hair from the face and guard, wait for the stubble to settle, and compare in both normal room light and close task light.
There is no universal pass count. Use slight overlap to cover a zone, but do not automatically repeat every strip. Dense or dark patches can look longer even when the hairs have been cut to the same nominal setting.
If one patch is already shorter, stop cutting it. Blend only truly longer surrounding hair with the longer safe setting, or allow the area to grow before the next complete trim. Repeatedly lowering the whole beard to chase one stripe removes correction room.
Mistake 8: Correcting Left and Right Sides Separately
Finishing one full side before starting the other can produce different pass counts, hand angles, pressure, and lighting. Divide the face into matched zones and alternate sides: upper cheeks, lower cheeks, sideburn transitions, jaw sections, chin edges, and neck.
Use one verified setting for the same target length. Confirm the guard remains seated before each side and avoid changing the dial because one side appears darker. The left-right stubble workflow explains matched checkpoints and conservative corrections.
Natural anatomy and density may remain asymmetric. The goal is a consistent process and controlled length, not forcing both sides to have identical hair count, color, or shadow.
Mistake 9: Using the Bare Blade for Length Correction
A bare cutting element can remove every hair it touches. Use it only for the contouring or close-trim task documented by the exact tool. It is not a substitute for an unidentified guard or a quick way to correct an uneven guarded area.
When defining a neckline, cheek line, or mustache boundary, establish the intended line before touching the skin. Keep movements controlled and stop if visibility is poor. Do not use an exposed cutter over painful, broken, or inflamed skin.
If the goal is short uniform stubble, return to a verified guarded setting. A detail tool and a length-control tool may be different heads or devices, and their instructions should not be exchanged.
Mistake 10: Ignoring Tool and Skin Stop Conditions
Do not continue with bent or broken cutting teeth, a cracked guard, loose attachment, shifting setting, swollen battery, damaged cable, hot plug, cracked housing, liquid exposure outside the model rating, or a cutter that pulls, rattles, stalls, smells unusual, or becomes unexpectedly hot.
Also stop over painful, broken, bleeding, or markedly irritated skin. This guide does not diagnose skin conditions. Do not respond to a tool fault by opening a sealed handle, bypassing a safety feature, fitting an unknown charger, or reshaping an attachment.
Use the exact manufacturer support and parts route. Record the model and symptoms before contacting support. Replace only user-serviceable parts whose compatibility is documented for that model.
Controlled Stubble Trimming Sequence
- Make the beard and skin clean and fully dry for the documented dry workflow.
- Map growth direction and compare both sides in even light.
- Inspect the blade, guard, housing, controls, and power components.
- Attach the correct guard and begin longer than the final target.
- Make one light, flat, controlled test pass in a model-approved direction.
- Switch off, clear clippings, let hair settle, and evaluate.
- Reduce only one documented step when the test remains too long.
- Alternate matched zones and clear packed hair during the trim.
- Stop when coverage is consistent rather than repeating passes automatically.
- Clean, dry, and store the tool exactly as the manual directs.
Frequently Asked Questions
Why does my stubble look uneven after trimming?
Common causes include a loose or incorrect guard, wet or flattened hair, too much pressure, one-direction passes across mixed growth, packed comb teeth, poor lighting, and changing settings before brushing away clippings.
Should I press harder on dense stubble?
No. Keep the documented guard surface flat and use light, steady pressure. Pressing harder can tilt the comb, compress hair, change an adjustable setting, or make one patch shorter than the surrounding area.
How many passes should I make over stubble?
There is no universal pass count. Map local growth, make controlled overlapping passes in model-approved directions, clear accumulated hair, brush away clippings, and stop when the area is consistently covered.
Can I fix one short patch immediately?
Stop cutting the short patch. Remove loose hair and compare in even light. Blend only genuinely longer surrounding hairs with a longer safe setting, or allow the area to grow before the next full trim.
Sources and Claim Boundary
Primary references reviewed in July 2026 are Philips’ uneven-trimming troubleshooting, groomer manual, and OneBlade beard-trimming instructions linked above. This page provides a generic error-prevention workflow. It does not report hands-on testing, guarantee a visual result, diagnose skin conditions, or replace the exact model’s attachment, direction, cleaning, lubrication, wet-use, charging, and safety instructions.
