
Disclosure: This site may use affiliate links. Product specifications should be checked against manufacturer or retailer pages before purchase.
Direct Answer
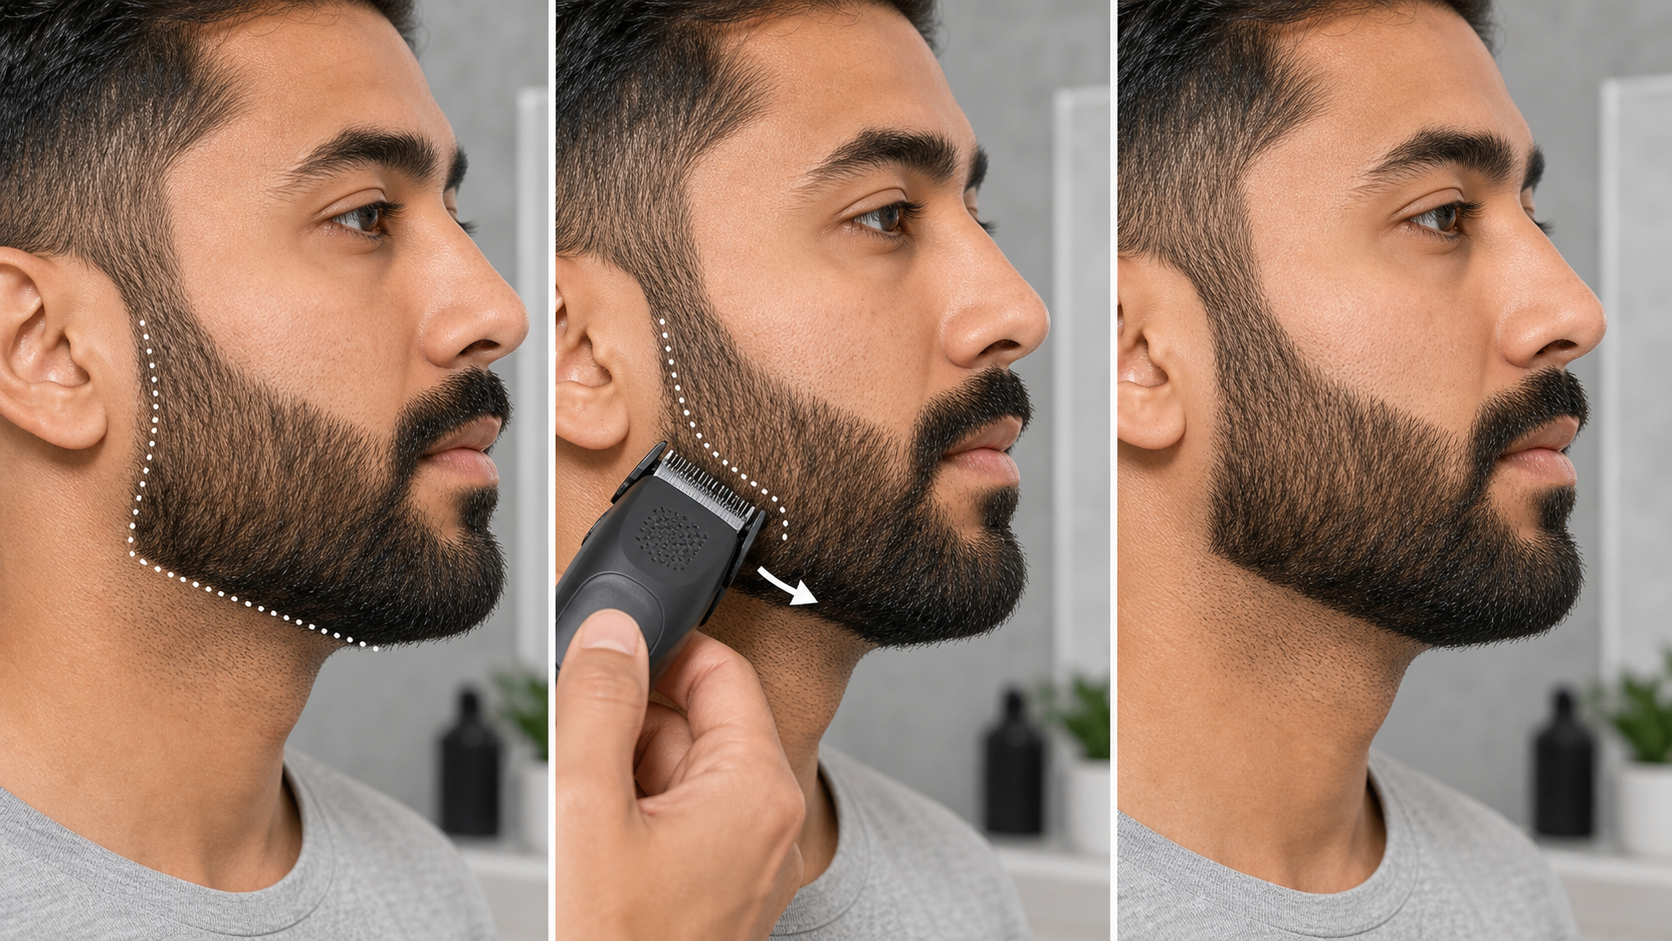
Direct answer: Clean up the edges of a short beard by preserving the existing cheek line, neckline, sideburn, and mustache opening. Comb dry hair into place, mark the current boundary, and remove only hairs clearly outside it. Approach from bare skin toward the beard with short, light strokes, clear loose hair often, alternate sides, and stop when the old edge becomes visible.
Edge cleanup is a contour task, not a base-length trim. The guarded beard surface, jaw blend, and chin length should remain unchanged. If you cannot identify the previous edge or several zones need reshaping, stop and plan a full trim rather than inventing a new boundary one stroke at a time.
Short-Beard Edge Cleanup Map
| Zone | Preserve | Remove only | Stop when |
|---|---|---|---|
| Cheek line | The established natural or shaped upper edge | Isolated hairs above that edge | The previous line is visible |
| Neckline | The existing center height and corner path | Hair below the planned boundary | The line begins moving upward |
| Sideburn | The current connection to hair and beard | Hair outside the side profile | The transition starts losing weight |
| Mustache opening | The chosen density and corner shape | Hair crossing the planned lip clearance | The opening is clear at rest |
The official Philips MG3900-series manual separates guarded length trimming from precision outlining and instructs users to use gentle pressure. Braun’s beard-trimming guide similarly separates overall length reduction from final shaping. These sources support the task separation; the exact manual for your tool controls attachment identity, direction, wet use, cleaning, and safety.
Decide Whether This Is Really an Edge-Only Task
Stand at normal mirror distance in even front and side light. Comb the beard into its usual position and clear any loose clipped hair. Identify the existing cheek line, neckline, sideburn profile, and mustache opening without switching on the tool.
An edge-only cleanup is appropriate when the beard’s main length and shape still look intentional and only a small amount of growth extends outside established boundaries. It is not appropriate when the whole beard is overlength, the jaw blend has collapsed, the chin needs reshaping, or an accidental notch must be blended.
For isolated length issues, use the short-beard touch-up guide. For a full reset, the short-beard mistakes guide provides base-length and zone controls. Keeping these jobs separate prevents an edge cleanup from gradually shortening the entire beard.
Prepare the Beard and Tool
Follow the exact model’s approved wet or dry method. For a typical dry contour session, let beard and skin dry fully, remove heavy product, and comb hair into its normal lay. Do not pull the skin into an exaggerated position when deciding where the line belongs; check it again with the face relaxed.
Switch the tool off before changing attachments. Inspect the blade or detail head for damage, packed hair, corrosion, looseness, or abnormal wear. Confirm that the selected attachment locks securely and that the housing, battery, cable, charger, and controls show no damage or unusual heat.
Use only the lubrication and cleaning method stated by the manufacturer. A detail head, bare trimmer edge, mini foil, and razor are different systems and do not share universal pressure or direction rules. If the chosen tool is hard to control near the line, use a more conservative model-approved attachment or leave the hair for a fuller trim.
Mark the Existing Boundary
Use natural landmarks and the previous outline rather than drawing a new ideal. On the cheeks, follow the visible transition from sparse upper hairs into the main beard. On the neck, identify the established center point and trace the line toward each jaw corner. At the sideburn, preserve the connection between head hair and beard.
You can use a washable skin-safe marker only if it is appropriate for you and removed as directed, but a marker is not required. A comb edge, fingertip reference held away from the cutter, or matched mirror checkpoints can be enough. Never place a loose template or finger where it can enter moving teeth.
The beard shaping template guide explains how reference tools can support a line without deciding it for you. For neckline placement principles, consult the beard neckline guide. Preserve the current line unless this session is intentionally a full reshape.
Clean the Cheek Line Conservatively
Relax the face and inspect each cheek from the front and side. Decide whether the existing line is natural and soft or deliberately defined. Remove only isolated hairs clearly above that line. Do not lower the entire cheek line to catch one distant hair.
Approach from the bare-skin side toward the beard with short strokes, stopping before the cutter enters the dense edge. Clear the head after a few strokes and compare both sides at the same mirror angle. If one cheek naturally grows higher or denser, preserve a balanced visual path rather than forcing mathematically identical coordinates.
Do not repeatedly trace the line from inside the beard outward. Starting within the dense area can remove the edge itself before you see the result. If the previous line is unclear, trim only obvious outliers and leave the broader decision for a planned shaping session.
Restore the Neckline Without Raising It
Find the existing center point under the chin, then trace the established path toward one jaw corner. Remove hair below the boundary in small sections. Return to the center and work toward the other side. This center-out sequence reduces the chance of one corner climbing higher than the other.
Keep the head in a neutral position for planning, then move only as needed for access. Stretching the neck strongly can make the line appear lower while trimming and higher after the skin relaxes. Pause, return to a normal posture, brush away loose hair, and check from the front and both profiles.
Philips’ official neckline shaping guide illustrates planning a boundary before removing hair. It is a general visual reference, not a mandatory shape for every face. Stop if the line begins entering visible jaw or chin fullness.
Keep the Sideburn Connection Intact
View the sideburn from the side with the ear, temple, cheek, and jaw visible. Preserve the existing width and the transition into the beard. Remove only hairs extending beyond the planned outer profile; do not use edge cleanup to create a new fade.
If the sideburn-to-beard connection has a hard length step, that is a blending task. Use the short-beard jaw-corner blending guide or schedule a full trim. A bare edge pass cannot restore missing transition weight.
Clear the Mustache Opening in Small Steps
Comb the mustache into its normal resting direction and close the mouth naturally. Decide whether the goal is only to clear hairs crossing the lip or to redefine the full mustache shape. For edge cleanup, trim only the visible overhang at the established opening.
Work from the center toward one corner, then repeat on the other side. Keep the cutting edge visible and use the model-approved orientation. Do not press into the lip, chase every small density difference, or widen the corners unless that change is part of a planned style reset.
Use Matched Checkpoints, Not Repeated Guessing
After each zone, switch off, clear loose hair, and compare matched points: cheek height near each sideburn, neckline center, both jaw corners, sideburn width, and mustache opening. Use the same light, distance, and head position for both sides.
Natural density and anatomy are not perfectly symmetrical. A darker edge may contain more hair rather than longer hair. If the boundary is in the intended place, stop rather than cutting the darker side repeatedly. Photos from the same angle can help reveal whether the difference is line position or visual density.
Common Edge-Cleanup Errors
- Lowering the whole cheek line to remove one distant hair.
- Raising the neckline a little more at every maintenance session.
- Starting the cutter inside the dense beard and moving outward.
- Using edge cleanup to repair a missing blend or short patch.
- Pulling the skin strongly while setting a permanent boundary.
- Changing attachments without switching the tool off.
- Continuing before clearing loose hair and checking normal posture.
- Forcing identical lines despite normal left-right growth differences.
Stop Conditions
Stop immediately if the blade or attachment is damaged, loose, hot, noisy, or pulling; if the line is no longer visible; if one correction creates another; or if the tool must enter the beard’s main body to reach the goal. Do not continue over broken, painful, or actively irritated skin.
This guide does not diagnose skin conditions or authorize electrical repair. Persistent pain, bleeding, concerning skin changes, or a damaged powered tool requires an appropriate professional or manufacturer service route.
Repeatable Edge-Only Workflow
- Confirm that the base length and overall shape do not need a full trim.
- Prepare the beard using the exact model’s approved wet or dry method.
- Inspect and attach the model-approved detail tool while switched off.
- Identify the existing cheek, neckline, sideburn, and mustache boundaries.
- Complete one zone at a time from outside the beard toward the line.
- Use short, light strokes and clear the cutter frequently.
- Compare matched checkpoints in normal posture and even light.
- Stop as soon as each established edge is visible.
- Record any useful boundary reference for the next maintenance session.
Frequently Asked Questions
Which short-beard edges can I clean up without changing the beard length?
Limit the task to hair clearly outside an existing cheek line, neckline, sideburn boundary, or mustache opening. Leave the guarded beard surface and transition zones untouched.
Should I clean the cheek line or neckline first?
Plan both before switching on, then complete one boundary at a time. Many people start at the neckline center because it provides a stable reference, but the existing boundary controls.
How do I avoid pushing a short-beard line inward?
Mark the existing edge in normal light, approach it from the outside, use short strokes, clear loose hair, and stop as soon as the established line is visible.
Do I need a bare blade for beard-edge cleanup?
No universal tool is required. Use only a model-approved detail head, trimmer edge, or guarded method that you can control. The exact manual governs attachment use and skin contact.
Sources and Claim Boundary
Primary references reviewed in July 2026 are the Philips MG3900-series manual, Braun beard-trimming guide, and Philips neckline guide linked above. This is a generic short-beard contour workflow, not hands-on testing, and it does not promise a specific appearance or irritation-free result. The exact model manual controls attachment identity, direction, pressure, wet use, cleaning, lubrication, charging, and safety.
