
Disclosure: This site may use affiliate links. Product specifications should be checked against manufacturer or retailer pages before purchase.
Direct Answer
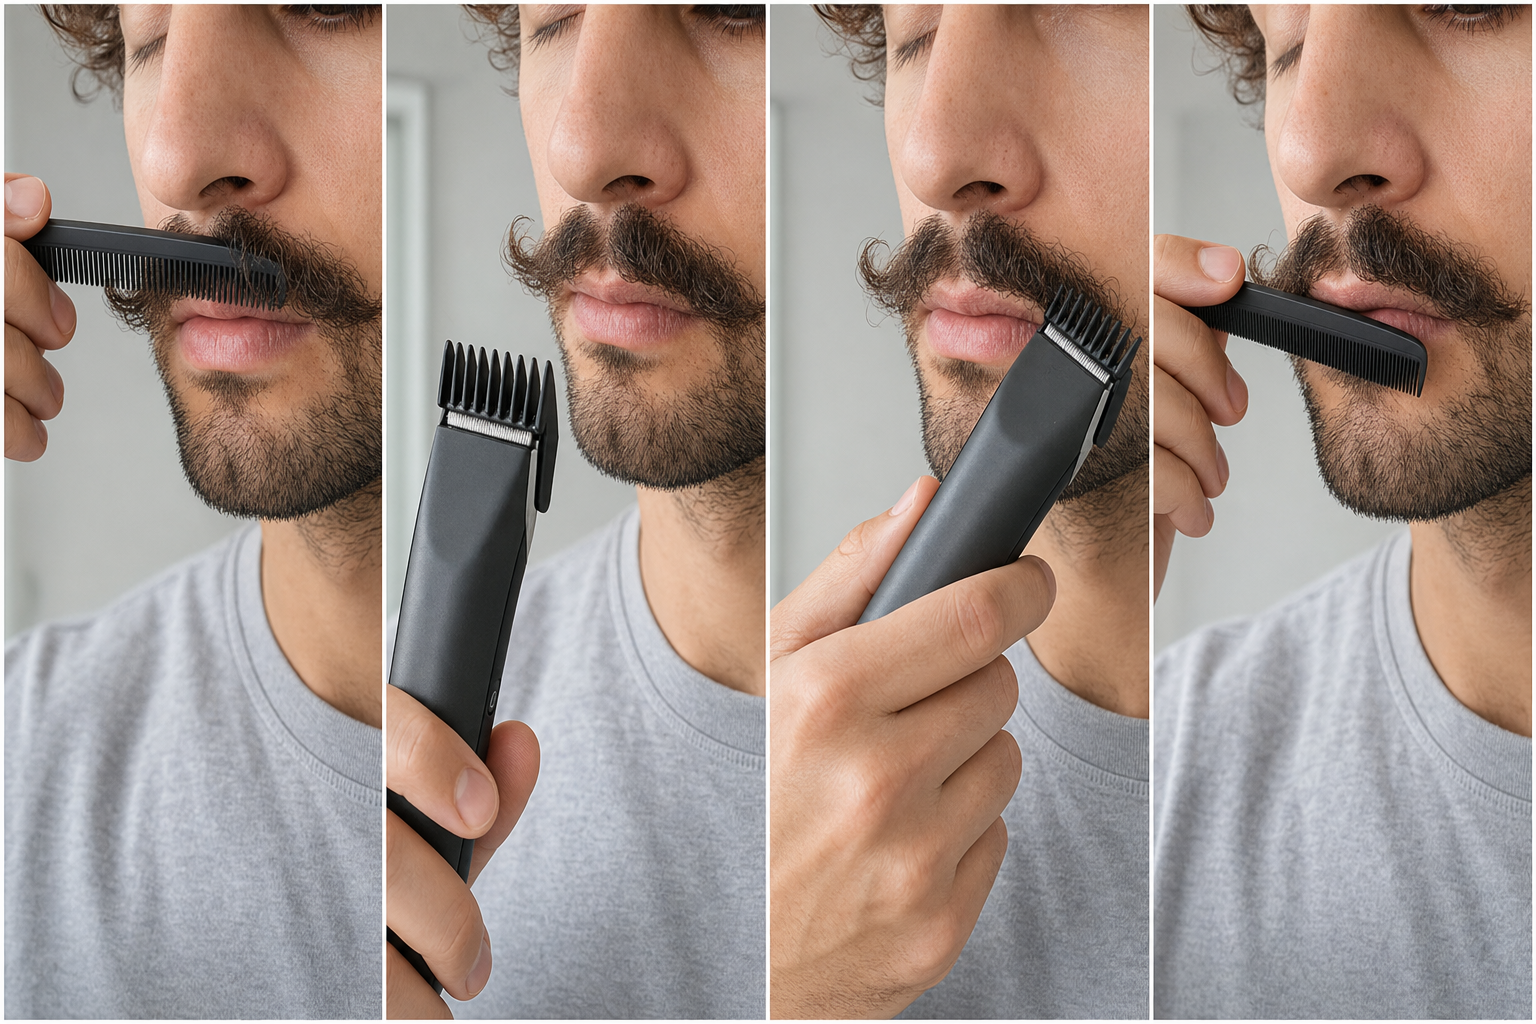
Direct answer: Trim a curly mustache with better control by preparing it dry when the tool requires, combing gently in each zone’s natural direction, and releasing all tension before judging length. Map the center, lip edge, endpoints, and individual curl groups. Protect the shortest released zone, test one small outer group with a verified longer guard, then recomb, release, wait for spring-back, and reassess.
This workflow controls uncertainty; it does not straighten hair, change curl pattern, create density, or promise symmetry, comfort, safety, or a specific result. “Curly” describes visible direction changes, grouping, and spring-back in this grooming task. The exact tool manual controls guard identity, contact, direction, cleaning, lubrication, wet use, charging, and safety.
Curly Mustache Control Table
| Observation | Control question | Conservative response |
|---|---|---|
| An end sits lower while held than after release | Is tension hiding spring-back? | Release fully and use the natural resting position |
| Several curls enter one guard opening | Are center, outer, and lower-edge hair being combined? | Switch off and isolate a smaller owned group |
| One side looks darker | Is the difference length, density, light, or curl grouping? | Compare landmarks and projection, not darkness alone |
| A curl crosses the middle or lip edge | Which root zone owns the visible end? | Trace it toward the root before assigning a target |
| The outline changes after recombing | Has the mustache fully settled? | Wait, release again, and delay another pass |
Keep Curl Control Separate From Coarse-Hair Pulling
This page owns natural-direction mapping, curl-group ownership, released-length reference, spring-back, and mustache landmark protection. The coarse mustache guide focuses on cutter load, section admission, pulling stops, guard blockage, cutter condition, maintenance, and power.
A mustache may be described as both curly and coarse, but the two workflows answer different questions. Do not continue cutting while deciding whether a problem is curl position or equipment load. Switch off, separate the observations, and use the matching troubleshooting path.
Keep the Mustache Intent Separate From a Long Beard
The curly long-beard guide manages outer, supporting, and crossing layers across the chin, jaw, and side silhouette. A mustache has different high-risk landmarks: the center, upper lip, lower edge, endpoints, mouth corners, and beard connections.
Do not transfer a long-beard pass, layer-lifting method, or silhouette target to the small space above the lip. This page uses smaller curl groups, shorter visible paths, and stricter protection of the mouth and center.
Define One Observable Shape Change
Write one narrow objective before handling the hair. Examples include reducing one outer curl that projects beyond an established endpoint, restoring one small lower-edge interruption, or bringing one released group back inside the current silhouette. Also write what must remain unchanged.
Protected items may include the center shape, shortest zone, upper-lip clearance, both endpoints, connection to beard or goatee hair, and the opposite side. Do not begin with “make every curl even.” Individual groups can rest at different heights and still support a coherent mustache.
Record the Natural Dry Released Baseline
Prepare the mustache according to the exact tool’s wet or dry instructions. For a dry workflow, allow the roots, body, and ends to dry fully. Remove heavy wax, prolonged mask pressure, towel compression, and repeated finger tension, then let the hair return to its ordinary worn position.
Philips’ current beard-trimming support guidance tells users of covered products to wash and dry facial hair and begin with a higher setting while learning the tool. That is a model-specific example supporting dry preparation and longer-first familiarization, not a universal wet-use or guard rule.
Do Not Use Heat or Tension as a Hidden Ruler
Heat styling, strong product hold, tight brushing, and sustained pulling can temporarily change how a curly mustache lies. If the intended result is the natural dry shape, do not choose final length while hair is stretched or fixed into an artificial position.
A held end can appear longer than its released position. Cutting it to a stretched reference can expose more lip or shorten the curl after it springs back. This page does not prescribe heat, chemical straightening, a styling product, or a tension-cutting method.
Prepare Before Mapping Curl Groups
Use the mustache preparation guide for cleaning, drying, gentle combing, boundary mapping, lighting, posture, and equipment inspection. Repeat that baseline if the apparent curl changes after product removal or several minutes of release.
Do not begin powered work while hair is clumped, wet contrary to the workflow, hidden by residue, or compressed against the lip. Preparation should make the current shape observable; it should not force the hair into a preferred result.
Comb in the Natural Direction and Release
Use a clean fine-tooth mustache comb with light contact. Wahl’s official trimmer instructions describe combing a mustache in the direction it grows so stray hair becomes visible. That supports observation on the covered product, not forceful detangling or an instruction to cut every visible end.
Remove the comb and let the hair settle before marking a target. Do not hold a curl stretched over the lip or pull it outward to make a guard pass. The released position, not the longest combed position, controls the protected floor.
Map Root Direction, Middle Travel, and Released Ends
Trace representative hair from where it grows, through the body of the mustache, to the released end. Center hair may travel outward, outer hair may curl inward, lower-edge hair may turn toward the lip, and connection hair may enter from beard or goatee zones.
The mustache grain guide explains root ownership and zone mapping. Use that map to identify a predictable path; do not force every section downward, outward, with the grain, or against it as a universal rule.
Identify Small Curl Groups
A curl group is a small cluster that naturally travels and releases together. Identify only the group relevant to the planned correction. Do not create rigid sections that require flattening, twisting, or separating every strand.
Mark the group’s root zone, visible body, released endpoint, neighboring hair, and protected landmark. If those boundaries disappear as soon as the comb or fingers are removed, the group is not ready for a powered pass.
Trace Crossing Hair Before Assigning Ownership
A visible end near the center may begin in an outer zone, and an apparent lower-edge hair may belong to a curl whose root sits higher. Trace it gently toward the root with the tool off. Separate only enough to identify ownership.
Do not cut an unidentified crossing bundle to make the comb pass. That can shorten the center, endpoint, and body at the same time. If ownership remains unclear, preserve the group and choose a different visible target.
Protect the Center Shape
Identify whether the center is continuous, naturally divided, overlapping, or deliberately gapped. Keep it outside the first curl-control test. Hair from either side can cross the middle, so a correction aimed at one curl may unintentionally widen or distort the center.
If the center itself is the planned task, use the mustache middle-gap guide as a separate workflow. Do not combine center redesign with learning how one outer curl responds after release.
Protect the Upper Lip and Lower Edge
Relax the mouth and mark the current lower mustache edge. Do not stretch the lip, use it as a cutting rail, or press a guard into soft tissue. The complete contact path and lift-away point must remain visible.
Length management inside the mustache body is different from removing isolated hair below an established boundary. If the task changes into edge cleanup, finish the current assessment and use the mustache edge-cleanup guide separately.
Protect Endpoints and Beard Connections
At each mouth corner, record whether the mustache ends above the corner, extends outward, turns down, or connects to beard or goatee hair. A curly endpoint can rotate after nearby weight is removed, and connection hair can enter a guard from a different direction.
Keep both endpoints and connections outside the first test unless one is the explicit fully visible target. Do not shorten the opposite endpoint automatically after trimming one side. Endpoint balance and curl-response testing are separate decisions.
Set the Shortest Released-Length Floor
Identify the shortest natural released zone that still supports the current center, coverage, and lip-edge relationship. Treat it as a protected floor. A guard number is not a universal measurement, and curled strands may not enter the same opening in the same way.
The mustache guard guide explains exact-model verification and longer-setting-first selection. If the verified guard cannot preserve the shortest released zone, reject the setup before it touches hair.
Compare Sides by Landmarks, Not Curl Count
Compare the center, lower edge, two mouth corners, endpoints, and released outer projection. Do not compare the number of visible curls, strand count, or darkness. Density, direction, grouping, and light can make structurally acceptable sides look different.
The mustache side-balance guide uses landmarks and protected reference zones. Keep one side untouched during the first curl test so it remains a reference rather than a template that must be copied strand by strand.
Verify the Exact Tool and Longer Guard
Confirm the device category, complete model and regional suffix, compatible guard, setting mechanism, cutter, power mode, cleaning method, lubrication rule, and wet-use boundary. A similar-looking attachment or printed number does not establish fit or retained length.
Install the guard with power off. Check teeth, rails, tabs, locks, seating, and adjustment travel. Stop for bent, chipped, corroded, loose, cracked, contaminated, unidentified, or misaligned parts. Do not stabilize a loose guard with a finger while the cutter moves.
Clean and Maintain Only as Documented
Compacted hair can obstruct guard slots or the cutter. Brush, rinse, dry, or lubricate only as the exact instructions permit. “Rinseable head,” “wet and dry,” and “waterproof” are not interchangeable statements, and a washable attachment does not prove that the powered handle may contact water.
The trimmer cleaning and oiling guide provides model-aware boundaries. Maintenance can remove one source of uncertainty, but it cannot promise that a tool will admit a particular curl group or produce a specific result.
Test Operation Away From the Face
After correct assembly and power preparation, switch the tool on away from hair. Listen and observe briefly. Stop for abnormal rattle, impact, surging, slowing, odor, smoke, unusual heat, unstable power, or guard movement.
Switch off before touching, clearing, or adjusting the head. A normal off-face run does not prove suitability for the planned mustache target; it only removes obvious equipment problems from the immediate workflow.
Choose One Small Outer Curl Group
Select one group that remains beyond the intended silhouette after preparation, gentle combing, complete release, and a short settling pause. Prefer an outer zone whose root ownership, lip clearance, endpoint relationship, neighboring hair, and lift-away path can all remain visible.
Avoid the center, shortest zone, sparse area, lower edge, and opposite side for the first test. The group should enter the verified longer guard without squeezing, twisting, stretching, or combining several protected zones.
Rehearse the Path With Power Off
Place the powered-off guarded trimmer near the selected group in an orientation allowed by the exact instructions. Mark the start point, end point, contact surface, protected side, and lift-away direction. Confirm that the lip, center, endpoint, and fingers remain outside the path.
A powered-off rehearsal cannot predict the cut, but it can reveal poor visibility, hidden crossing hair, an overloaded guard opening, or a path that depends on pressure. Reject the setup if the target cannot stay released and visible.
Make One Short Longer-Setting Pass
Use one small outer target, the verified longer setting, light stable handling, and one short movement supported by the manual. Lift away at the mapped stop point. Do not scoop toward the lip, follow a curl around several zones, rock the guard, or immediately repeat the path.
Stop at pulling, snagging, stalling, guard movement, lost visibility, or unexpected section movement. Do not solve curl uncertainty by adding pressure or tension. Use the coarse-hair troubleshooting workflow if cutter load becomes the actual problem.
Clear, Recomb, Release, and Wait
Switch off and move the tool away from the face. Clear clippings only as the manual permits, then gently recomb the entire mustache in its natural zones. Remove the comb, relax the mouth, and let the target and neighboring groups settle.
Do not judge while holding the curl or immediately after lifting it. Check the front and both three-quarter views at ordinary distance. A change that disappears after full release needs no second pass.
Assess Spring-Back Before Correcting
Compare the target’s released endpoint with the protected floor, center, lower edge, endpoint, and opposite-side reference. Record whether it retracted, rotated, joined a neighboring group, or changed the apparent edge.
If the group now sits inside the plan, stop. If it remains outside but ownership or cause is uncertain, stop and remap. Spring-back is an observation to manage; trimming cannot remove the underlying curl pattern.
Use a Strict Correction Budget
Allow one initial pass, one complete clipping-clearance and release cycle, and at most one later justified correction on the same owned group. Keep tool, guard, direction, side, and protected landmarks unchanged while evaluating the first result.
The mustache mistake guide explains why changing several variables destroys useful feedback. If the task expands to both sides, a new guard, center work, endpoint redesign, or several curl groups, stop and plan a separate complete session.
Know When an Isolated-End Method Is Separate
Small grooming scissors may be considered when one fully visible released end exceeds the contour but cannot enter a verified guard without tension or protected hair. This is a method boundary, not a claim that scissors are safer, easier, or suitable for every person.
Do not combine a new scissor technique with an unresolved powered-tool problem. Use adequate light, keep the lip and hidden hair outside the blades, and create separate stop conditions for any isolated-end workflow.
Know When No Further Trim Is Correct
Stop when the center, lip edge, endpoints, protected floor, and overall released projection are coherent at ordinary distance, even if individual curls differ. A visible curl is not automatically excess, and natural side-to-side variation is not a defect.
The mustache touch-up guide limits maintenance to one confirmed target. A no-cut or stop result preserves length and information when another pass has no clear, bounded purpose.
Do Not Diagnose Curl or Skin
Curl, wave, coarseness, gray hair, density, direction, dryness, and spring-back can have different meanings. This page does not measure hair structure, diagnose a condition, recommend growth or straightening treatment, or predict how mustache hair will change.
Do not apply an unfamiliar oil, serum, relaxer, medication, or other product immediately before trimming to make hair lie differently. Residue can alter guard admission and observation. Keep cosmetic grooming separate from health or treatment questions.
Equipment and Skin Stop Conditions
Stop for pulling, snagging, stalling, abnormal noise, odor, smoke, heat, impact, guard movement, damaged teeth, loose parts, cracked housing, unstable power, uncertain wet-use status, or any path that cannot remain visible and clear of the lip.
Also stop over painful, broken, bleeding, swollen, infected-looking, or actively irritated skin. Seek appropriate professional guidance for sudden, persistent, severe, or concerning symptoms or hair changes. This guide does not diagnose or treat them.
Curly Mustache Checklist
- Define one observable change and protected landmarks.
- Prepare according to the exact tool and record the dry released baseline.
- Do not use heat, product hold, or tension as a hidden ruler.
- Comb gently by zone, remove the comb, and release fully.
- Map root direction, middle travel, released ends, and crossing hair.
- Protect the center, lip edge, endpoints, connections, and shortest zone.
- Compare sides by landmarks rather than curl count or darkness.
- Verify the exact tool, longer guard, cutter, maintenance, and power.
- Rehearse one small outer curl group with power off.
- Make one short pass, then clear, recomb, release, and wait.
- Assess spring-back and use a strict correction budget.
- Stop when no further bounded correction is justified.
Frequently Asked Questions
Should I straighten a curly mustache before trimming?
Do not make straightening a universal step. If the intended result is the naturally worn shape, gently comb, remove the comb, and let every zone release before judging length. Heat, product, or sustained tension can temporarily change where curled ends sit.
Why does a curly mustache look shorter after trimming?
A curl group can retract after comb or finger tension is removed, and removing a small amount of outer weight can change how nearby hair rests. Clear the tool, recomb, release fully, wait, and inspect before deciding whether another correction is justified.
Should I trim a curly mustache with or against the grain?
Map root direction, middle travel, and released ends by zone, then follow the exact trimmer instructions. Use only a direction that admits one identified curl group predictably. Do not force every zone into one downward or outward path.
Can trimming make both sides of a curly mustache identical?
No. Curl grouping, density, growth direction, endpoints, and spring-back can remain different. Compare the center, lower edge, endpoints, and released projection, then correct only confirmed excess instead of chasing identical curls or darkness.
Sources and Claim Boundary
- Wahl trimmer instructions for natural-direction mustache combing and visible stray-hair observation on the covered product.
- Philips beard-trimming support guidance for covered-model preparation, comb use, and longer-first familiarization.
- American Academy of Dermatology healthy-beard guidance for general facial-hair and underlying-skin care boundaries.
Claim boundary: This page provides a generic curly-mustache preparation, natural-direction, curl-group ownership, released-length, longer-setting test, spring-back, and reassessment workflow. It does not straighten hair, change curl pattern, diagnose skin or hair, prescribe a universal guard, direction, pressure, speed, pass count, product, wet-use method, maintenance schedule, or replacement interval; rank products; report hands-on testing; promise comfort, symmetry, density, growth, safety, control, or a result; or replace exact-model instructions and qualified care.
