
Disclosure: This site may use affiliate links. Product specifications should be checked against manufacturer or retailer pages before purchase.
Direct Answer
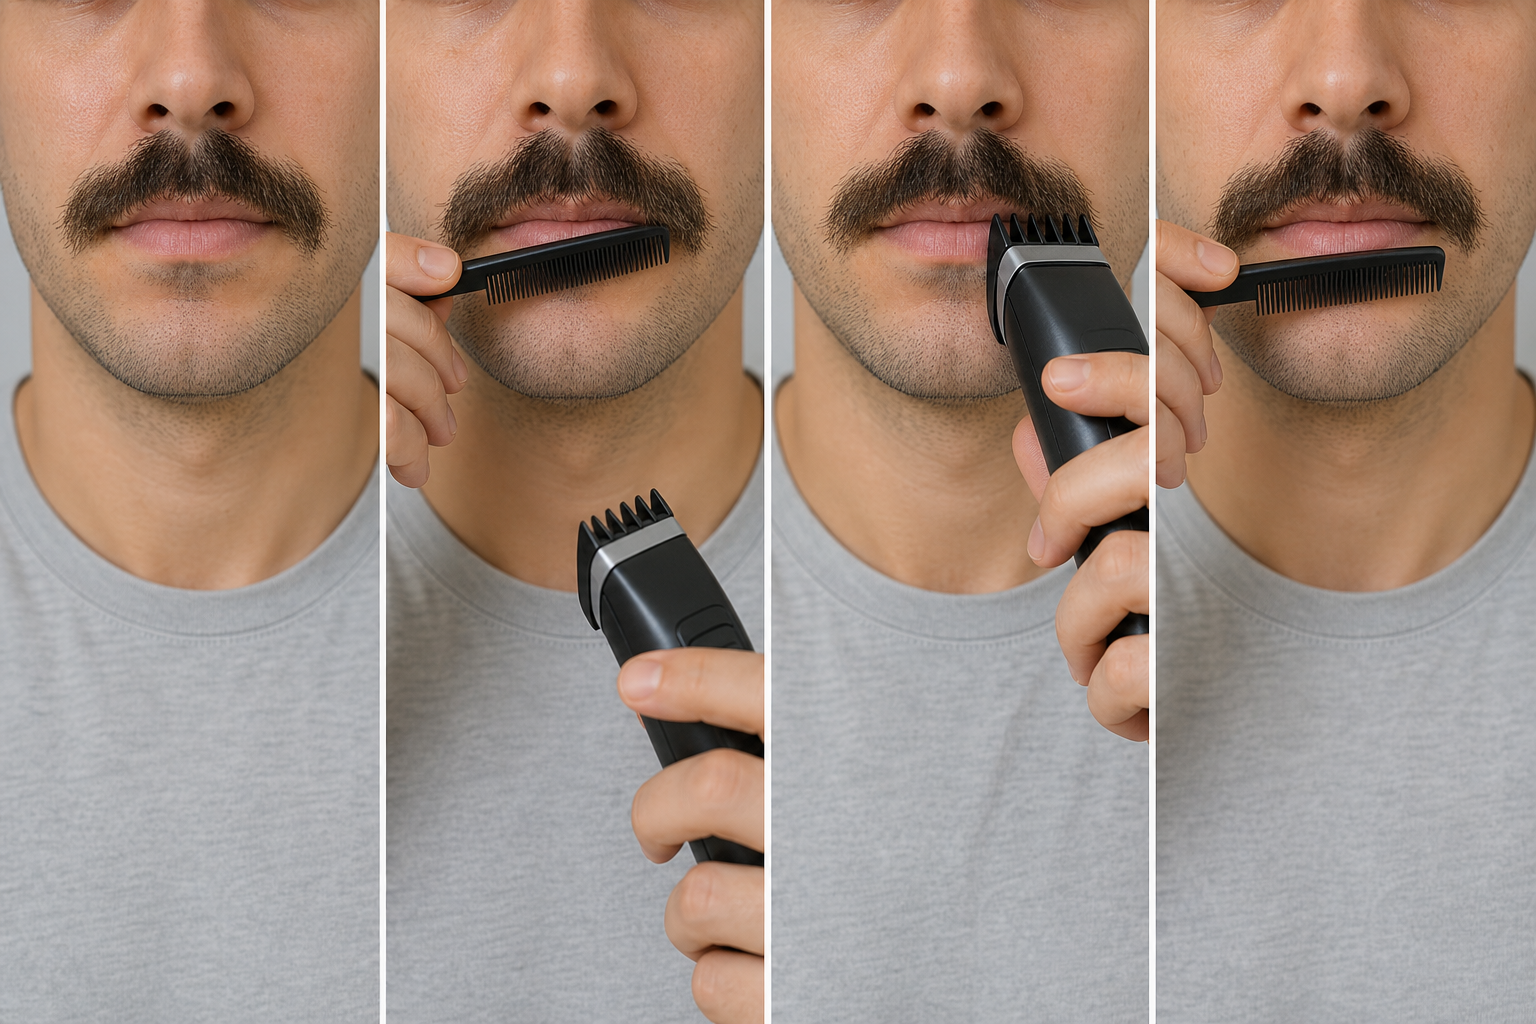
Direct answer: Trim a patchy mustache more evenly by drying and releasing it, separating true coverage differences from length, curl, direction, and lighting effects, and protecting the shortest or sparsest useful zone. Reduce only one clearly longer or heavier section with a verified guard, then switch off, clear clippings, recomb, release, and reassess before another correction.
This workflow can change visible length and silhouette, not the number or distribution of hairs. It does not fill a gap, stimulate growth, diagnose hair loss, or guarantee symmetry. When the concern is density itself rather than an overlong zone, preservation is usually more useful than further shortening.
Start With the Right Definition of Patchy
People use “patchy” for several different observations: a lower-density area where more skin is visible, a group of shorter hairs, hair growing in another direction, a curl that separates after combing, a temporary gap caused by compression, or one dense section that makes the neighboring area look lighter by contrast. These are not the same trimming problem.
Write a neutral observation before choosing a tool. For example: “the left outer zone shows more skin when fully released, while the right center extends farther over the lip.” Avoid writing “fix the weak side.” That phrase assumes a defect and can encourage cutting the very area whose available coverage should be protected.
Patchy Appearance Decision Table
| Released observation | First decision | Protected reference |
|---|---|---|
| One zone has fewer visible hairs but similar length | Do not shorten it; assess density and contrast separately | All available coverage in the sparse zone |
| One dense zone projects farther or sits heavier | Consider one conservative guarded correction there | Shortest useful zone and overall base length |
| A gap disappears after release or a light change | Correct preparation and observation, not length | Complete mustache |
| Long hair crosses from another root zone | Trace ownership before isolating any end | Underlying shorter hair |
| Coverage has changed suddenly or skin is symptomatic | Stop cosmetic problem-solving | Hair and skin pending appropriate guidance |
Separate Density From Retained Length
Density describes how much hair grows within an area; retained length describes how long the current hair remains after trimming. A guard can change retained length, but it cannot add follicles or redistribute growth. Shortening a lower-density zone may make the skin beneath it more visible and reduce the overlap that currently supports coverage.
Use the longest and shortest released hairs as observations, not as proof of density. A dense zone can contain short hair, and a sparse zone can contain a few long hairs. Protect the shortest useful area until you know whether the visual imbalance is caused by excess length somewhere else.
Rule Out Preparation Artifacts
Heavy wax, dampness, sleep compression, mask pressure, towel friction, and forceful combing can hold hair together or split it apart. Prepare the mustache according to the exact tool’s wet or dry instructions, then return it to its ordinary worn state before judging a gap or heavier zone.
The mustache preparation guide owns cleaning, drying, natural combing, boundary mapping, and equipment inspection. Repeat that baseline whenever the apparent patch changes between morning and evening, after product removal, or after the hair has been released for several minutes.
Use Neutral Light and Ordinary Viewing Distance
Hard overhead light can deepen the shadow under dense hair while direct front light can flatten it. A close phone lens can also exaggerate texture and side-to-side distance. Use broad neutral light, a relaxed face, and the same front and three-quarter views for each comparison.
Check at the distance from which the mustache is normally seen before inspecting individual hairs. The aim is a coherent silhouette, not identical skin visibility in a magnifying mirror. If the concern disappears at ordinary distance, do not create a new cutting target solely from close inspection.
Comb Gently in the Natural Direction, Then Release
Use a clean fine-tooth comb with light contact to separate hair and reveal its ordinary direction. Wahl’s official trimmer instructions describe combing a mustache in the direction it grows so stray hair becomes visible. That supports observation; it does not require cutting every visible end.
Remove the comb and wait for the mustache to settle. Do not compare zones while the comb lifts, stretches, or compresses them. Repeat the release once. A target that moves or disappears after release is not stable enough for a length correction.
Map Root Zones Before Comparing Sides
Divide the mustache into center, left and right inner zones, outer zones, lower lip edge, endpoints, and any beard connections. Trace crossing hairs back toward where they emerge. A long center hair may lie over an outer zone, and beard hair may enter the mustache outline from below.
The mustache grain guide explains direction mapping and root-zone ownership. Do not trim a visible end as part of a sparse zone until you know where it begins and where it returns after release.
Identify the Shortest Useful Zone
The shortest useful zone is the area whose released length already supports as much coverage and silhouette as it can without becoming visibly overlong. Treat it as a protected floor. It may be the sparser side, a shorter center section, or an outer endpoint with finer hair.
Record its location and keep the first tool path away from it. The goal is not to force the entire mustache down to the shortest isolated hair. It is to prevent a heavier area from dominating while preserving the length that gives the lighter area its available visual continuity.
Choose One Untouched Reference Zone
Keep one acceptable zone completely untouched during the first correction. That reference may be the shorter outer side, the established center, or the lower edge that already sits correctly. It provides a stable comparison after clippings are cleared and the hair is released again.
The mustache balance guide distinguishes landmark balance from mathematical mirroring. Natural density, direction, lip shape, and endpoints can differ. Use the untouched zone to judge visual weight and boundary continuity rather than matching individual hair counts.
Do Not Shorten the Sparse Zone to Match
When skin is more visible in one zone, shortening it usually removes overlap and can make the contrast stronger. Leave it outside the first pass. Also avoid cutting isolated long hairs there until you have released them twice and confirmed that their excess length, rather than their coverage, is the actual target.
If the sparse zone is not overlong, there may be nothing useful for a trimmer to correct. The practical choice can be to preserve it and make a small reduction only in the dense zone, or to leave the whole mustache unchanged. A grooming workflow must allow a no-cut result.
Look for a Clearly Heavier Zone
A heavier zone is not merely denser. It should also project farther, hang lower, bunch after release, obscure an established boundary, or create a stable visual weight difference at ordinary distance. Confirm the same observation from the front and a slight three-quarter view.
Mark one small target such as “right inner zone extends below the protected base line.” Do not authorize the complete right side, center, and lip edge together. If no single stable overlong section can be named, stop and preserve the current length.
Separate Curl and Direction From Excess Length
Curled hair can look shorter from one angle and longer when stretched. Hair growing outward can expose skin even when its measured length matches the other side. Do not pull a curl straight or force sideways hair downward to create an artificial comparison.
Observe at least two natural releases. If direction is the main difference, length reduction may not improve the ordinary silhouette. The curly beard control guide provides a broader release-and-control framework; apply only its observation principles here, not its beard-specific length plan.
Keep Center Gaps as a Separate Decision
A natural center separation may be part of the growth pattern or chosen style. Do not widen, sharpen, or erase it while balancing outer weight. Hair crossing the center can temporarily hide a gap, but cutting that hair may expose a larger separation after release.
The mustache middle-gap guide treats center ownership independently. Protect the center during the first patch-balance session unless a separate, reviewed center plan already exists.
Choose a Guard From the Protected Baseline
There is no universal guard number for a patchy mustache. Verify the complete trimmer model, compatible guard, printed setting system, mounting method, supported direction, and retained-length information. A number on one guard does not transfer reliably to another product.
The mustache guard guide explains model-bound selection and the longest-setting-first logic. Choose a setting that cannot shorten the protected reference if accidental contact occurs, then restrict the intended path to the named heavier zone.
Follow the Exact Tool Manual
Philips’ current MG3900 manual identifies beard-and-mustache guards for the covered models, notes that hair grows in different directions, and gives product-specific movement and cleaning instructions. Those directions are evidence for that product family, not a universal pass for every trimmer.
Confirm whether the device supports the selected attachment, wet or dry use, rinsing, oiling, corded operation, and the planned contact orientation. Stop if the full model identity or manual cannot be verified. Similar-looking heads and guards can mount differently and retain different lengths.
Inspect the Tool Before It Approaches Hair
With power disconnected, inspect cutter teeth, guard teeth, attachment tabs, housing, switch, cable, and charger. Clear debris only by the method allowed in the manual. Confirm that the guard seats fully without rocking, lifting, or releasing under gentle handling.
Switch on away from the face and listen for a stable normal sound. Stop for damaged teeth, a new rattle, impact, slowing, heat, odor, smoke, cable damage, or attachment movement. The cleaning and oiling guide provides general maintenance boundaries, but the exact manual controls water and lubrication.
Rehearse One Path With Power Off
Hold the switched-off guarded trimmer near the target without touching hair. Identify the start, end, contact surface, supported movement direction, protected side, and lift-away point. Check the path in the mirror while the mouth remains relaxed.
If the path would cross the sparse zone, center, lip, endpoint, or beard connection, shorten the target. Keep the first path small enough to see from start to lift-away. Do not use pressure to reach hair or rotate the tool into an unsupported angle.
Make One Conservative Guarded Correction
Use the verified guard and model instructions on the one clearly heavier zone. Maintain normal supported contact, keep the sparse and reference zones outside the pass, and lift away at the recorded stop point. Do not continue merely because the powered tool is already in hand.
A first correction should test whether excess length was creating the contrast. It should not attempt final perfection. The bounded touch-up guide explains how one target and one stop rule preserve useful feedback.
Do Not Switch to a Bare Blade for More Progress
Removing the guard changes both the retained-length control and the contact boundary. It can turn a conservative bulk correction into an outline or skin-adjacent task. Do not make that change inside the same sequence because the first guarded result appears subtle.
If a separate edge needs restoration, finish the current release check first. The mustache edge cleanup guide owns isolated boundary work. Keep length balance and edge design as different decisions with different protected structures.
Clear Clippings Before Judging Coverage
Switch off and set the tool away. Clear loose hair from the mustache, face, comb, and attachment according to the manual. Clippings can bridge a sparse area, stick to skin, or hold retained hair outward, creating a false impression of both density and length.
Do not tap a powered head on a sink or rinse a component unless the exact instructions allow it. Dry any washable parts as directed before storage or reuse. Evaluation begins only after loose cut hair is gone and the mustache is returned to its ordinary state.
Recomb, Release, and Recheck Three Views
Gently comb in the natural direction, remove the comb, and allow the mustache to settle. Check the front for center, visual weight, and lower-edge continuity. Use each three-quarter view to check projection, endpoints, and beard connections. Return to ordinary viewing distance before deciding.
If the sparse zone now looks more exposed, do not shorten it to compensate. Record that the dense-zone reduction changed contrast and stop. If balance improved without exposing a new boundary problem, the session can end even when natural density differences remain visible.
Use a One-Variable Record
Record the date, dry baseline, neutral-light views, protected zone, target zone, complete tool and guard identity, movement direction, single correction, and released result. Comparable photographs can help only when distance, posture, expression, light, and styling state are controlled.
The record prevents a later session from treating memory as a measurement. It also reveals whether apparent patchiness is stable, preparation-dependent, direction-dependent, or changing independently of trimming. Do not interpret the record as a medical diagnosis.
Wait Before a Second Correction
Allow the mustache to return to its normal worn state before deciding on another pass. Hair can shift after washing, sleep, product application, or several hours of movement. A quick second correction made under the same close inspection often removes more than the first observation justified.
The mustache mistake guide explains why changing guard, direction, pressure, side, and target together destroys feedback. If a second correction is later justified, keep the same protected reference and define one new bounded target.
Know When No Further Trim Is the Best Result
Stop when the heavier section no longer dominates, the remaining difference is density rather than length, or the next pass would enter the shortest useful zone. Natural asymmetry can remain after a technically appropriate session. A no-cut or one-cut result is valid.
Do not chase identical darkness, hair count, or photographic symmetry. Those targets can lead to repeated shortening until both sides lose useful coverage. Preserve a coherent outline, comfortable lip clearance, and the chosen center and endpoints without claiming that trimming changes the growth pattern.
Do Not Turn Grooming Advice Into Growth Treatment
This page does not recommend medication, supplements, oils, serums, microneedling, or other interventions for mustache growth. It does not assess causes of low density or predict whether coverage will change. Product marketing, anecdotal timelines, and close photographs are not substitutes for appropriate evidence or professional evaluation.
Do not apply an unfamiliar product immediately before trimming to make hair look thicker or to treat skin. Residue can alter guard movement and observation. Keep cosmetic length management separate from any health question.
Recognize Medical Stop Conditions
Stop trimming over painful, bleeding, swollen, infected-looking, or actively irritated skin. Also stop using a cosmetic workflow to explain sudden, rapidly changing, or concerning hair loss. Those observations may have different causes and are outside a grooming guide.
Seek appropriate professional guidance when a change is sudden, persistent, severe, or concerning. Do not make a diagnosis from side-to-side density, and do not trim repeatedly to conceal a changing area. Preserve the skin and hair until the concern can be evaluated appropriately.
Equipment and Process Stop Conditions
Stop for uncertain model identity, an unsupported attachment, damaged cutter or guard teeth, loose parts, pulling, abnormal sound, slowing, heat, odor, smoke, electrical damage, unexpected movement, or a path that cannot remain visible. Keep the tool away from the lip and broken skin.
Also stop when the target changes after release, the protected sparse zone enters the path, the center or endpoint would be redesigned, both sides now seem to need correction, or every pass creates a new perceived imbalance. Those are signs that the bounded test has ended.
Patchy Mustache Balance Checklist
- Prepare, dry, gently comb, and fully release the mustache.
- Describe the observation without assuming a defect or treatment.
- Separate coverage from length, curl, direction, light, and compression.
- Map root zones and protect the shortest or sparsest useful area.
- Keep one acceptable center, side, or edge completely untouched.
- Name one stable longer or heavier target at ordinary distance.
- Verify the exact model, guard, manual, condition, and supported path.
- Rehearse with power off and keep the protected zone outside the pass.
- Make one conservative guarded correction, then switch off.
- Clear clippings, recomb, release, and check front and three-quarter views.
- Stop when the remaining difference is density rather than excess length.
- Pause for skin symptoms or sudden or concerning hair changes.
Frequently Asked Questions
Can trimming make a patchy mustache look more even?
Trimming can sometimes improve visual balance by preserving shorter or sparser zones and reducing only a clearly longer, heavier zone. It does not add hair or change follicle density. Judge the released mustache in neutral light and stop after one conservative correction.
Should I trim the sparse side shorter to match?
Usually not. Shortening the sparse side can expose more skin and reduce the coverage it already provides. Keep that zone protected while you check whether excess length, crossing hair, curl, direction, or a heavier opposite zone is creating the visible imbalance.
What guard should I use on an uneven mustache?
There is no universal guard number. Verify the exact trimmer and compatible guard, identify the shortest useful retained zone, and begin with a setting that cannot shorten that protected reference. Follow the model manual and test only one small, clearly heavier zone.
When is a patchy mustache not a trimming problem?
If the concern is missing coverage rather than excess length, trimming cannot create new density. Also stop cosmetic trimming for sudden or concerning hair loss, pain, swelling, broken skin, or persistent irritation and seek appropriate professional guidance.
Sources and Claim Boundary
- Wahl trimmer instructions for natural-direction mustache combing and visible stray-hair observation on the covered product.
- Philips MG3900 user manual for the covered models’ beard-and-mustache guards, variable growth direction, movement, shutdown, and cleaning boundaries.
Claim boundary: This page provides a conservative cosmetic workflow for distinguishing visible density from excess length and reducing one verified heavier zone. It does not diagnose hair or skin conditions; prescribe a universal guard, direction, pressure, pass count, style, schedule, or treatment; report hands-on testing; promise growth, increased density, safety, comfort, symmetry, performance, recovery, or a result; or replace the exact model manual and current equipment checks.
