
Disclosure: This site may use affiliate links. Product specifications should be checked against manufacturer or retailer pages before purchase.
Direct Answer
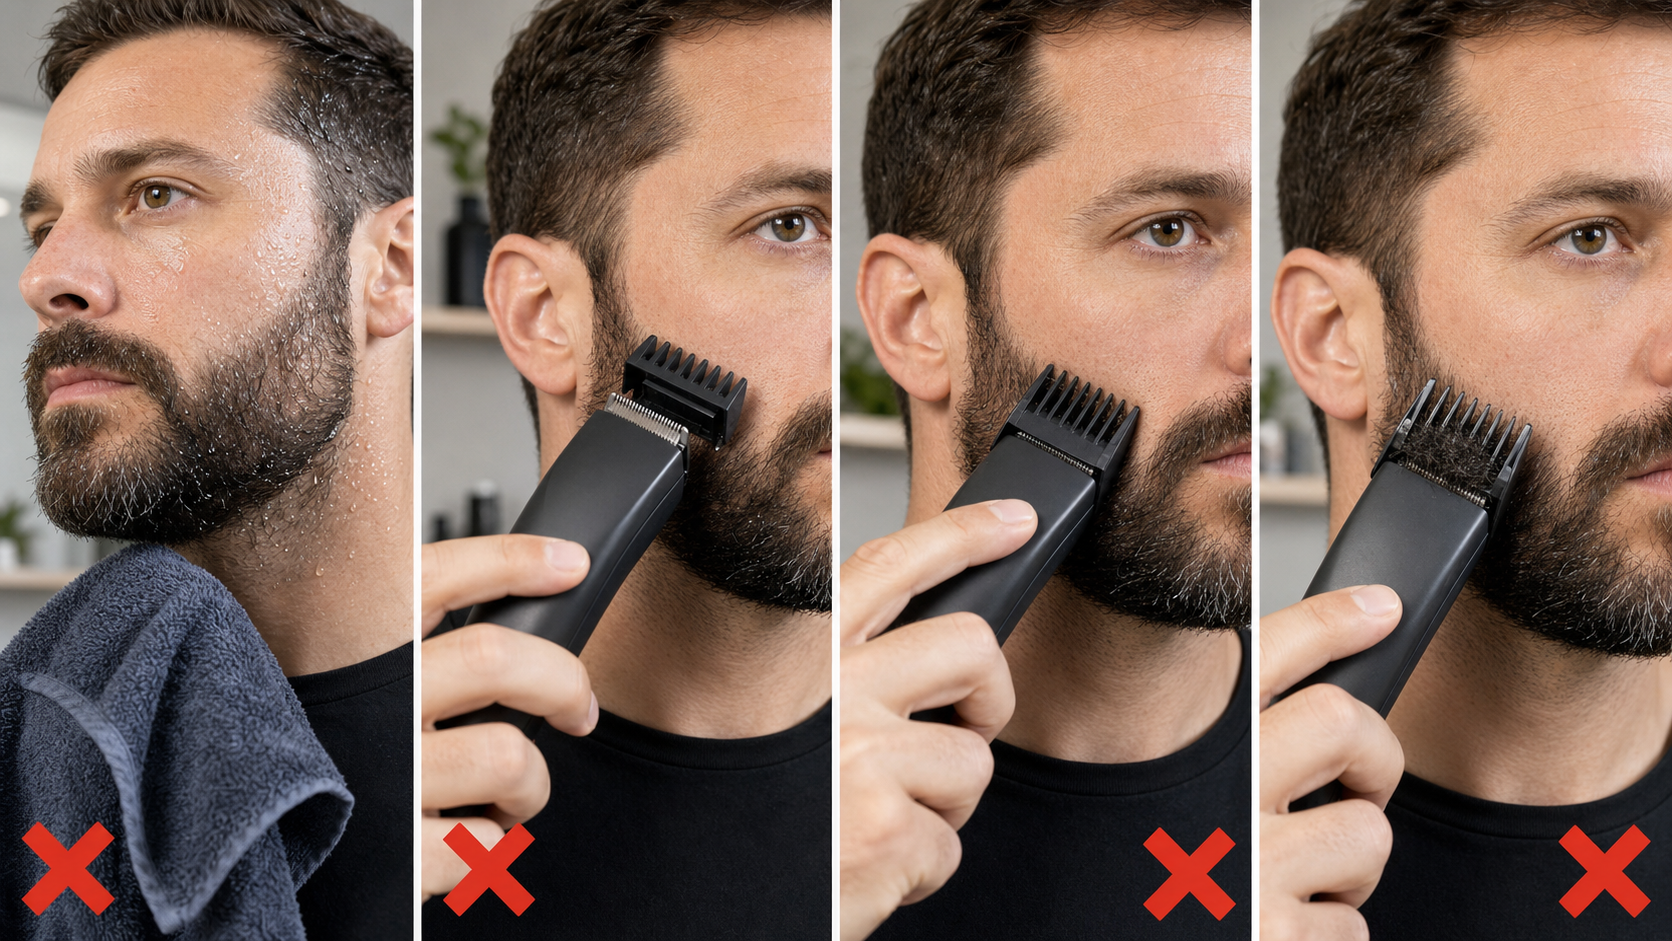
Direct answer: Avoid common short-beard trimming mistakes by starting longer, trimming clean dry hair to one documented base length, dividing the beard into cheek, jaw, chin, under-jaw, and neckline zones, keeping the guard flat, and clearing clippings often. Make one small change at a time, compare both sides in even light, and stop before a correction becomes a new short patch.
This guide covers maintained short beards with visible shape and multiple zones. It is distinct from the stubble-mistakes guide, which focuses on near-skin uniformity. A short beard adds contour decisions around the chin, jaw corners, under-jaw area, cheek line, and neckline, so one whole-face pass is rarely the complete workflow.
Short-Beard Mistake Prevention Table
| Mistake | What it changes | Safer response |
|---|---|---|
| Starting at the intended final setting | Removes correction room | Begin longer and reduce in documented steps |
| Trimming damp or compressed hair | Hides normal length and direction | Use the model-approved preparation method and let hair settle |
| Using one pass pattern everywhere | Misses different growth directions | Map local growth and use controlled passes |
| Tilting or pressing the guard | Creates stripes and short patches | Keep the comb seated, level, and lightly in contact |
| Correcting density as if it were length | Overcuts naturally darker areas | Brush, change the viewing angle, and compare actual hair length |
| Raising the neckline during cleanup | Changes the beard shape | Plan the boundary separately and work from the center outward |
The official Philips MG3900-series manual advises starting at the maximum trimming length, using smooth gentle movements, keeping the guard surface in contact, trying directions that follow local growth, and clearing accumulated hair. Braun’s beard trimming guide separates length reduction from shaping and recommends a longer initial setting. The manual for the exact model remains controlling.
Mistake 1: Skipping the Base-Length Pass
A short beard can look like one length while containing longer cheek hair, a denser chin, compressed under-jaw hair, and recently trimmed edges. Starting with detail work before establishing a base makes every later comparison unreliable. Comb the beard into its normal position and complete a conservative guarded pass through all intended length zones first.
Record the attachment and dial position in millimeters where the manufacturer provides them. Guard numbers are not universal. The guard selection guide explains how to verify a model-specific setting instead of transferring a number from another tool.
After the base pass, switch off, remove loose clippings, and inspect from the front, both profiles, and below the chin. Only then decide whether any zone needs a controlled transition. Darker density alone is not evidence that the hair is longer.
Mistake 2: Trimming Hair That Has Not Settled
Water, heavy product, sleep compression, a tight collar, or repeated combing can temporarily change how short-beard hair lies. For a documented dry-trimming workflow, let the beard become fully dry and return to its normal position. If the manufacturer permits a wet workflow, follow that exact method rather than assuming the powered handle is washable.
Do not judge an apparent hollow area while adjacent hair is wet or pressed flat. A length decision made in that condition can become visibly uneven after the beard dries. Brush gently, wait for the hair to settle, and use consistent lighting for every comparison.
Mistake 3: Jumping Several Settings Shorter
A large setting jump removes the intermediate length needed to soften a boundary. Start longer than the target and reduce one documented step at a time. Make the first test under a less visible jaw area, clear the guard, and compare it with the untouched side before expanding the pass.
If a transition appears too strong, return to the longer of the two settings and work only across the boundary with short outward passes. Do not solve a narrow hard line by shortening the entire cheek, chin, or under-jaw area.
Mistake 4: Tilting the Guard or Adding Pressure
A guard controls length only when it is correctly identified, fully seated, undamaged, and used as the manual directs. Tilting one edge into the beard or pressing harder can bring the cutter closer than intended. This often produces a stripe that repeated whole-face passes cannot restore.
Keep the guard surface stable against the contour and use gentle movement. At the jaw curve, shorten the pass rather than forcing a long stroke around the corner. Stop if the comb shifts, flexes, cracks, or will not lock. Never hold a loose attachment in place while the tool runs.
Mistake 5: Ignoring Growth Direction
Short-beard hair can grow down on the cheeks, forward near the jaw, sideways under the chin, and in more than one direction on the neck. One pass direction may lift hair in one zone while gliding over another. Map the direction with a fingertip or comb while the tool is off.
Use the direction permitted by the manual and make controlled passes only until the target zone is consistent. More passes are not automatically better. Repeatedly attacking a resistant swirl can shorten the surrounding area while the center continues to look different because of direction or density.
Mistake 6: Letting Clippings Pack the Guard
Loose cut hair can fill the spaces between comb teeth and prevent the guard from lifting new hair consistently. Switch off and clear the attachment as instructed whenever the cutting sound, feed, or visible buildup changes. Do not poke into a moving cutter or rinse a powered handle unless the manual explicitly allows it.
A packed guard can also make the user press harder, which compounds the error. Clearing the attachment restores visibility and removes one variable before another pass. The blade sanitation guide separates routine clipping removal from deeper cleaning and disinfection claims.
Mistake 7: Hollowing the Chin or Jaw Corners
The chin often carries more visible mass than the sides. Running a shorter transition setting through the central chin can make the beard look hollow even when both sides are even. Preserve a clear chin reference area and blend each jaw corner toward it in small sections.
The jaw-corner blending guide gives a dedicated base-length and transition workflow. Use that method when the problem is a hard step around the jaw, rather than treating the whole short beard as one flat surface.
Mistake 8: Moving the Neckline While Correcting Length
Length control and boundary placement are different tasks. Trying to remove an under-jaw shadow with a bare blade can raise the neckline into the visible beard. Plan the neckline with the tool off, establish the guarded length, then define the final boundary separately.
Philips’ official neckline guide works from the center outward and distinguishes the jawline from the lower neck boundary. The site neckline workflow adds conservative checkpoints. Neither source establishes one universal line for every face.
Mistake 9: Chasing Perfect Visual Symmetry
Matched settings and pass counts do not guarantee identical visual density. Face shape, follicle distribution, growth direction, lighting, and hair color can make one side appear darker. Alternate sides at matched checkpoints, but compare the process and outline rather than repeatedly shortening the darker side.
Take front and profile photos from the same distance and lighting. Remove loose hair before comparing. If one area is genuinely longer, reduce only that zone with the longer safe setting. If it is simply denser, cutting more may create a real length mismatch.
Mistake 10: Turning a Small Correction Into a Full Retrim
When one patch is short, stop cutting that patch. Brush the beard and identify only the surrounding hairs that are genuinely longer. Blend with the longer safe setting or allow the area to regrow. Do not repeatedly lower the whole beard to match a single accidental notch.
Use a stop rule: after one controlled correction, clear the tool, step away from the mirror, and reassess in normal light. Close inspection magnifies small density differences and can encourage unnecessary passes.
Repeatable Short-Beard Workflow
- Inspect the blade, guard, housing, cable, battery, and attachment lock.
- Prepare the beard using the exact model’s approved dry or wet method.
- Comb hair into its normal position and map local growth direction.
- Choose a verified base setting longer than the intended finish.
- Trim cheek, jaw, chin, and under-jaw zones with light, stable contact.
- Switch off and clear clippings whenever buildup changes the feed.
- Compare both sides in even light before changing a setting.
- Use one smaller documented step only in a defined transition zone.
- Shape cheek and neckline boundaries as separate final tasks.
- Record the settings, zones, and stop point for the next maintenance trim.
Frequently Asked Questions
Should a short beard be trimmed wet or dry?
Use the method specified for the exact trimmer. For a typical guarded dry-trimming workflow, let the beard become fully dry and comb it into its normal position before judging length.
How can I fix one short patch without cutting the whole beard shorter?
Stop cutting the patch, clear loose hair, and compare it in even light. Blend only genuinely longer surrounding hair with the longer safe setting, or let the patch regrow.
Why does my short beard look uneven after using one guard?
Hair direction, density, compressed hair, a tilted guard, packed clippings, or missed zones can create an uneven appearance even when one setting was used. Brush, clear, and reassess before shortening.
Should I define the neckline before trimming the beard length?
Plan the neckline before cutting, but establish the beard’s base length before making the final close contour. This keeps length reduction and boundary placement as separate decisions.
Sources and Claim Boundary
Primary references reviewed in July 2026 are the Philips MG3900-series manual, Braun beard-trimming guide, and Philips neckline guide linked above. This is a generic short-beard error-prevention workflow, not hands-on testing, and it does not promise a specific result. The exact model manual controls attachment identity, trimming direction, guard contact, wet use, cleaning, lubrication, charging, and safety.
